Welcome to this edition of Wireless Wednesday. Each Wednesday NXP will be bringing you articles, videos, blogs and
more on key topics for wireless connectivity.
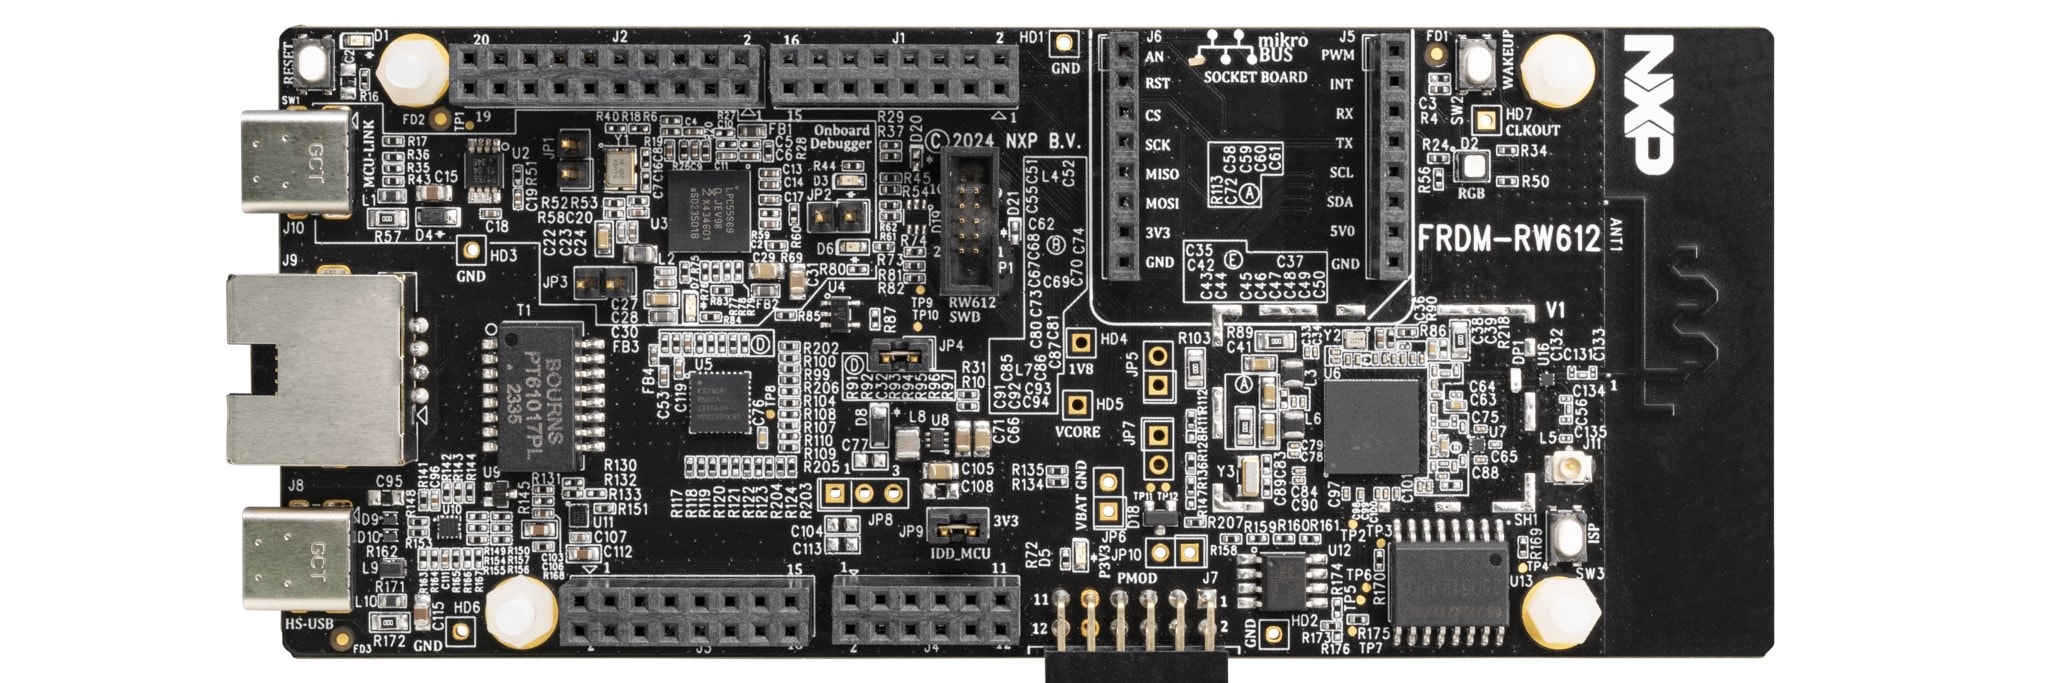
This Wednesday, we are excited to show you how to make your first Wi-fi connection with the FRDM-RW612 board. The
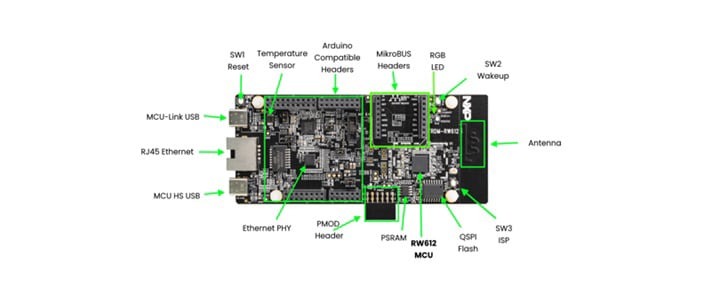
board includes everything needed to easily develop with Wi-Fi 6, Bluetooth LE, and 802.15.4 (Thread/Zigbee). It
includes
a
built-in USB C programmer/debugger, Arduino, mikroBUS and Pmod headers, and an RGB LED and temperature sensor, as
shown
below. The RW612 device comes preprogrammed with a Wi-Fi CLI (Command-Line Interface) blinking LED demo, which
verifies
that the device is working as expected out of the box. The Wi-Fi CLI demo provides the user with a menu of different
commands to explore the Wi-Fi capabilities of the FRDM-RW612 board.
 FRDM-RW612 development board.
For a better experience, download the
image.
NXP's FRDM-RW612 accelerates Wi-Fi, Bluetooth LE and 802.15.4 development. To order, please
visit our
FRDM-RW612 page.
Start by pluging the board into your laptop or PC using the "MCU-Link USB” port, the RGB light will start blinking.
Next,
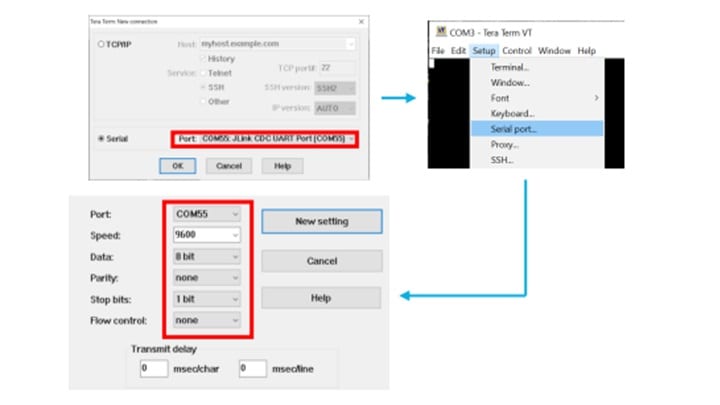
identify your FRDM-RW612 Jlink COM Port number through the “Windows Device manager”. A serial terminal, such as Teraterm is required for the next step. Open a serial terminal (Teraterm) and configure the FRDM-RW612
board as shown in the image below.
 Tera Term settings (Please keep the baud rate as 115200).
For a better experience, download the
image.
With your serial terminal open and configured, press and release the Reset Switch (SW1 located next to the MCU Link
USB-C Connector). The Wi-Fi CLI menu will appear on the serial terminal. Now, we will create a Wi-Fi access
point
on the FRDM-RW612 board using commands from the CLI application. All commands must be typed on one single line using
just spaces, hitting “enter” will issue the command. Enter the three commands below to set up the Wi-Fi access
point:
- wlan-add demo ssid NXP_Demo ip:192.168.10.1,192.168.10.1,255.255.255.0 role uap wpa2 psk 12345678 (NXP_Demo is
the
name seen by other devices so they can interact with your network, 12345678 is the eight letter password which
can be
changed later)
- wlan-start-network demo (to start and make it visible to other devices)
- wlan-list (to see your list of networks)
Finally, using your cell phone or laptop, scan for the available Wi-Fi networks, look for the SSID “NXP_Demo” and
connect
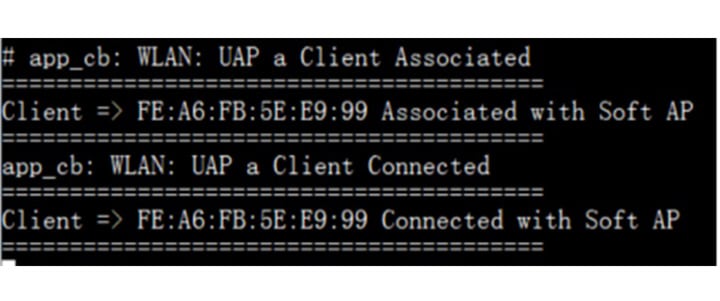
to it using the password you set (in this demo is 12345678). You will see a message in the CLI confirming the
connection
(see image below).
 Final message in CLI confirming the connection.
For a better experience, download the
image.
Congratulations you have just made your first Wi-Fi connection with the FRDM-RW612 board. The RW612 SDK for this
setup
can be found on the MCUXpresso SDK Builder , by searching for the FRDM-RW612
development board. For more information on
how to get started visit the FRDM-RW612 Getting Started Page.
All Wireless Wednesday content is available through the NXP Smarter World blog by simply searching “Wireless
Wednesday”.


