Getting Started with the FRDM-K64F
Contents of this document
-
Plug It In
-
Get Software
-
Build, Run

Purchase your Zephyr™ OS for Edge Connected Devices
Sign in to save your progress. Don't have an account? Create one.
1. Plug It In
1.1 Important Information Before Plugging In Your FRDM-K64F
Board Information
- BATT-18EMULATOR Design Files
-
- UM11817, Introduction to 18-cell Slider Battery Pack Emulator User Manual
OpenSDA is a serial and debug adapter circuit that runs on a Kinetis K20 device built into many NXP development boards.
It allows users to download and debug programs onto the target K64F chip using only a USB cable.
Some FRDM-K64F boards may contain older OpenSDA firmware that is incompatible with Windows 10 due to changes made in how Windows handles Mass Storage Devices. This can potentially corrupt older versions of the OpenSDA firmware found on those FRDM-K64F boards.
The vast majority of FRDM-K64F boards currently being shipped from distributors will already have updated firmware that is not affected, but some older inventory may still contain the outdated firmware.
To ensure proper operation of the FRDM-K64F with Windows 10, disable Storage Services on your Windows 10 computer before plugging it in the first time and update the OpenSDA firmware if needed:
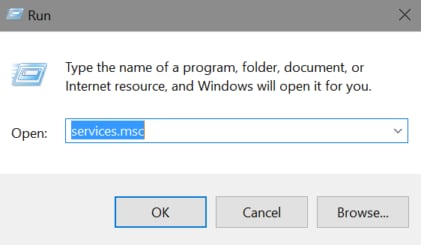
- Hold down the Windows logo key on your keyboard and press R to bring up the Windows Run prompt
- Type in services.msc and hold down Ctrl+Alt and hit Enter to launch the Services application in Administrator mode
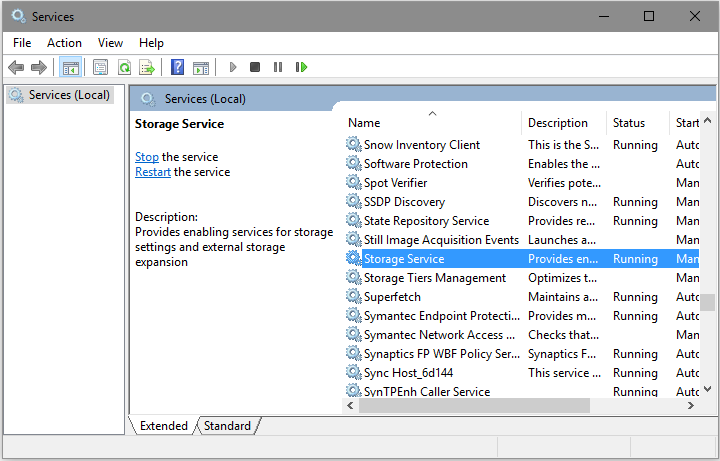
- Once open, find the "Storage Services" item and double click on it to open it
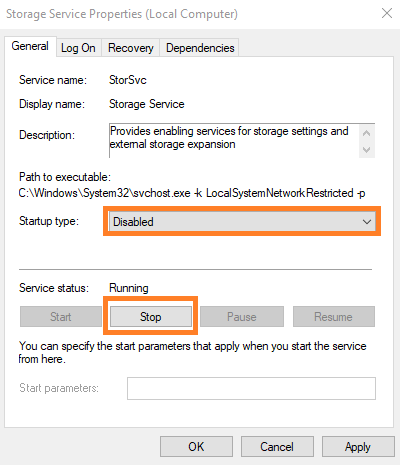
- In the properties box that comes up, change the Startup type to “Disabled” and then click on "Stop". If both options are grayed out, make sure you started the Services program in Administrator mode
- Now take the FRDM-K64F board and hold down the reset button as you plug the board into your computer
- If the board enumerates as a drive named "MAINTENANCE" then your board has the latest firmware and no further action is needed. Skip to the last step (#10) to re-enable Storage Services
- If the board enumerates as a drive named something else, drag and drop this 0244_k20dx_bl_0x5000.bin file to that drive file to that drive. This will update the OpenSDA bootloader
- The board should now automatically re-enumerate as a drive named MAINTENANCE. Drag and drop this k20dx_frdmk64f_if_crc_legacy_0x5000.bin file to that MAINTENANCE drive to update the OpenSDA CMSIS-DAP application
- The board should automatically re-enumerate again and come up as a drive named FRDM-K64FD. The OpenSDA bootloader and OpenSDA application are now both up to date and will work correctly with Windows 10
- Re-enable the Storage Services by using the same steps as before to open up the Storage Services dialog box, change the startup type back to "Automatic (Delayed Start)" and click on "Start"
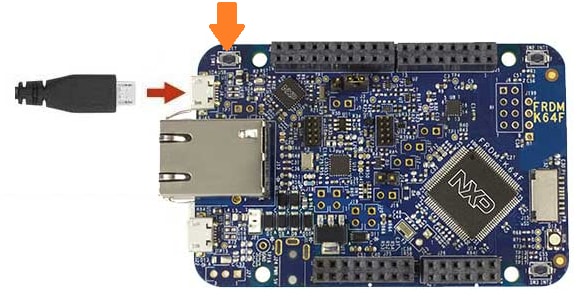
If you do not see any drive enumerate at all when plugging in the board in Step #6, the OpenSDA firmware may have been corrupted by Windows. The only way to fix this is to reprogram the K20 chip that the OpenSDA firmware runs on using an external debug tool. Instructions for this process can be found in this OpenSDA Community post.
1.2 Get Started with FRDM-K64F Development Platform
Let's take your FRDM-K64F for a test drive! You have the choice of watching the sequence in a short video or following the detailed actions list below.
  Diagnostic Test Release 201909XX
  CPU: NXP S32G
  Board: S32G274A Board

  MC_CGM_0 Clock Mux 0 -> XBAR_CLK (Core Clock)
  CORE_DFS_1 Clock -> MC_CGM_0 Clock Mux 0
  CORE_VCO Clock -> CORE_DFS_1 Clock
  FXOSC -> CORE_VCO Clock
  FXOSC: 40000000Hz
  CORE_VCO Clock: 2000000000Hz
  CORE_DFS Clock: 1000000000Hz
  XBAR_CLK: 500000000Hz
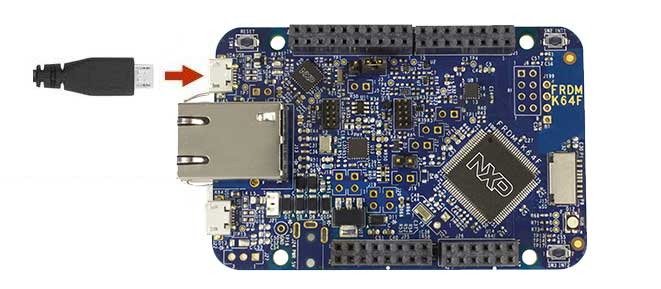
1.3 Attach the USB Cable
  Diagnostic Test Release 201909XX
  CPU: NXP S32G
  Board: S32G274A Board

  MC_CGM_0 Clock Mux 0 -> XBAR_CLK (Core Clock)
  CORE_DFS_1 Clock -> MC_CGM_0 Clock Mux 0
  CORE_VCO Clock -> CORE_DFS_1 Clock
  FXOSC -> CORE_VCO Clock
  FXOSC: 40000000Hz
  CORE_VCO Clock: 2000000000Hz
  CORE_DFS Clock: 1000000000Hz
  XBAR_CLK: 500000000Hz
1.4 Run the Out-of-Box Demo
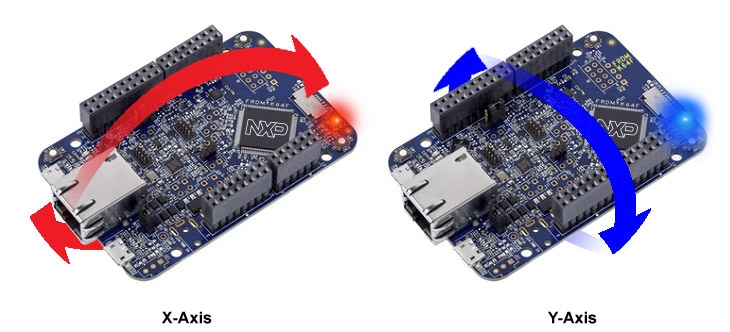
Your FRDM-K64F comes loaded with a "bubble level" demo that leverages the onboard accelerometer. When the board is flat, the RGB LED is turned off and when the board is tilted, the red or blue LEDs gradually illuminate based on the degree of tilt on the X- and Y-axis.
2. Get Software
Choose a Development Path
Kinetis Software Development Kit (SDK) + Integrated Development Environment (IDE)
- True debug support via SWD and JTAG
- High software flexibility
- Full set of peripheral drivers with source
- Application examples and project files
Zephyr™ OS
- A scalable, open source real-time operating system (RTOS)
- Supports multiple hardware architectures
- Optimized for resource constrained devices
- Built with security in mind
Arm Mbed Online Development Site
- Online compiler, no SWD or JTAG debug
- Simple, heavily abstracted programming interface
- Useful but limited drivers with source
- Community-submitted examples
2.1 Installing Software
2.2 Jump-Start Your Design with the MCUXpresso SDK
Click below to download a preconfigured SDK release for the FRDM-K64F. Learn about SDK.
The MCUXpresso SDK is complimentary and includes full source code under a permissive open source license for all hardware abstraction and peripheral driver software.

3. Build, Run
Build and Run SDK Demos on the FRDM-K64F
3.1 Explore the MCUXpresso SDK Example Code
The MCUXpresso SDK comes with a long list of example applications code. To see what's available, browse to the SDK boards folder of your SDK installation and select your board, the FRDM-K64F <SDK_Install_Directory>/boards/frdmk64f.
To learn more about specific example code, open the readme.txt file in an example's directory.
3.2 Build, Run and Debug MCUXpresso SDK Examples
If one or more of the demo applications or driver examples sounds interesting, you're probably wanting to know how you can build and debug yourself. The Getting Started with MCUXpresso SDK guide provides easy, step-by-step instructions on how to configure, build and debug demos for all toolchains supported by the SDK.
Use the guide below to learn how to open, build and debug an example application using the MCUXpresso IDE.
Use MCUXpresso IDE
Import the MCUXpresso SDK
- Open up the MCUXpresso IDE
- Switch to the Installed SDKs view within the MCUXpresso IDE window
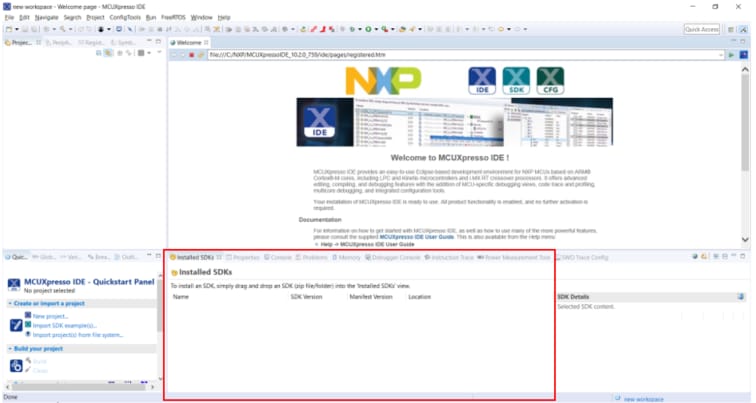
- Open Windows Explorer and drag and drop the FRDM-K64F SDK (unzipped) file into the Installed SDKs view
- You will get the following pop-up. Click on OK to continue the import:
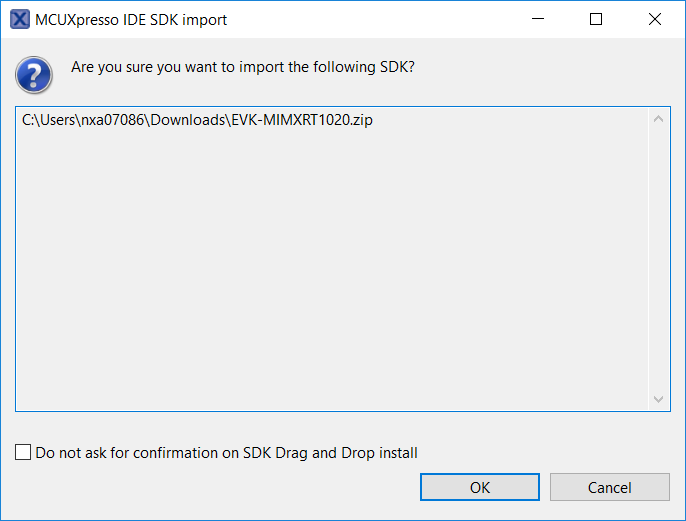
- The installed SDK will appear in the Installed SDKs view as shown below:

Build an Example Application
The following steps will guide you through opening the hello_world example.
-
Find the Quickstart Panel in the lower left-hand corner
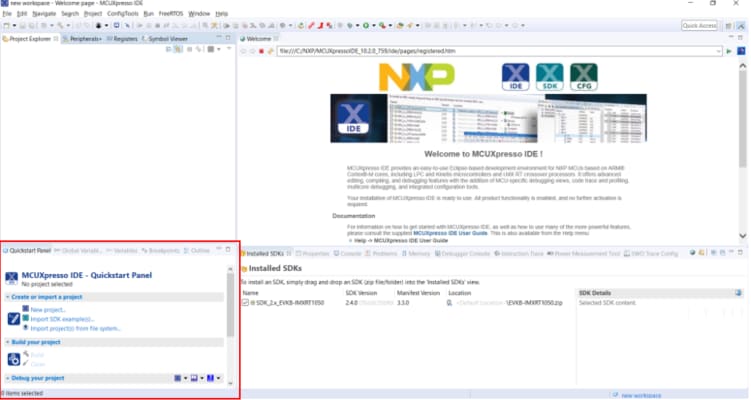
-
Then click on Import SDK examples(s)…
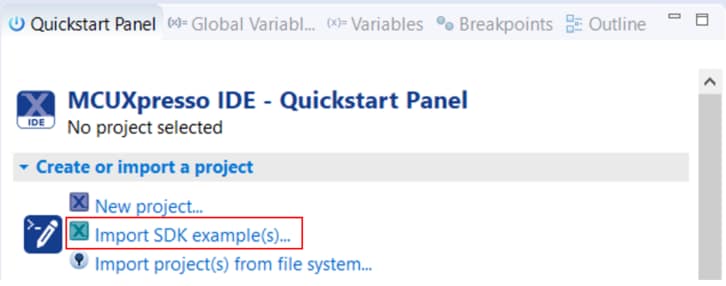
-
Click on the frdmk64f board to select that you want to import an example that can run on that board and then click on Next
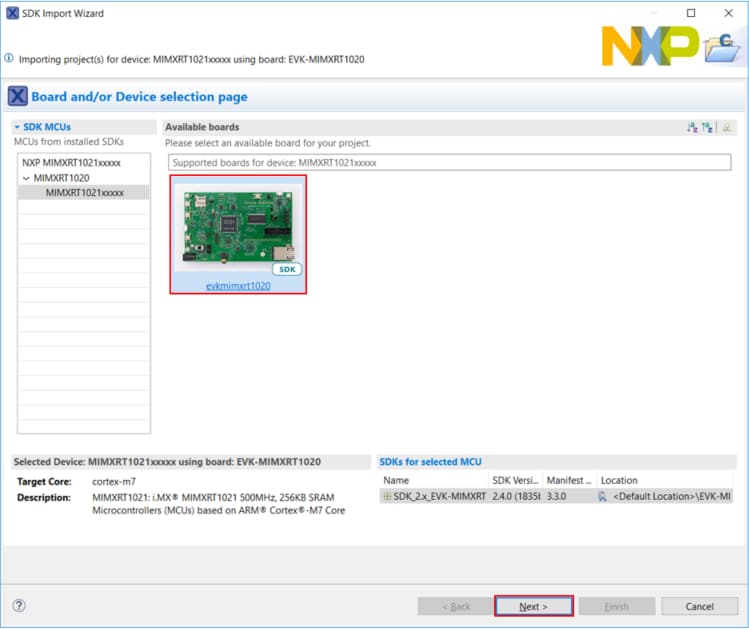
-
Use the arrow button to expand the demo_apps category and then click the checkbox next to
hello_worldto select that project. To use the UART for printing (instead of the default semihosting), clear the “Enable semihost” checkbox under the project options. Then, click on Next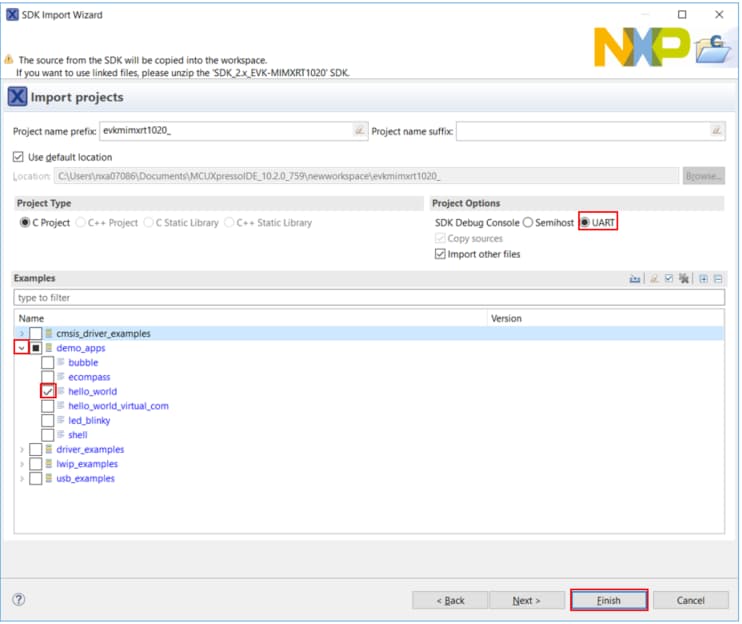
-
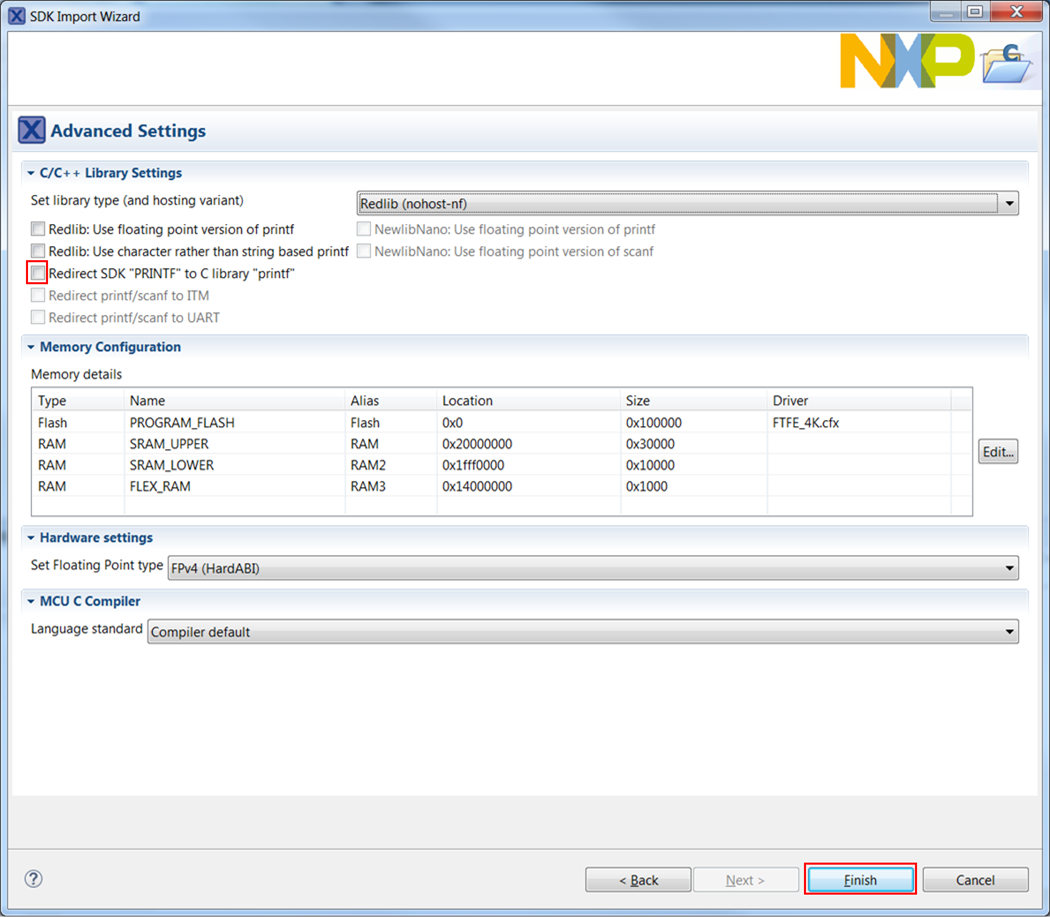
On the Advanced Settings wizard, clear the checkbox “Redirect SDK “PRINTF” to C library “printf”“ in order to use the MCUXpresso SDK console functions for printing instead of generic C library ones. Then click on Finish
-
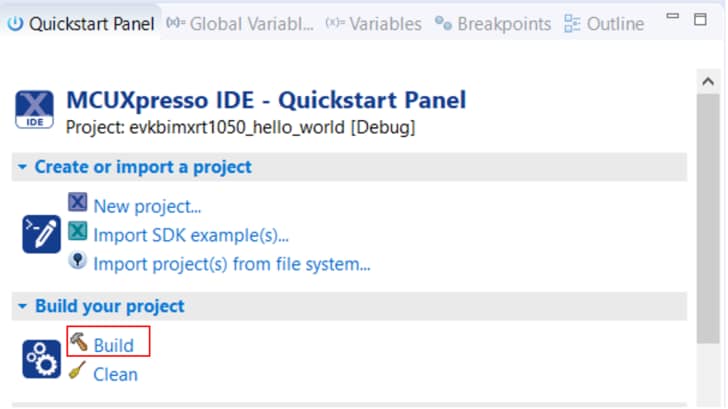
Now build the project by clicking on the project name and then click on the Build icon
-
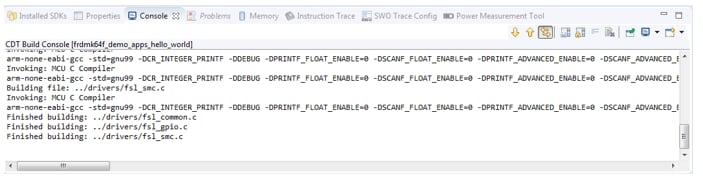
You can see the status of the build in the Console tab
Run an Example Application
- Now that the project has been compiled, you can now flash it to the board and run it
- Make sure that the FRDM-K64F board is plugged in and click on Debug '
frdmk64f_demo_apps_hello_world' [Debug]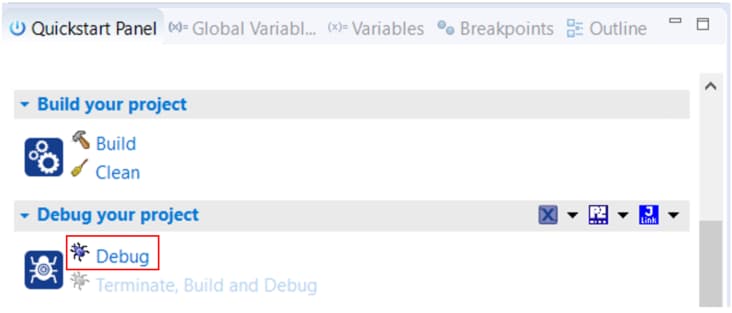
-
MCUXpresso IDE will probe for connected boards and should find the MBED CMSIS-DAP debug probe that is part of the integrated OpenSDA circuit on the FRDM-K64F. Click on OK to continue
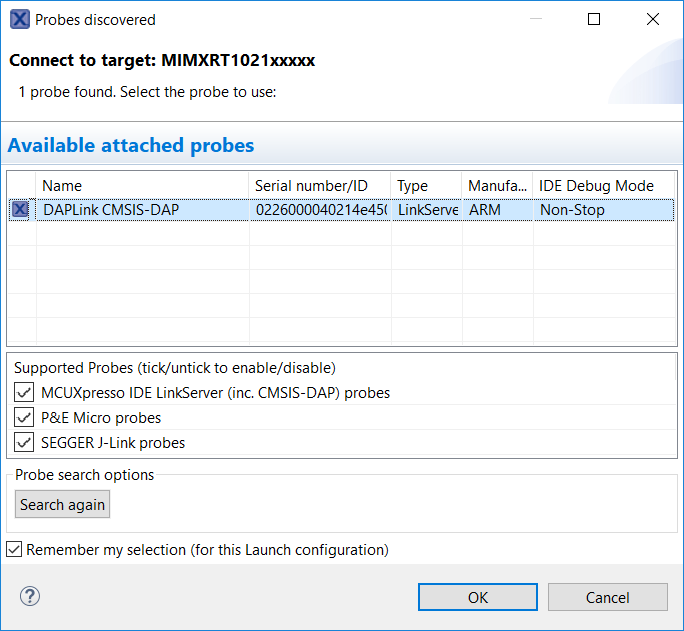
-
The firmware will be downloaded to the board and the debugger started
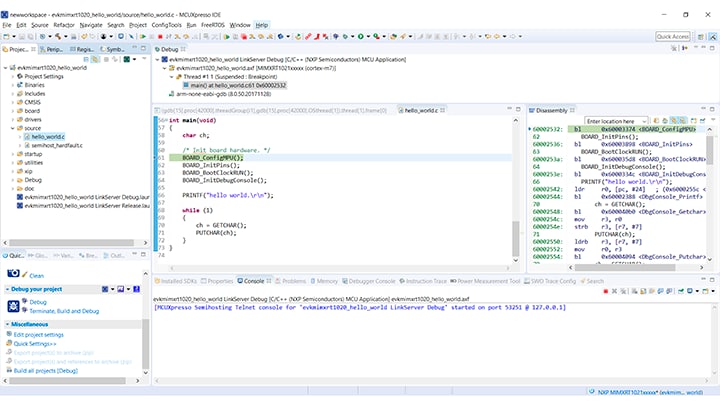
-
Open up a terminal program and connect to the COM port the board counted as. Use 115,200 baud 8 data bits, no parity and 1 stop bit
-
Start the application by clicking the "Resume" button:
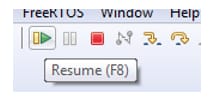
-
The
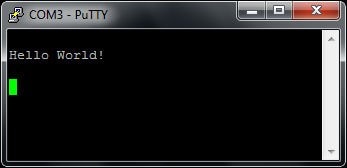
hello_worldapplication is now running and a banner is displayed on the terminal. If this is not the case, check your terminal settings and connections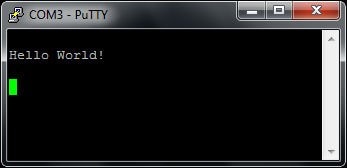
-
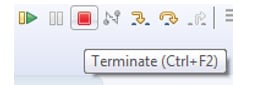
Use the controls in the menu bar to pause, step into and step over instructions and then stop the debugging session by click on the Terminate icon:
Using a Different Toolchain?
Running a Demo Using IAR
Build an Example Application
The following steps will guide you through opening the hello_world application. These steps may change slightly for other example applications as some of these applications may have additional layers of folders in their path.
-
If not already done, open the desired example application workspace. Most example application workspace files can be located using the following path:
<install_dir>/boards/<sdk_board_name>/<example_type>/<application_name>/iarUsing the
hello_worlddemo as an example, the path is:<install_dir>/boards/frdmk64f/demo_apps/hello_world/iar -
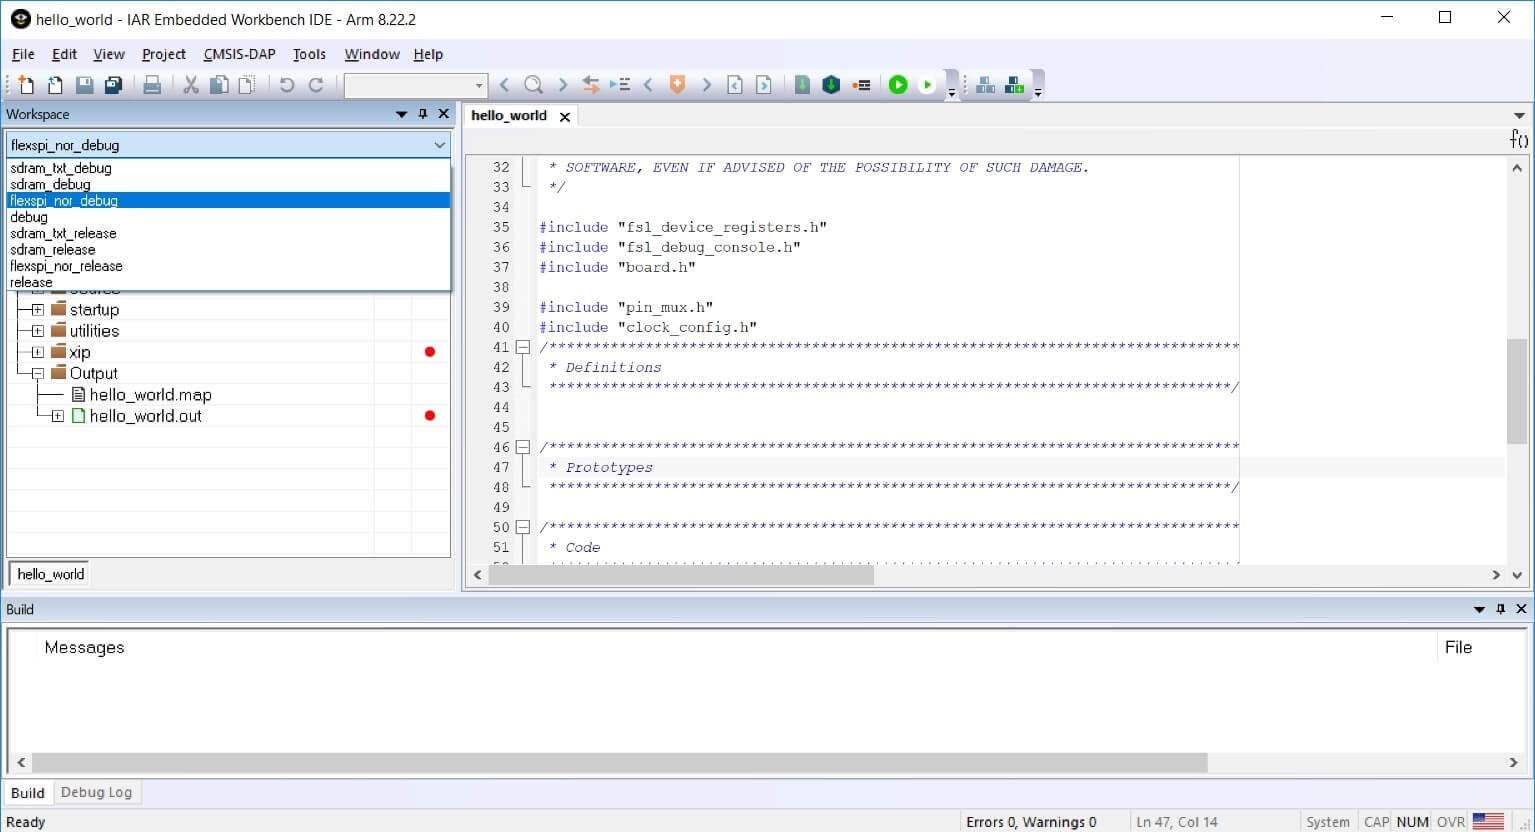
Select the desired build target from the drop-down. For this example, select the “hello_world - Debug” target
-
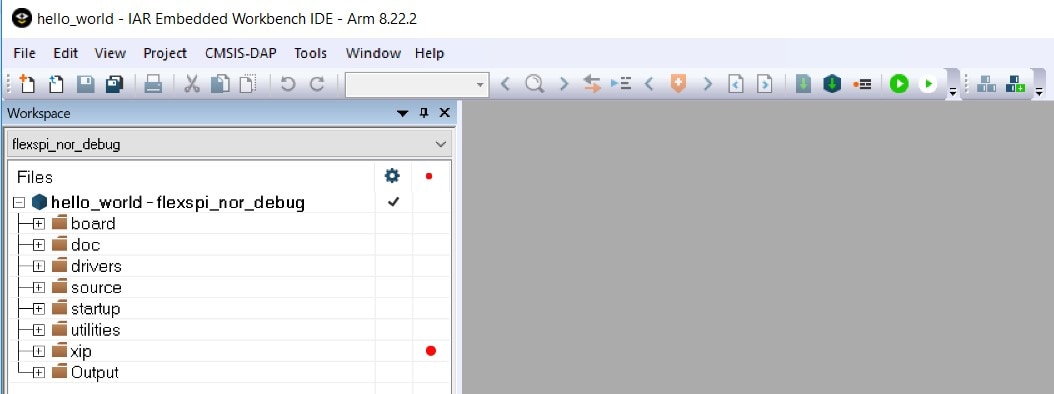
To build the application, click the “Make” button, highlighted in red below
-
The build will complete without errors:
Run an Example Application
The FRDM-K64F board comes loaded with the mbed/CMSIS-DAP debug interface from the factory. If you have changed the debug OpenSDA application on your board, visit Open SDA for information on updating or restoring your board to the factory state.
-
Connect the development platform to your PC via USB cable between the "SDAUSB" USB port on the board and the PC USB connector
-
Open the terminal application on the PC (such as PuTTY or TeraTerm) and connect to the debug COM port you determined earlier. Configure the terminal with these settings:
- 15,200 baud rate
- No parity
- Eight data bits
- One stop bit
-
Click the "Download and Debug" button to download the application to the target

-
The application is then downloaded to the target and automatically runs to the main() function

-
Run the code by clicking the "Go" button to start the application

- The
hello_worldapplication is now running and a banner is displayed on the terminal. If this is not the case, check your terminal settings and connections
Running a Demo Using Keil® MDK/µVision®
Install CMSIS Device Pack
After the MDK tools are installed, Cortex® Microcontroller Software Interface Standard (CMSIS) device packs must be installed to fully support the device from a debug perspective. These packs include things such as memory map information, register definitions and flash programming algorithms. Follow these steps to install the appropriate CMSIS pack.
- Open the MDK IDE, which is called µVision. In the IDE, select the "Pack Installer" icon

- In the Pack Installer window, navigate to the section with the Kinetis packs (they are in alphabetical order). The Kinetis packs start with "Keil::Kinetis" and are followed by the MCU family name, for example "Keil::Kinetis_K60_DFP". Because this example uses the FRDM-K64F platform, the K60 family pack is selected. Click on the "Install" button next to the pack. This process requires an Internet connection to successfully complete
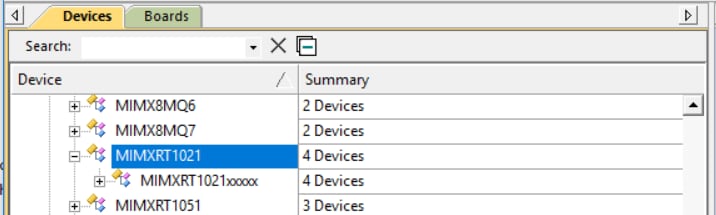
- After the installation finishes, close the Pack Installer window and return to the µVision IDE
Build the Example Application
The following steps will guide you through opening the hello_world application. These steps may change slightly for other example applications as some of these applications may have additional layers of folders in their path.
-
If not already done, open the desired demo application workspace in:
<install_dir>/boards/<sdk_board_name>/<example_type>/<application_name>/mdkThe workspace file is named <application_name>.uvmpw, so for this specific example, the actual path is:
<install_dir>/boards/frdmk64f/demo_apps/hello_world/mdk/hello_world.uvmpw - To build the demo project, select the "Rebuild" button, highlighted in red

- The build will complete without errors
Run an Example Application
The FRDM-K64F board comes loaded with the mbed/CMSIS-DAP debug interface from the factory. If you have changed the debug OpenSDA application on your board, visit OpenSDA for information on updating or restoring your board to the factory state.
- Connect the development platform to your PC via USB cable between the "SDAUSB" USB port on the board and the PC USB connector
-
Open the terminal application on the PC (such as PuTTY or TeraTerm) and connect to the debug COM port you determined earlier. Configure the terminal with these settings:
- 15,200 baud rate
- No parity
- Eight data bits
- One stop bit
- After the application is properly built, click the "Download" button to download the application to the target
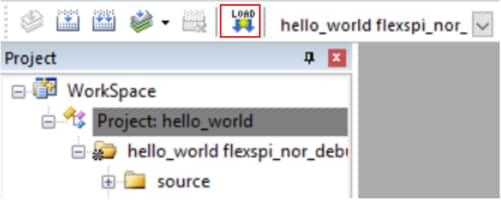
- After clicking the "Download" button, the application downloads to the target and should be running. To debug the application, click the "Start/Stop Debug Session" button, highlighted in red
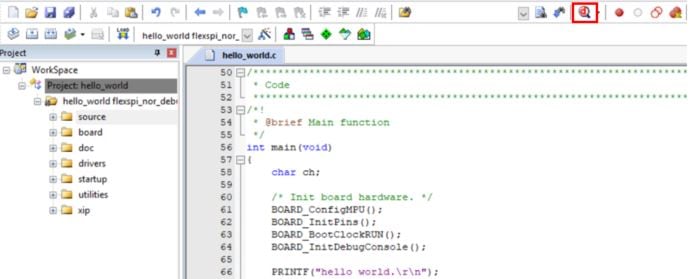
- Run the code by clicking the "Run" button to start the application
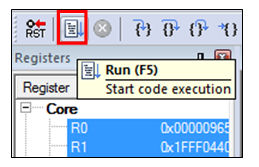
- The
hello_worldapplication is now running and a banner is displayed on the terminal. If this is not the case, check your terminal settings and connections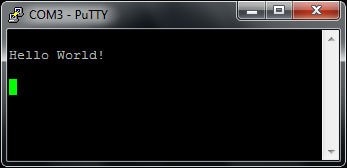
Running a Demo Using Arm
Set Up Toolchain
This section contains the steps to install the necessary components required to build and run a KSDK demo application with the Arm GCC toolchain, as supported by the Kinetis SDK. There are many ways to use Arm GCC tools, but this example focuses on a Windows environment. Though not discussed here, GCC tools can also be used with both Linux OS and Mac OSX.
Install GCC Arm Embedded Toolchain
Download and run the installer from GNU Arm Embedded Toolchain . This is the actual toolchain (i.e., compiler, linker, etc.). The GCC toolchain should correspond to the latest supported version, as described in the Kinetis SDK Release Notes.
Install MinGW
The Minimalist GNU for Windows (MinGW) development tools provide a set of tools that are not dependent on third-party C-Runtime DLLs (such as Cygwin). The build environment used by the KSDK does not use the MinGW build tools, but does leverage the base install of both MinGW and MSYS. MSYS provides a basic shell with a Unix-like interface and tools.
- Download the latest MinGW mingw-get-setup installer from MinGW - Minimalist GNU for Windows Files
- Run the installer. The recommended installation path is
C:\MinGW, however, you may install to any location - Ensure that the "
mingw32-base" and "msys-base" are selected under Basic Setup
- Click "Apply Changes" in the "Installation" menu and follow the remaining instructions to complete the installation
-
Add the appropriate item to the Windows operating system Path environment variable. It can be found under Control Panel → System and Security → System → Advanced System Settings in the "Environment Variables..." section. The path is:
<mingw_install_dir>\binAssuming the default installation path,
C:\MinGW, an example is shown below. If the path is not set correctly, the toolchain does not work.Note: If you have "
C:\MinGW\msys\x.x\bin" in your PATH variable (as required by KSDK 1.0.0), remove it to ensure that the new GCC build system works correctly.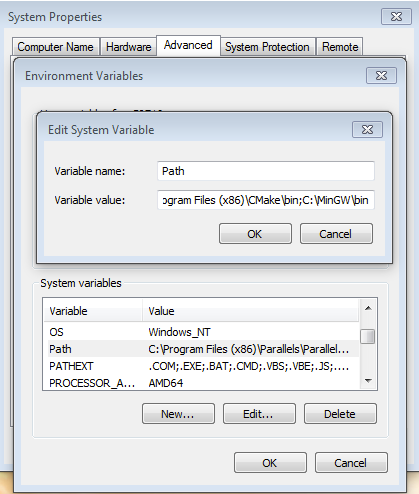
-
Download CMake 3.0.x from CMake
-
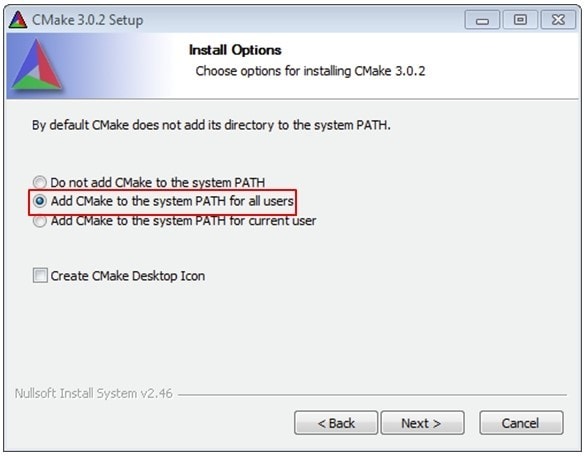
Install CMake, ensuring that the option "Add CMake to system PATH" is selected when installing. It's up to the user to select whether it's installed into the PATH for all users or just the current user. In this example, the assumption is that it's installed for all users
-
Follow the remaining instructions of the installer
-
You may need to reboot your system for the PATH changes to take effect
Note: The installation path cannot contain any spaces.
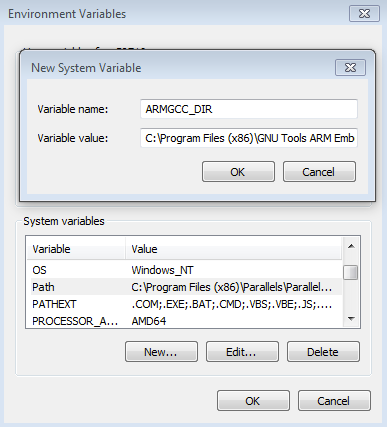
Add a New Environment Variable for ARMGCC_DIR.
Create a new system environment variable and name it ARMGCC_DIR. The value of this variable should point to the Arm GCC Embedded tool chain installation path, which, for this example, is:
C:\Program Files (x86)\GNU Tools Arm Embedded\4.9 2015q3
Reference the installation folder of the GNU Arm GCC Embedded tools for the exact pathname of your installation.
Install CMake
Build an Example Application
To build an example application, follow these steps.
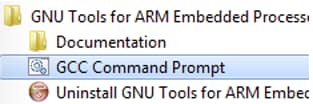
- If not already running, open a GCC Arm Embedded tool chain command window. To launch the window, from the Windows operating system Start menu, go to “Programs → GNU Tools Arm Embedded <version>” and select “GCC Command Prompt”
-
Change the directory to the example application project directory, which has a path like this:
<install_dir>/boards/<board_name>/<example_type>/<application_name>/armgccFor this guide, the exact path is:
<install_dir>/boards/frdmk64f/demo_apps/hello_world/armgcc - Type “
build_debug.bat” on the command line or double click on the "build_debug.bat" file in Windows operating system Explorer to perform the build. The output is shown in this figure: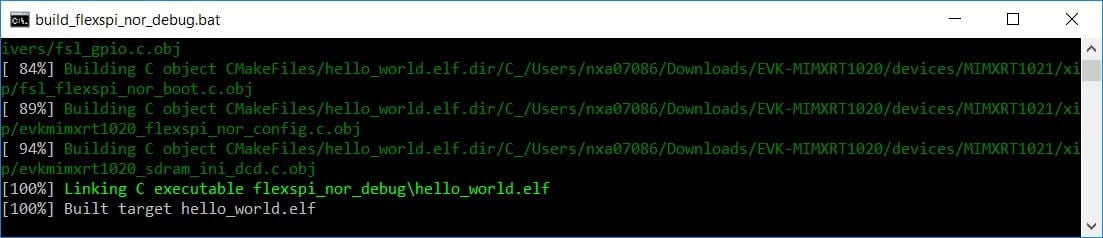
Run an Example Application
The GCC tools require a J-Link debug interface. To update the OpenSDA firmware on your board to the latest J-Link app, visit OpenSDA. After installing the J-Link OpenSDA application, download the J-Link driver and software package from Segger
- Connect the development platform to your PC via USB cable between the "SDAUSB" USB port on the board and the PC USB connector
-
Open the terminal application on the PC (such as PuTTY or TeraTerm) and connect to the debug COM port you determined earlier. Configure the terminal with these settings:
- 15,200 baud rate
- No parity
- Eight data bits
- One stop bit
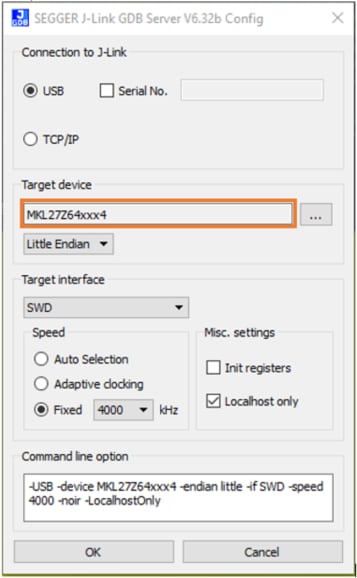
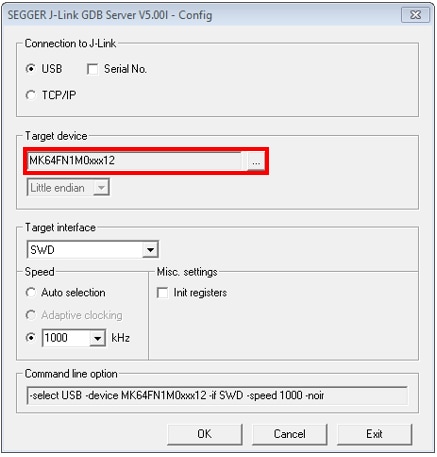
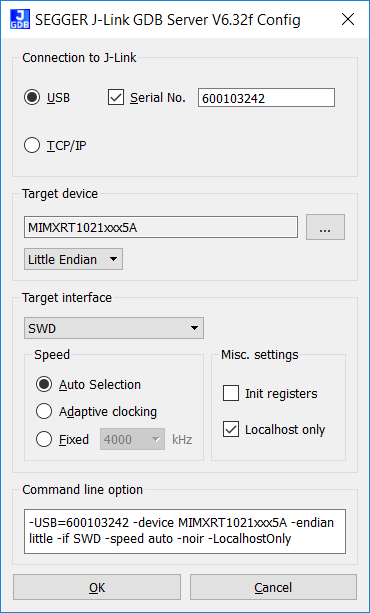
- Open the J-Link GDB Server application. Assuming the J-Link software is installed, the application can be launched by going to the Windows operating system Start menu and selecting "Programs → SEGGER → J-Link <version> J-Link GDB Server"
- Modify the settings as shown below. The target device selection chosen for this example is the “MK64FN1M0xxx12” and use the SWD interface
- After it is connected, the screen should resemble this figure:
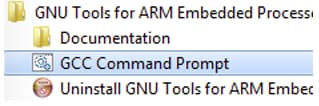
- If not already running, open a GCC Arm Embedded tool chain command window. To launch the window, from the Windows operating system Start menu, go to "Programs → GNU Tools Arm Embedded <version>" and select "GCC Command Prompt"
-
Change to the directory that contains the demo application output. The output can be found in using one of these paths, depending on the build target selected:
<install_dir>/boards/<board_name>/<example_type>/<application_name>/armgcc/debug <install_dir>/boards/<board_name>/<example_type>/<application_name>/armgcc/releaseFor this guide, the path is:
<install_dir>/boards/frdmk64f/demo_apps/hello_world/armgcc/debug - Run the command "
arm-none-eabi-gdb.exe <demo_name>.elf". For this example, it is "arm-none-eabi-gdb.exe hello_world.elf"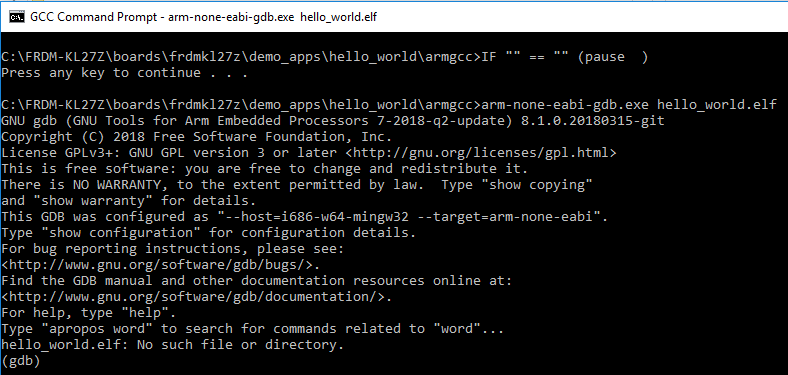
-
Run these commands:
- "target remote localhost: 2331"
- "monitor reset"
- "monitor halt"
- "load"
- "monitor reset"
-
The application is now downloaded and halted at the reset vector. Execute the "monitor go" command to start the example application
The
hello_worldapplication is now running and a banner is displayed in the terminal window