Getting Started with S12ZVM 3-phase PMSM Water Pump solution
Contents of this document
-
Plug It In
-
Get Software
-
Build, Run
-
Debug
Sign in to save your progress. Don't have an account? Create one.
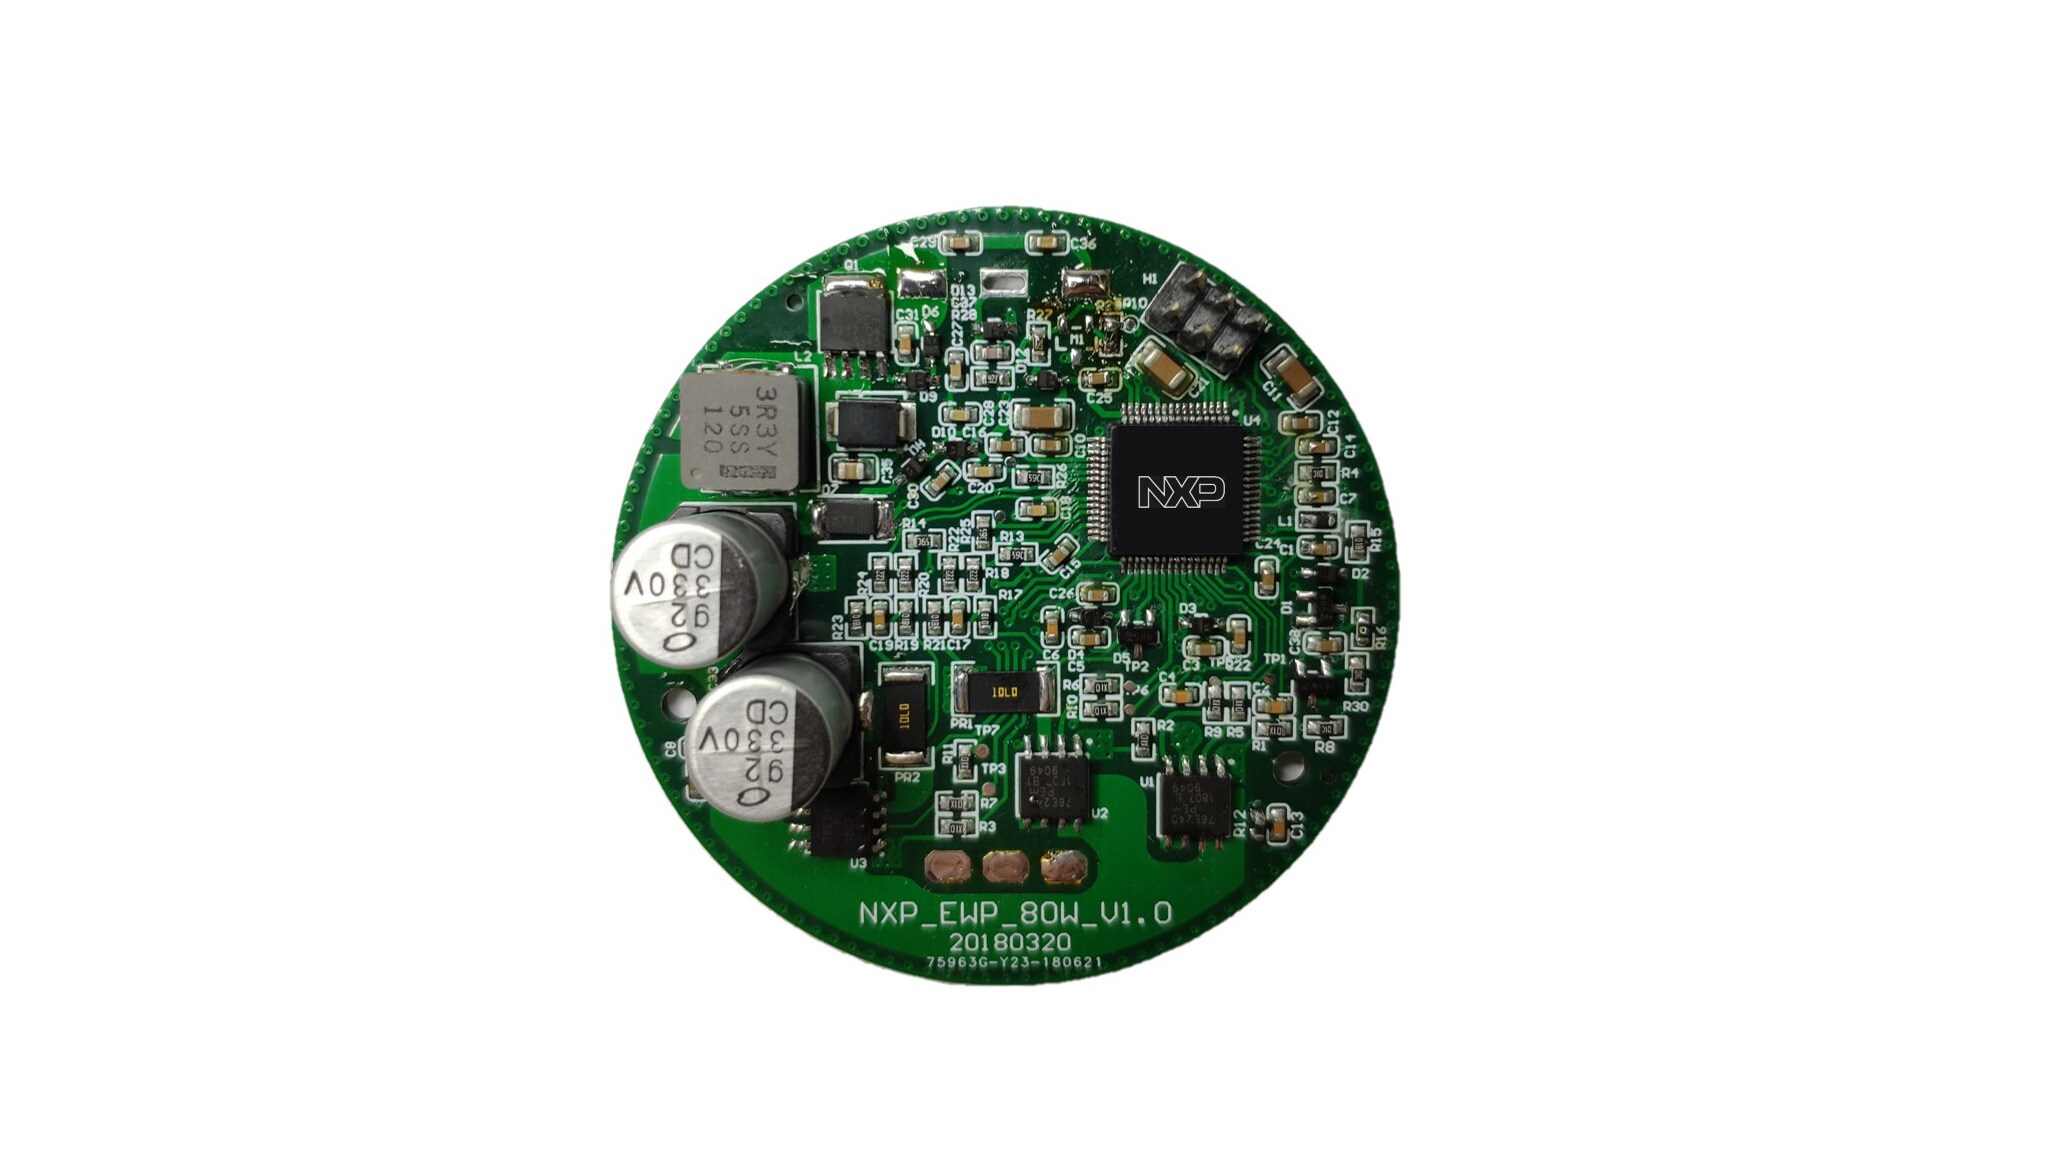
Purchase your S12ZVM 3-Phase Electrical Water Pump (EWP) Reference Design
1. Plug It In
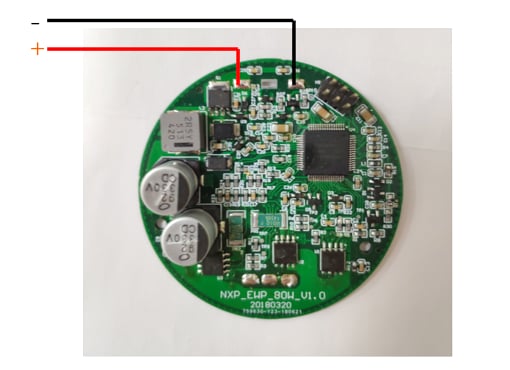
1.1 Connect the S12ZVM-EWP with DC Power Supply
DO NOT turn power on this moment, but set the voltage to 12 V and the current limit to 7.0 A
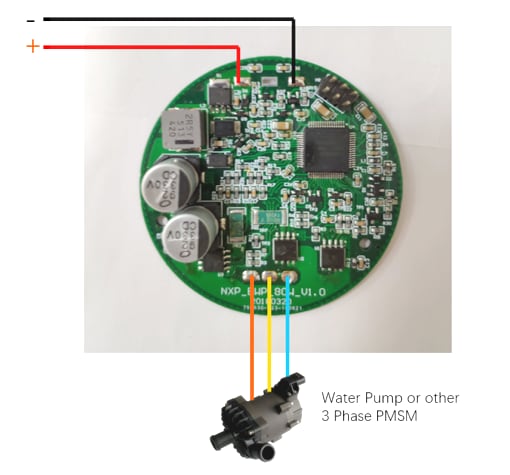
1.2 Connect the 3-Phase Water Pump or Other PMSM Motor
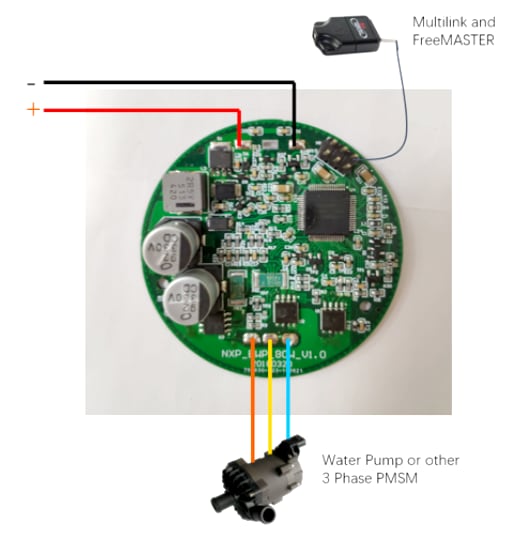
1.3 Connect the PE Multilink Debugger to BDM Port (H1) Onboard and PC
1.4 Turn the Power Supply On
2. Get Software
2.1 Download the S12ZVML-EWP Quick Start Package (QSP)
The Quick Start Package includes the S12ZVML-EWP Quick Start Guide, the S12ZVML-EWP User Guide, S12ZVML-EWP Schematics, and Motor Control Application Software to kick start your design.
2.2 Get your Integrated Development Environment (IDE)
S12ZVML-EWP performs better using CodeWarrior® for MCUs (Eclipse IDE)
NOTE: Check CodeWarrior updates for the latest version.
Download CodeWarrior® EVAL version
2.3 Get the OSBDM Debug Interface Driver from P&E
Install the latest version of OSBDM hardware driver. Working with the Version 12 (Win XP/Vista/7/8/10)
Go to OSBDM for more
information about the OSBDM.
Get OSBDM debug interface drive
2.4 Get the S12ZVML-EWP Motor Control Application Software
Install the complete motor control application software from the Quick Start Package.
The installation process offers downloading the latest version of Automotive Math and Motor Control Library Set.
2.5 Get the Run-time Debugging Tool
S12ZVML-EWP performs better using the FreeMASTER tool for run-time debugging. Install the latest version of FreeMASTER application and optionally FreeMASTER Communication Driver.
Download FreeMASTER application and communicator driver
3. Build, Run
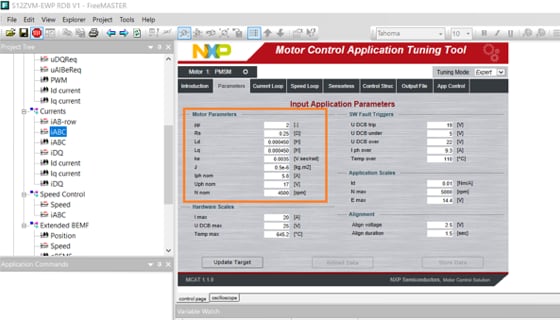
3.1 Set up Motor Control Application Tool (MCAT)
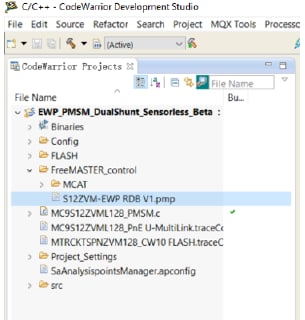
Open S12ZVM-EWP RDB V1.pmp file from the project directory and set the proper parameters up in MCAT for your water pump or other PMSM parameters.
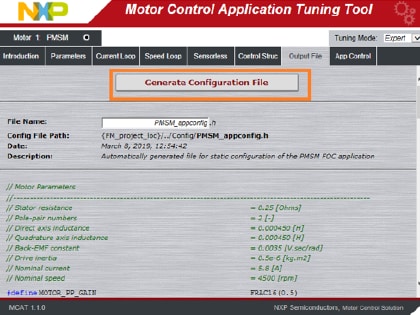
After complete the parameters set, go to the MCAT “Output File” card and click the “Generate Configuration File” to set them effectively in your project.
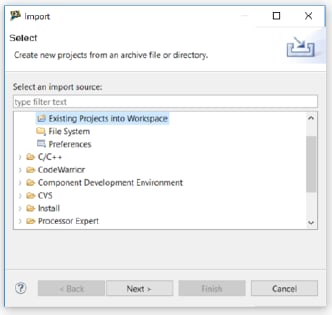
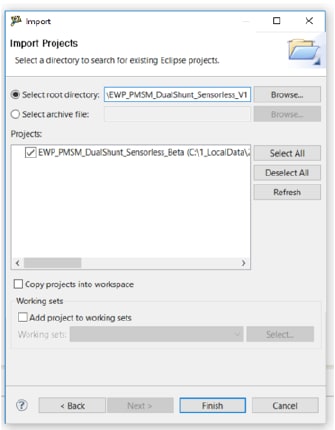
3.2 Import Your Project into the IDE
In CodeWarrior you should follow: File → Import → General → Existing Project into Workspace. Then choose the root directory which you store the S12ZVM-EWP project and click the “Finish” button to complete the import.
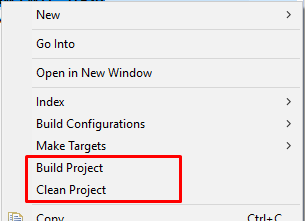
3.3 Build the Project
Right click on the imported project and select Clean project from the context menu.
Right click on the imported project and select Build project from the context menu.
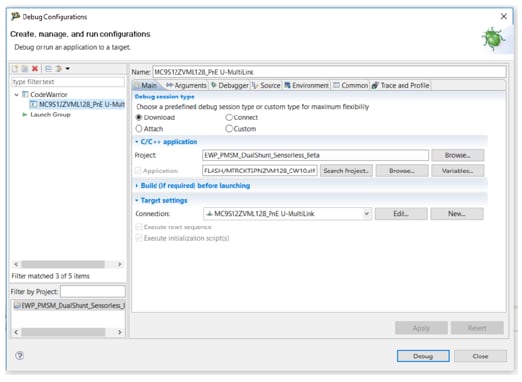
3.4 Debug the Loaded Code into MCU
In CodeWarrior you should follow: Run → Debug Configuration → select predefined debug configuration.
Then click on Debug button to load built code into the S12ZVML MCU.
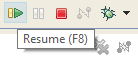
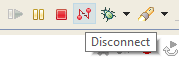
3.5 Let Code Run and Disconnect
Let code run by clicking on the Resume (F8) button, and use Disconnect button for avoiding interference between CW debugger and FreeMASTER tool.
4. Debug
4.1 Debug Your Motor Control Application Using a Debugger Tool
In FreeMASTER you should run the appropriate *.pmp file from your application project folder.
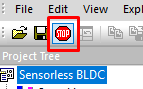
4.2 Start a Connection with the S12ZVML MCU
Initiate a connection with the MCU by clicking the Stop icon on FreeMASTER.
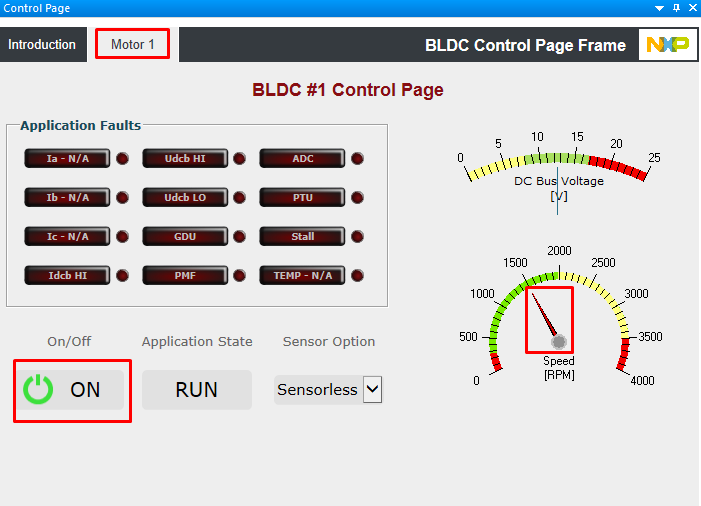
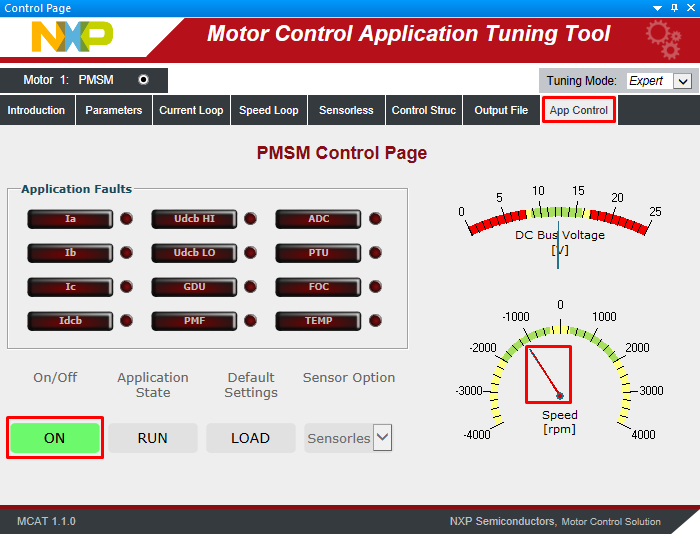
4.3 Control Your Motor
In FreeMASTER go to Control page tab to set the required motor rpms and turn on the motor drive.
On this page
- 1.1
Connect the S12ZVM-EWP with DC Power Supply
- 1.2
Connect the 3-Phase Water Pump or Other PMSM Motor
- 1.3
Connect the PE Multilink Debugger to BDM Port (H1) Onboard and PC
- 1.4
Turn the Power Supply On
- 2.1
Download the S12ZVML-EWP Quick Start Package (QSP)
- 2.2
Get your Integrated Development Environment (IDE)
- 2.3
Get the OSBDM Debug Interface Driver from P&E
- 2.4
Get the S12ZVML-EWP Motor Control Application Software
- 2.5
Get the Run-time Debugging Tool