Getting Started with the OM40007
Contents of this document
-
Get Software
-
AWS IoT
-
Build, Run
-
Learn
Sign in to save your progress. Don't have an account? Create one.
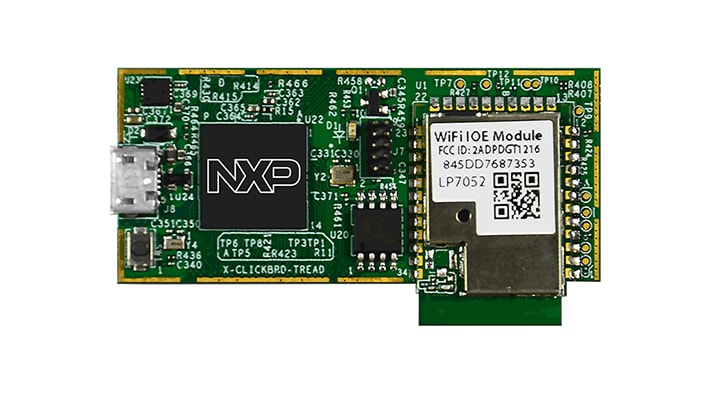
Purchase your OM40007 LPC54018 IoT Module
1. Get Software
1.1 Choose a Development Path
- NXP MCUXpresso Software Development Kit (SDK) with Amazon FreeRTOS + Integrated Development Enviroment (IDE)
- Amazon Web Services + Amazon FreeRTOS + IAR Embedded Workbench
1.2 Jump Start Your Design with the MCUXpresso SDK
The MCUXpresso SDK is complimentary and includes full source code under a permissive open-source license for all hardware abstraction and peripheral driver software.
Click below to download a pre-configured SDK release for the IoT module:

You can also use the online SDK Builder to create a custom SDK package using the SDK builder.
1.3 Install Your Toolchain
NXP offers a complimentary toolchain called MCUXpresso IDE.
Want to use a different toolchain?
No problem! The MCUXpresso SDK includes support for other tools such as IAR , Keil and command-line GCC .

1.4 Update QCA firmware for latest SDK
The firmware on the Longsys GT1216 module used on the LPC54018 IoT Module requires a manual update to work correctly with MCUXpresso SDK releases starting from SDK 2.4.0. Follow these steps to perform the update.
Update QCA Firmware
Hardware Requirements
- Micro-USB Cable
- LPC54018-IoT-Module
- Debug probe: IoT Module baseboard/LPC-Link2/J-Link probe
- Personal Computer with Windows OS
Import the MCUXpresso SDK
- Open the MCUXpresso IDE
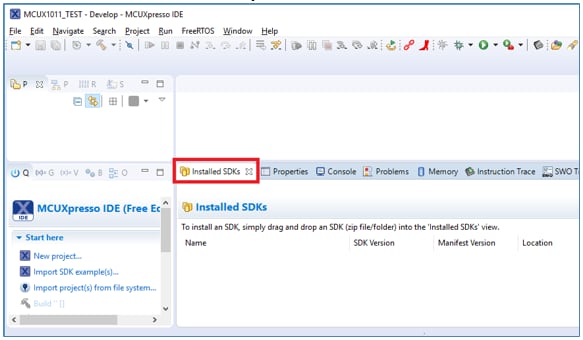
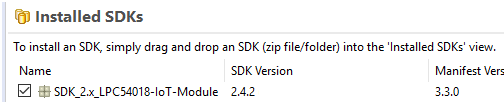
- Select "Installed SDKs" tab within the MCUXpresso IDE window
- Open Windows Explorer, and drag and drop the previously downloaded SDK file into the "Installed SDKs" view
- Click OK to the confirmation window
- The installed SDK will appear in the Installed SDKs view as shown below:
Use the Import SDK example "qca_fwupdate" project from SDK
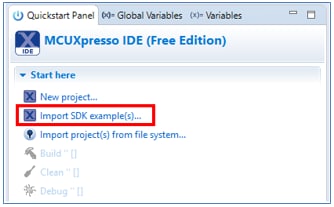
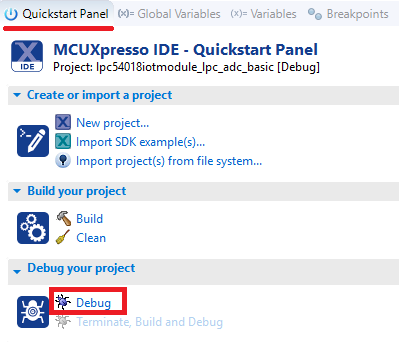
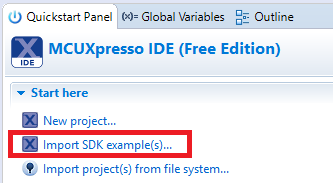
- On the Quickstart Panel, select "Import SDK example(s)"
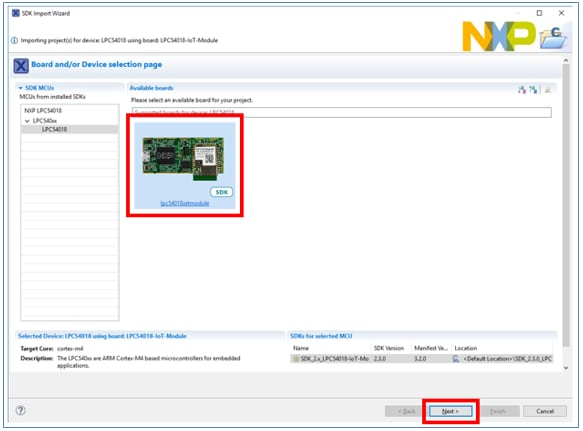
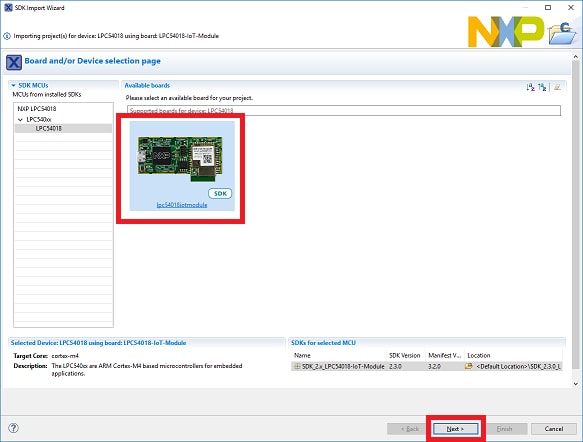
- Select the "lpc54018iotmodule" board and click on Next
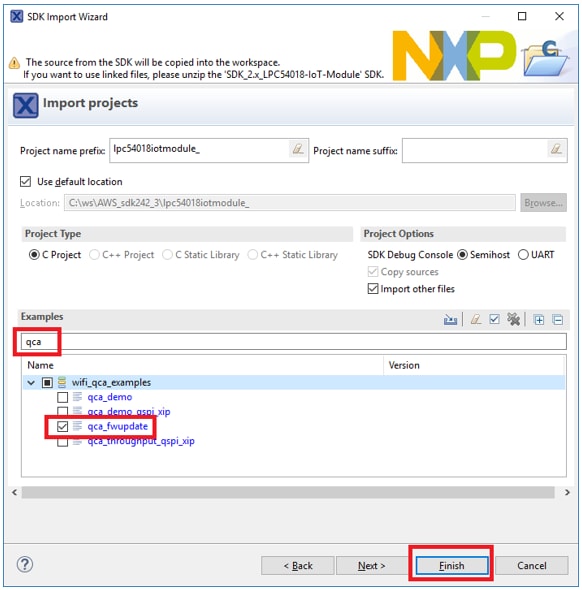
- In the filter textbox, type "qca". Select the "qca_fwupdate" example project (wifi_qca_examples → qca_fwupdate), and click on "Finish"
- Build and download the application to the target board using debugging probe (J-Link or LPC-Link2). Click on the "Debug" button from the Quickstart Panel
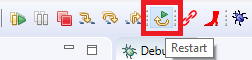
- Click on "Resume" button or press "F8" to start the application
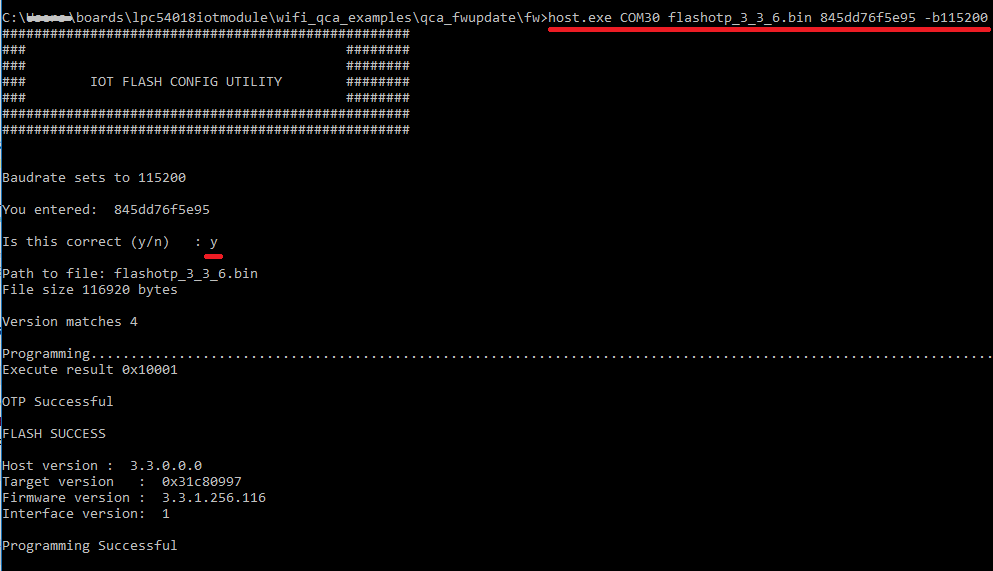
- While the application is running, locate the "host.exe" application and firmware folder at:
<sdk_path>\boards\lpc54018iotmodule\wifi_qca_examples\qca_fwupdate\fw\ - Open the command line from Windows and execute the host.exe application as follows:
where:
host.exe COM30 flashotp_3_3_6.bin 845dd76f5e95 -b115200COM30is the LPC54018IoT Module (portJ8) CDC Virtual COM Port nameflashotp_3_3_6.binis the path to firmware binary845dd76f5e95is the MAC address of the GT1216 module-b115200is a communication baudrate

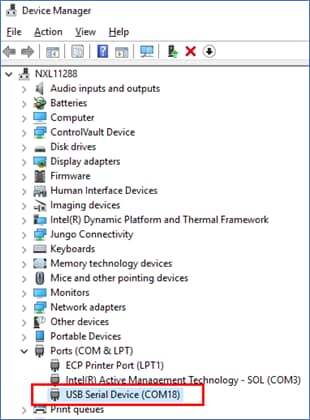
Note: The COM port name can be found using the "Windows Device Manager". The MAC address of your WiFi IOE Module can be found in a label on top of the LPC54018IoT Module. The host.exe application cannot resolve COM port with number greater than 99; the Windows control panel may be used to override the COM port number assigned if necessary.
2. AWS IoT
2.1 Create an AWS account
- Open the AWS homepage Amazon Web Services and choose to Create a Free Account
- Follow the online instructions to create a free account. Part of the sign-up procedure involves:
- Add payment information, where you will be charged $1.00 USD. No additional charges will apply
- For account verification, please enter the PIN on your phone when Amazon verification call is received
- Wait up to 24 hours for your AWS account to be activated
2.2 IAM Policies
Before beginning, you need an IAM user with permission to access AWS IoT and Amazon FreeRTOS. Click below for instructions on how to create a new user with such authorities.
Create an Activate AWS User
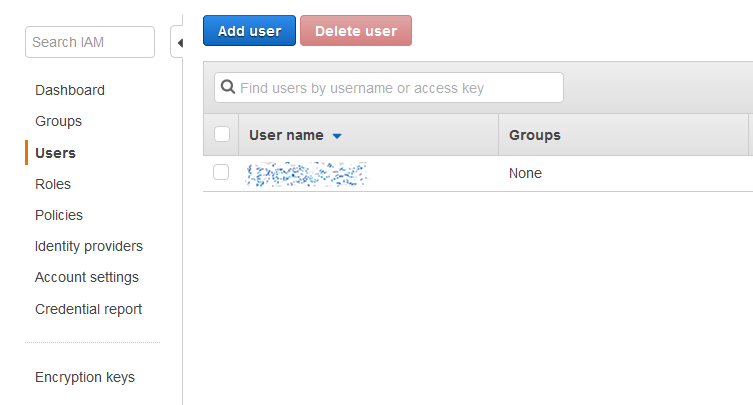
- Use your AWS root credentials to sign in to the IAM AWS console
- In the navigation pane, choose Users and then choose Add user
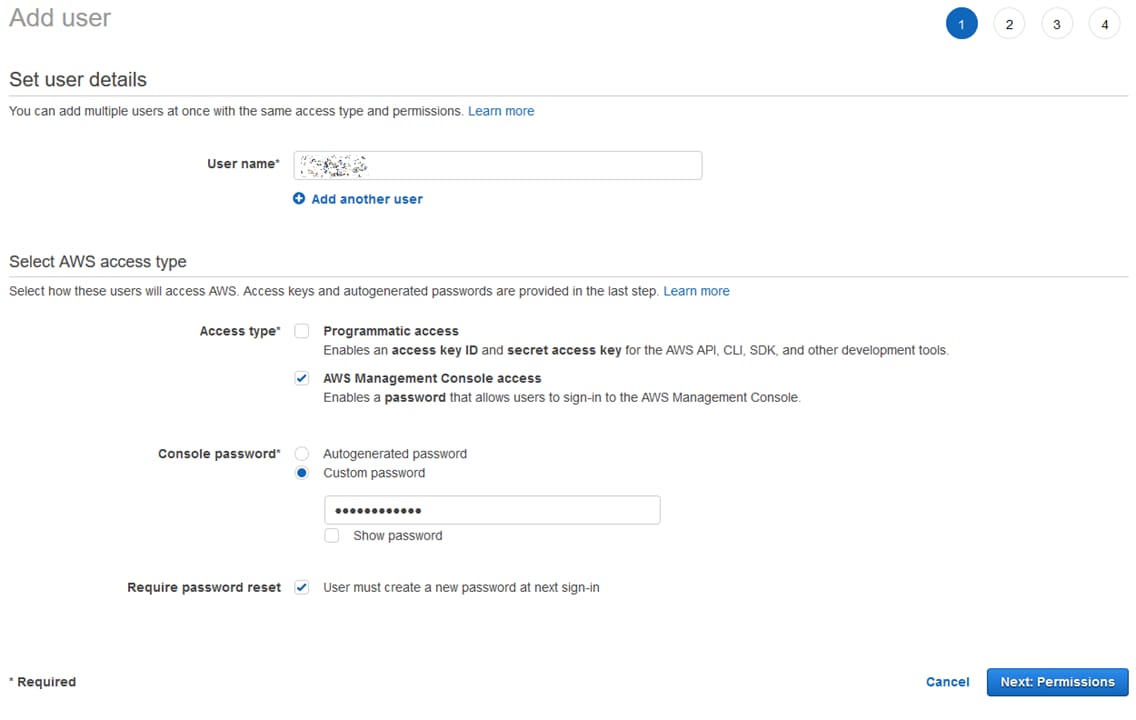
- Type a username, such as Administrator. Select the checkbox next to the "AWS Management Console access", select "custom password", and then type your new password in the text box. Click "Next: Permissions"
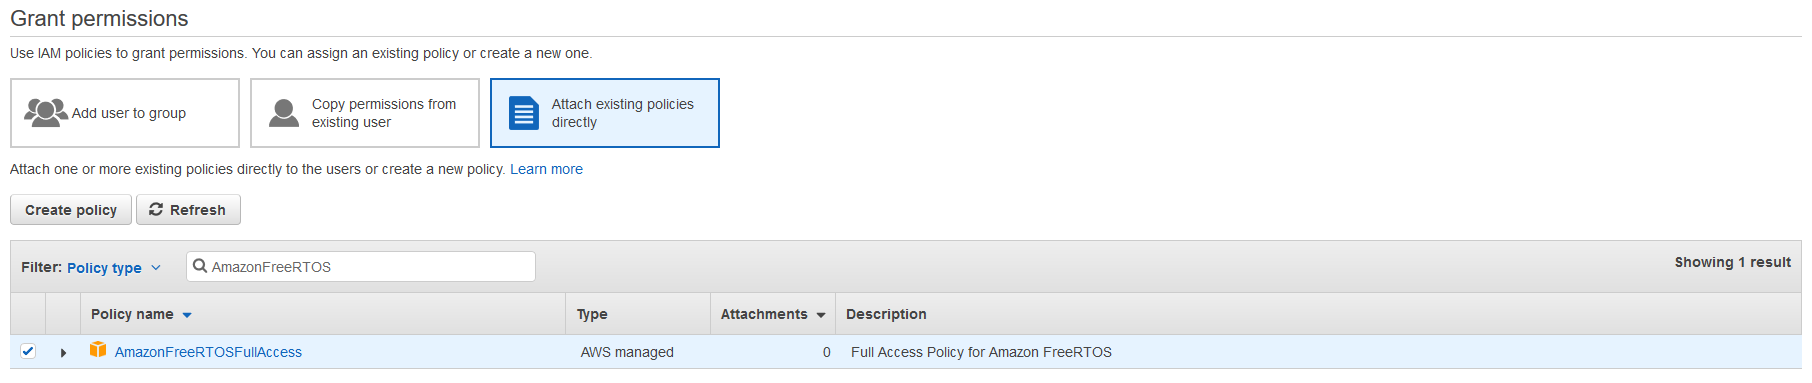
- Select "Attach existing policies directly" type "AmazonFreeRTOSFullAccess" in the search text box, look for the check box button next to the policy name and click it. Then repeat for "AWSIoTFullAccess", and "AdministratorAccess". Finally choose "Next: Review"
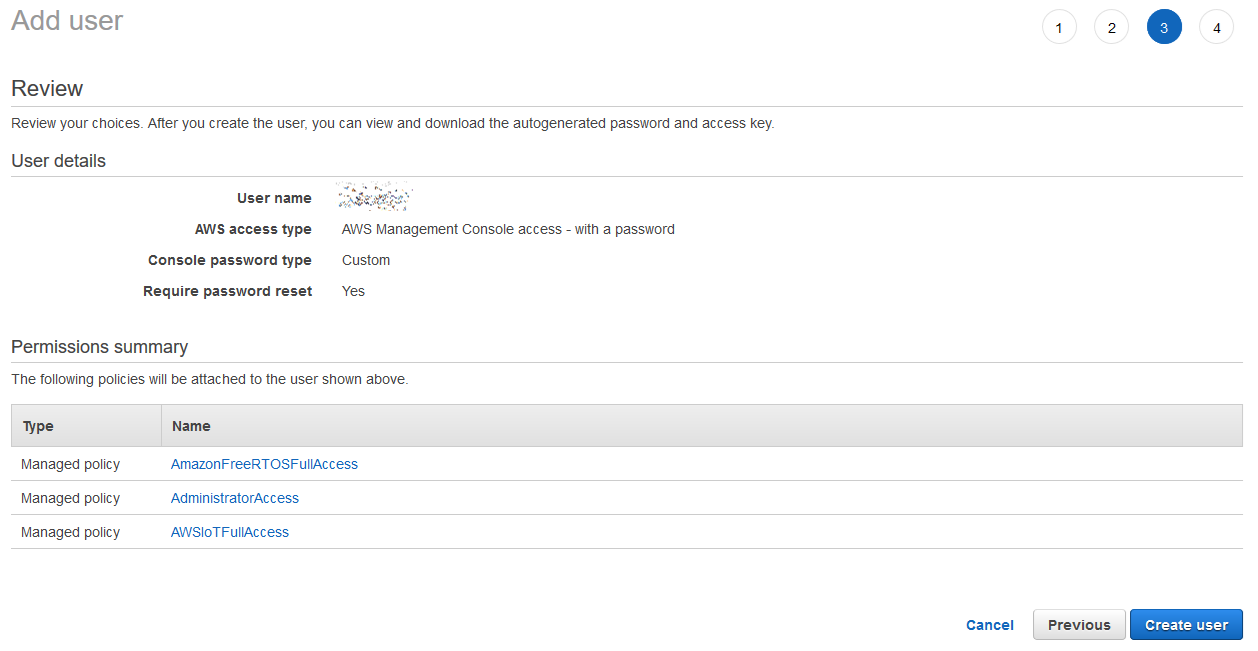
- Verify that you have the "AdministratorAccess, AmazonFreeRTOSFullAccess" and "AWSIoTFullAccess" policies attached to your account, then click "Create user"
- Sign out from your root account. Sign in using the newly created user account and password by clicking on the link next to Users with AWS Management Console access can sign-in at

2.3 Create an IoT thing, private key, and certificate for your device
Amazon FreeRTOS - an open-source MCU operating system built on the FreeRTOS kernel, offers developers a universal connection to the Amazon Web Services (AWS) platform.
AWS IoT is an Amazon web service that provides secure, bi-directional communication between Internet-connected devices such as embedded micro-controllers and the AWS Cloud. AWS IoT provides a registry that helps you manage "things". A thing is a representation of a specific device or logical entity (for example, a light bulb, sprinkler, switch, etc). It can be a physical device or sensor.
Now it's time to use the AWS IoT service to create an IoT thing. Click in the button below for a step-by-step guide.
Use the AWS IoT Service and create an IoT Thing
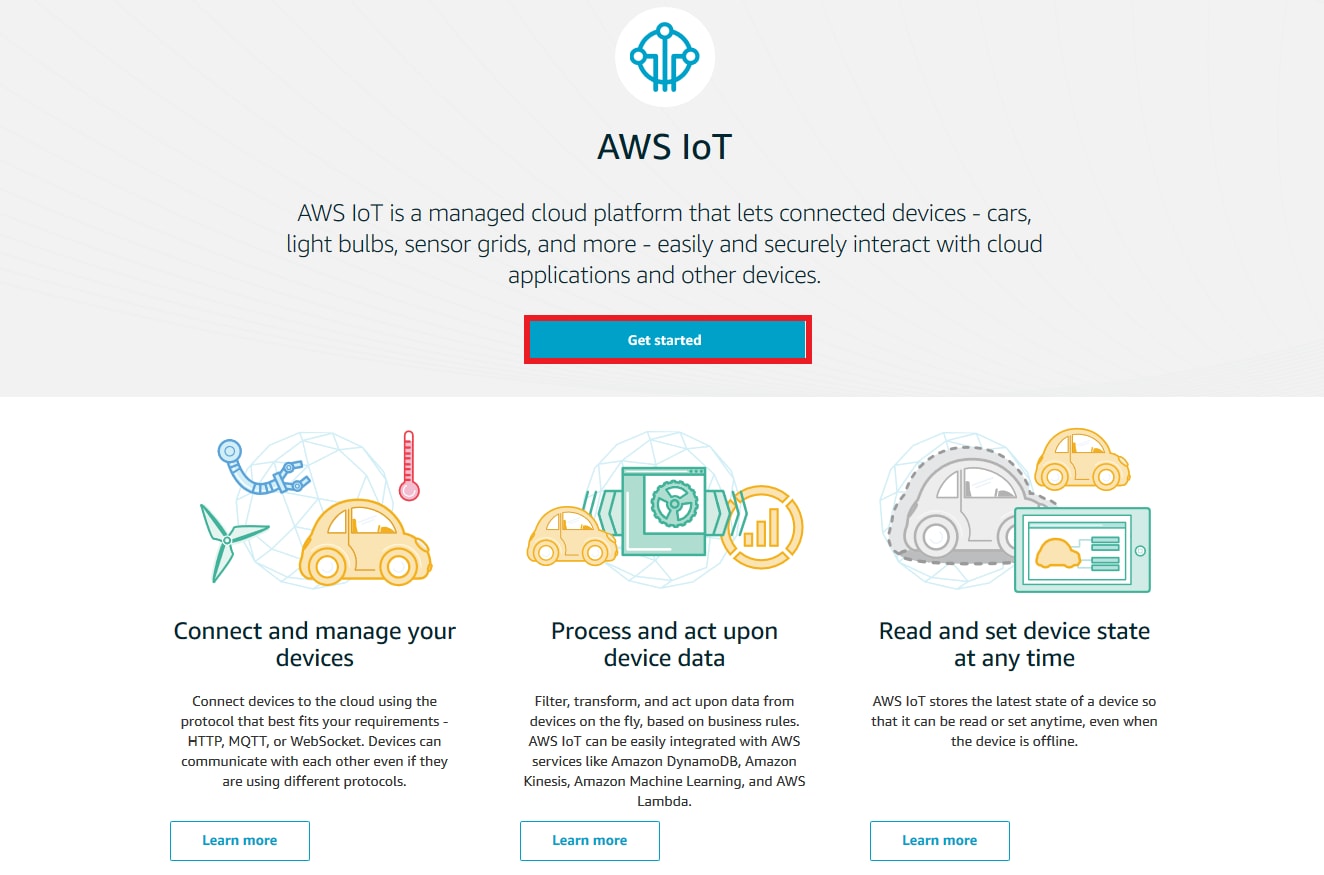
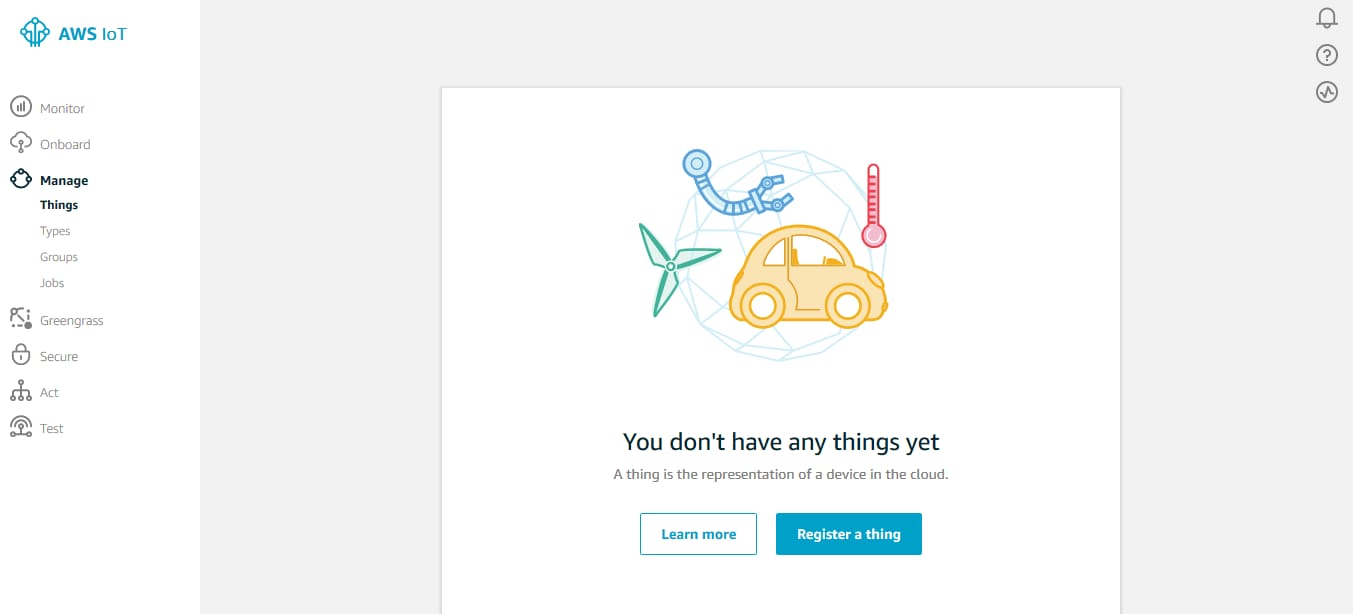
- Open a web browser and go to AWS IoT console locate at AWS IoT Console
- If this is the first time you access to the AWS IoT console click on "Get started"
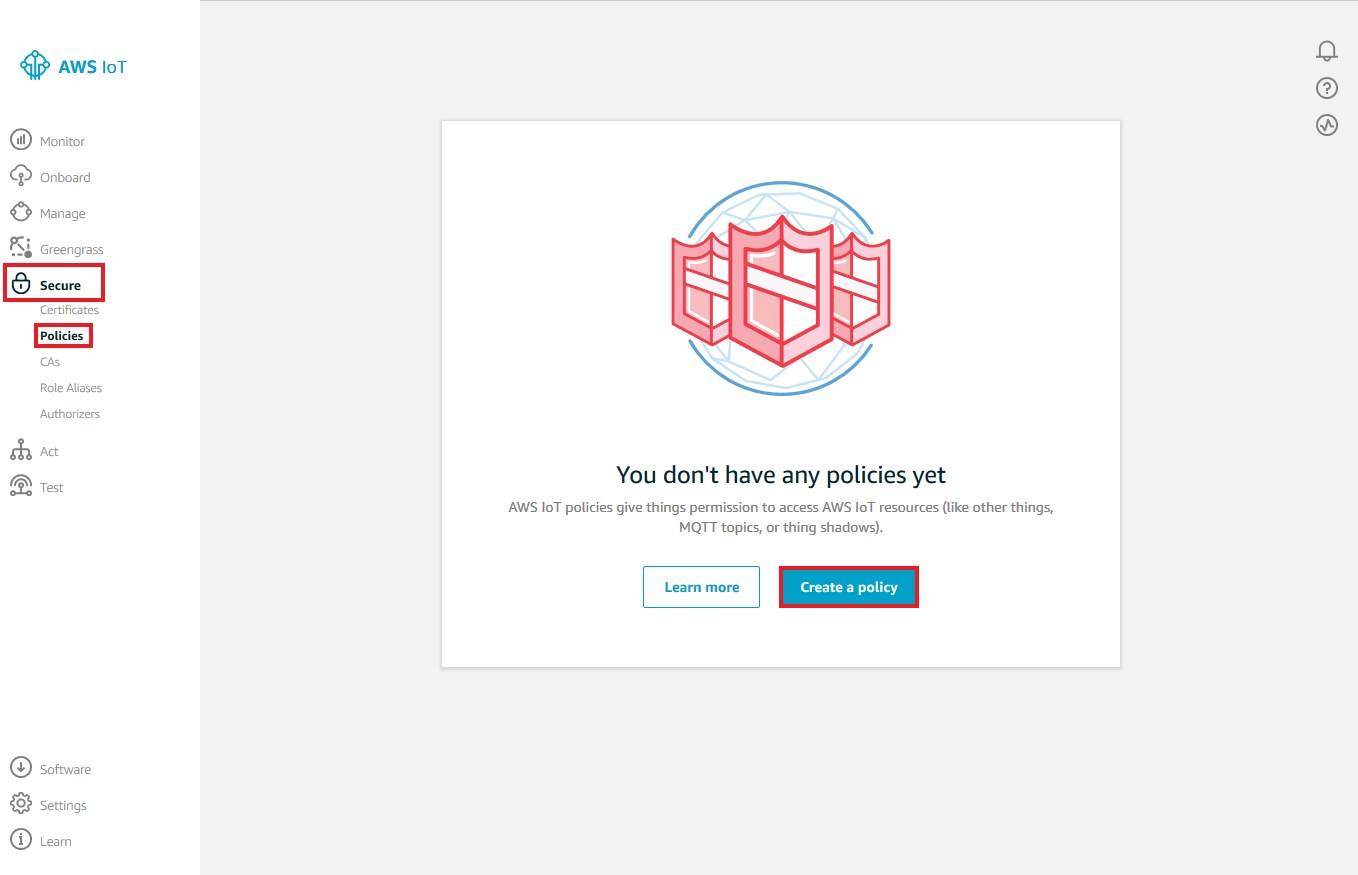
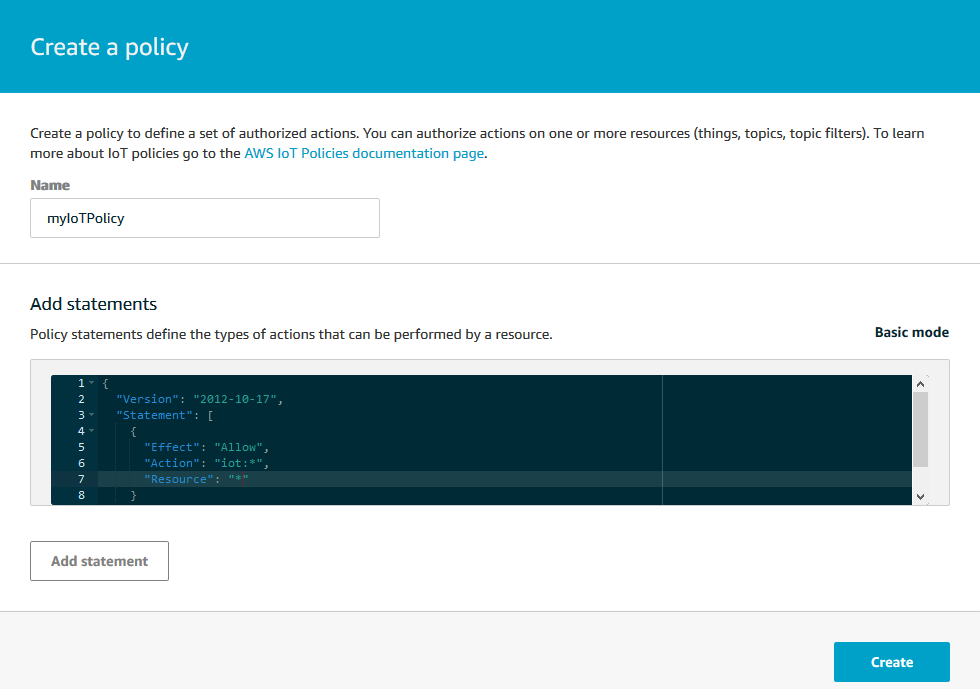
- In the left navigation pane, choose Secure, and then choose Policies. If you do not have any policies registered in your account, the "You don't have any policies yet" page is displayed. If you see this page, choose to "Create a policy"
- Type "myIoTPolicy" in the Name text box to identify your policy. In the "Add statements" section, click "Advanced mode". Modify lines 5, 6, and 7 with the following content:
- Choose "Create"
- In the left navigation pane, choose Manage, and then choose Things. If you do not have any IoT things registered in your account, the "You don't have any things yet" page is displayed. If you see this page, choose "Register a thing". Otherwise, choose to "Create"
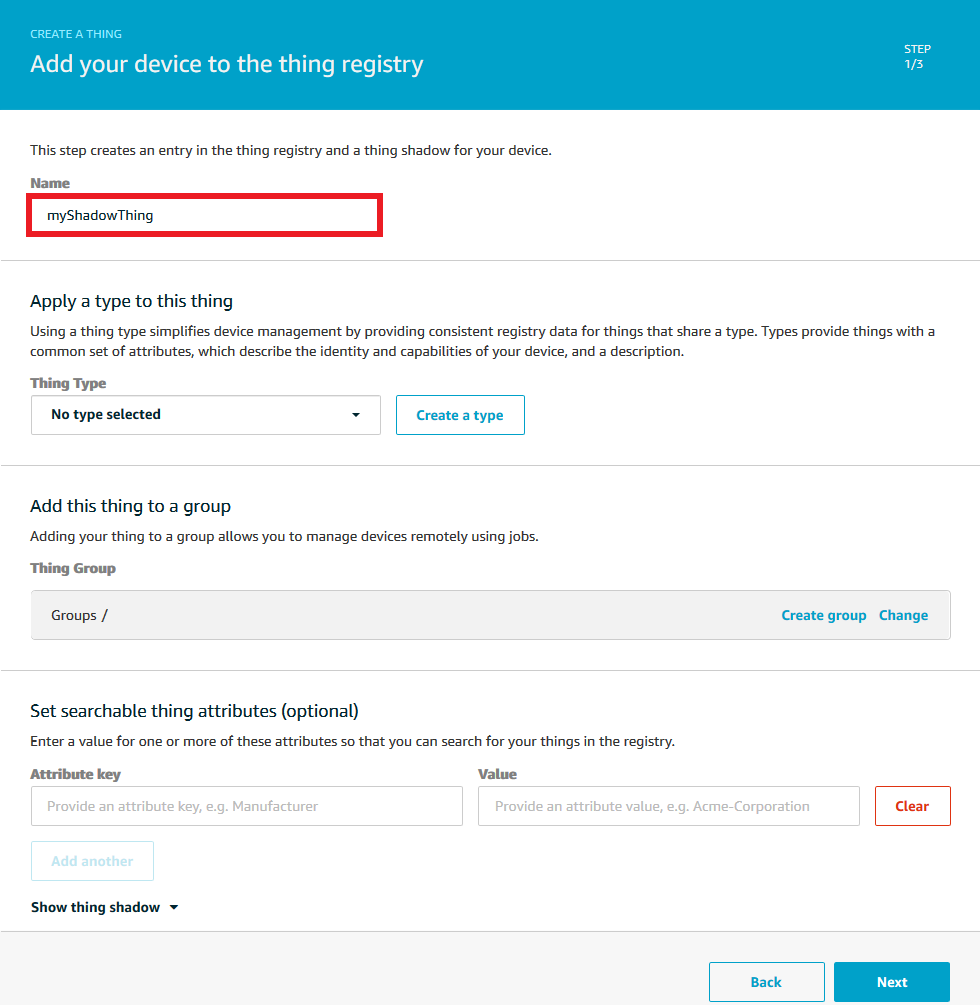
- On the Creating AWS IoT things page, choose to "Create a single thing"
- On the Add your device to the thing registry page, type myShadowThing in the name text box, then click "Next"
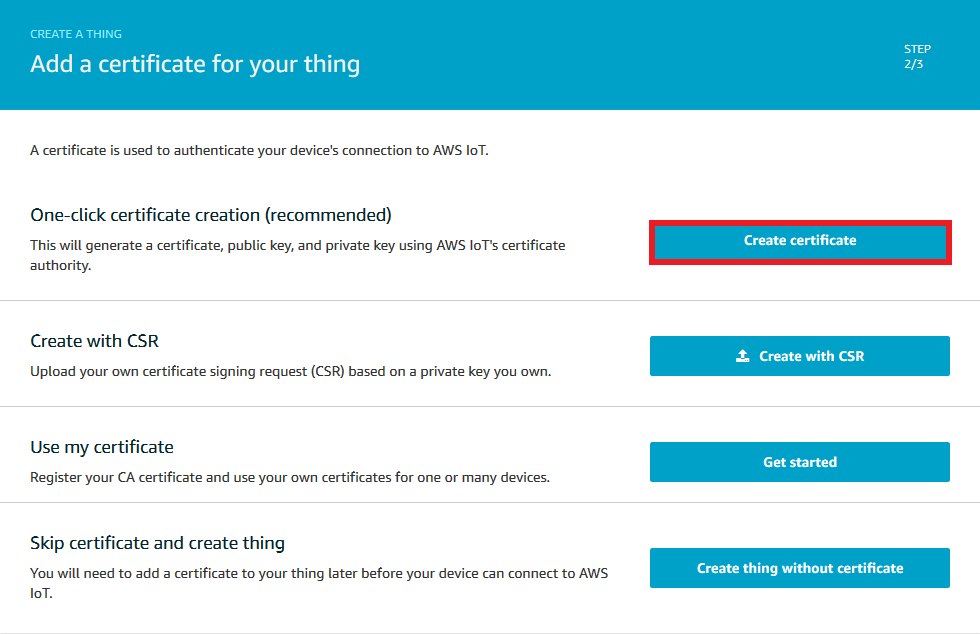
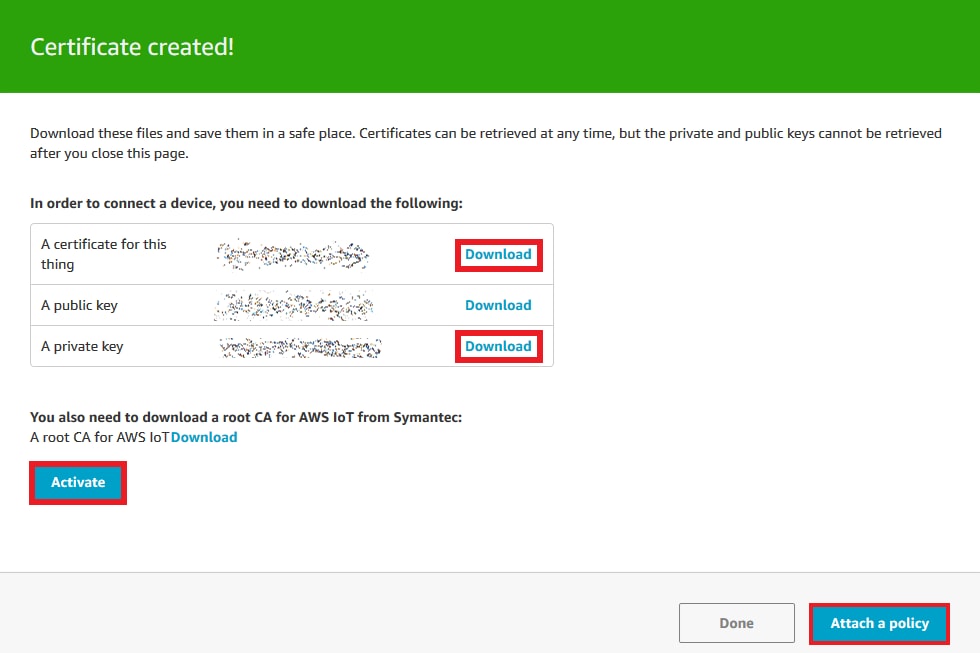
- On the "Add a certificate for your thing" page, under "One-click certificate creation", choose to "Create certificate"
- Download your "private key" and "certificate" by choosing the Download links for each. Choose "Activate" to switch on your certificate. Then click Attach a policy
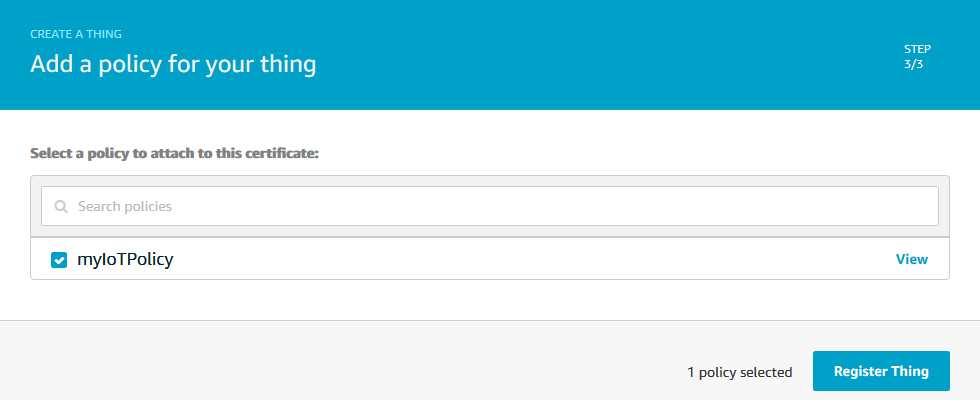
- Select the checkbox next to "myIoTPolicy" and choose "Register Thing"
        {
          "Effect": "Allow",
          "Action": "iot:*",
          "Resource": "*"
        }

3. Build, Run
3.1 Import an AWS example project from the MCUXpresso SDK
Use the MCUXpresso IDE to clone an AWS example project.
Import an AWS example project from the MCUXpresso SDK
- Open the MCUXpresso IDE
- Click Import SDK Example(s) from the QuickStart Panel
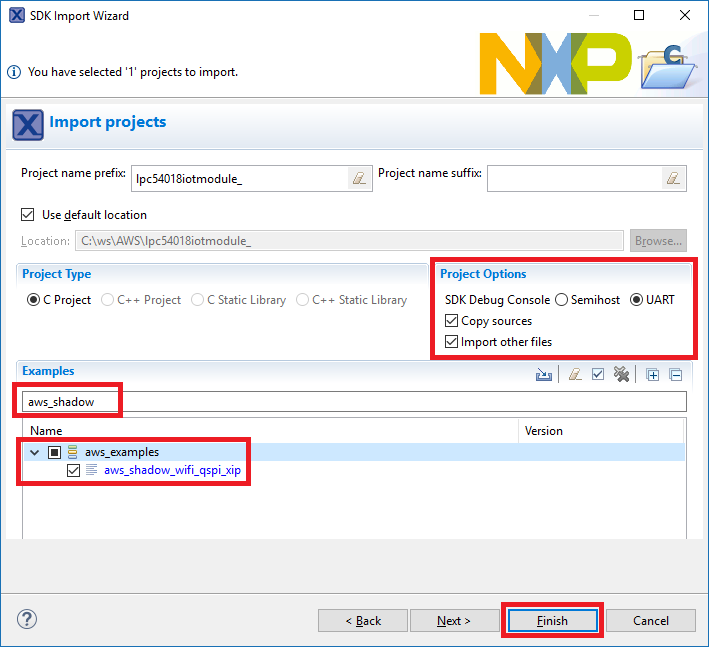
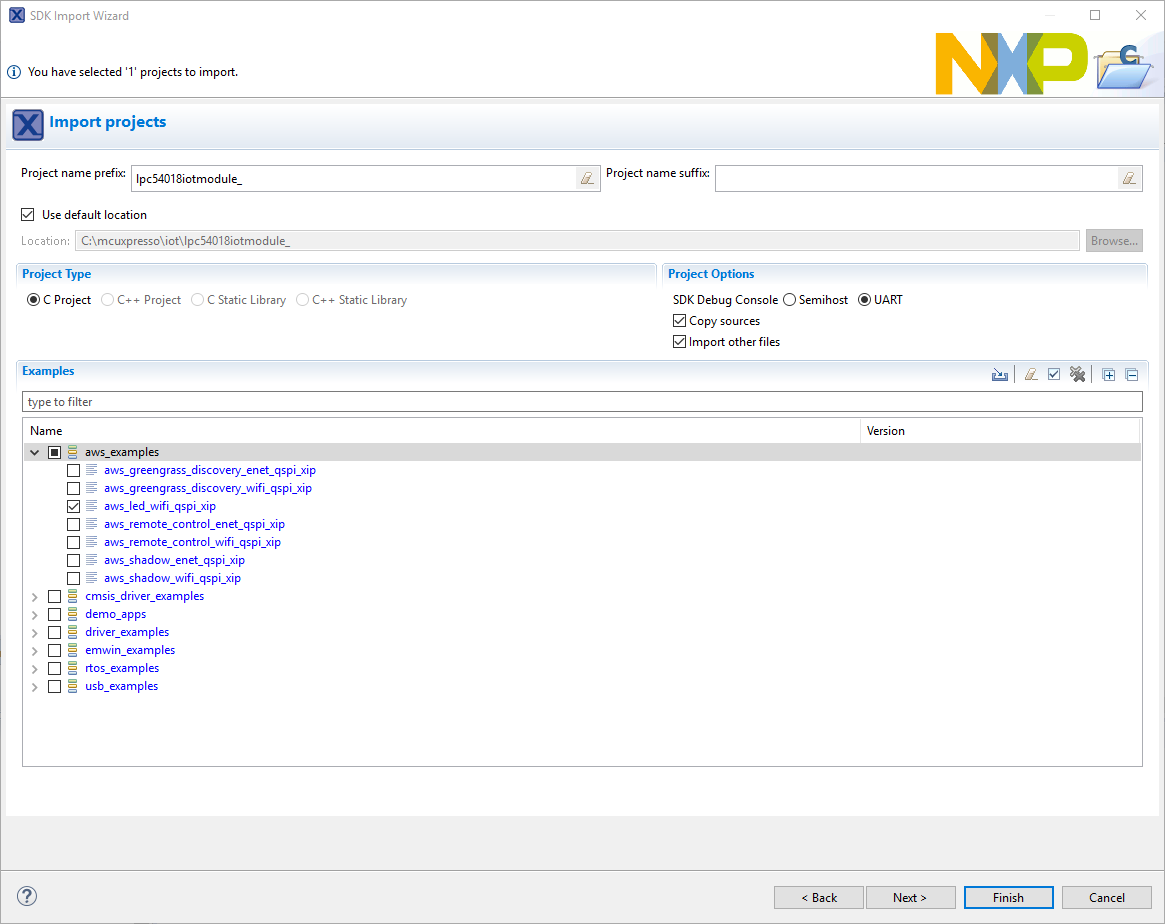
- Select the "lpc54018iotmodule" board in the Import Wizard. Then, select Next
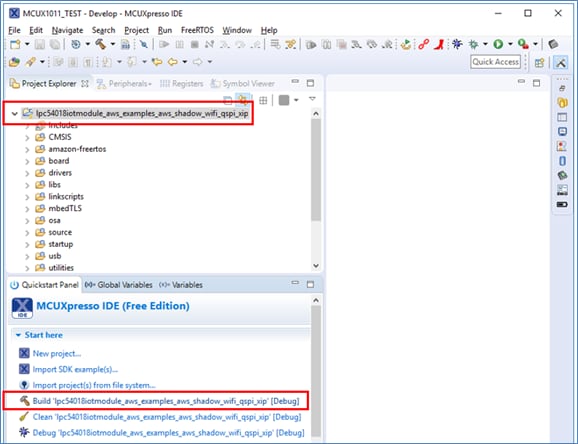
- Type "aws_shadow" into the search bar, and select the "aws_shadow_wifi_qspi_xip" project under aws_examples. Then, click on "Finish"
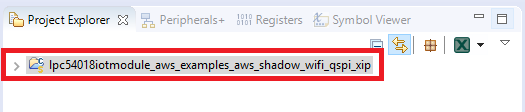
- Verify that project is loaded into the workspace as shown below
3.2 Configure your AWS Credentials to the project
Load your AWS IoT thing's credentials into the project and configure the Wi-Fi parameters.
Configure your AWS credentials to the project
- Open the MCUXpresso IDE
- Open your previously imported "aws_shadow" example project
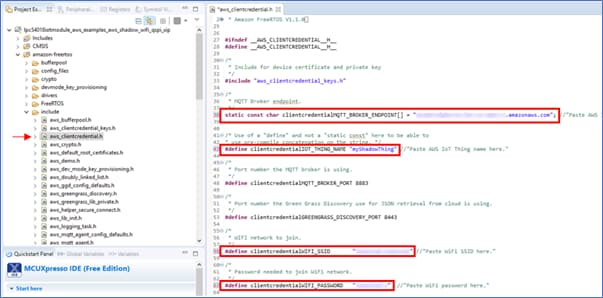
- Locate the file
/amazon-freertos/include/aws_clientcredential.hand configure:- Broker endpoint (Copy the URL from AWS IoT → 'myShadowThing' → Interact)
- Thing name ('myShadowThing')
- Wi-Fi SSID
- Wi-Fi Password
- From the SDK folder, locate the "Certificate Configurator" in the following path:
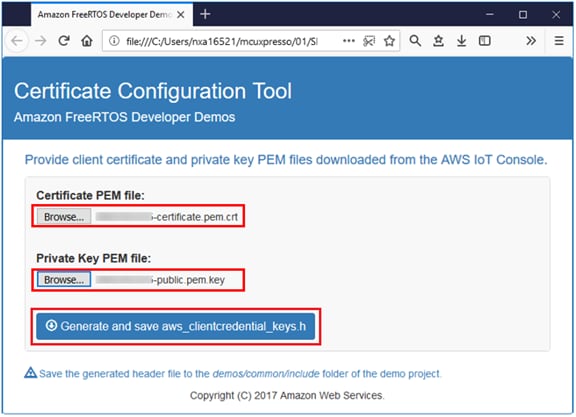
- Open the "Certificate Configurator" file; this tool will generate a "aws_clientcredential_keys.h" header file, based on the certificate files you previously downloaded
- Browse to the Certificate and Key files you previously downloaded from your 'Thing' (myShadowThing) and click on "Generate and save aws_clientcredential_keys.h"
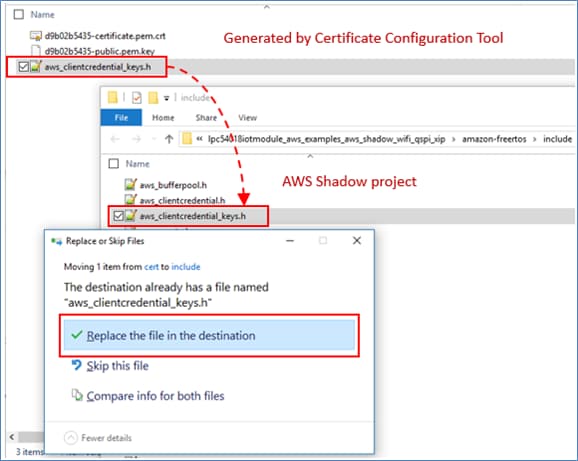
- Copy the newly generated
"aws_clientcredential_keys.h" and replace the one from your aws shadow project. The file is located at:
/lpc54018iotmodule_aws_examples_aws_shadow_wifi_qspi_xip\amazon-freertos\include
/SDK_2.3.0_LPC54018-IoT-Module/rtos/amazon-freertos/demos/common/devmode_key_provisioning/CertificateConfigurationTool/CertificateConfigurator.html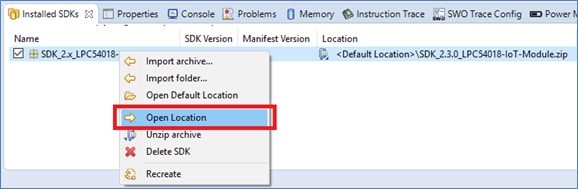

3.3 Build your Application
Build your AWS IoT Shadow application using MCUXpresso IDE.
Build and Run your application
- Open the MCUXpresso IDE
- Open your previously imported "aws_shadow" example project
- Select the project folder and click on "Build"
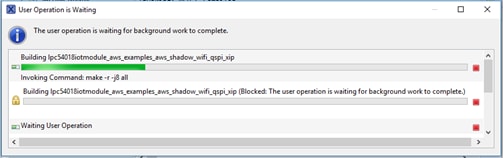
- Wait until the project is built
- Verify the build finished without any errors

3.4 Connect a Debugger probe
Connect a debugger probe to your LPC54018 IoT Module.
Connect a Debugger probe | LPC-Link2
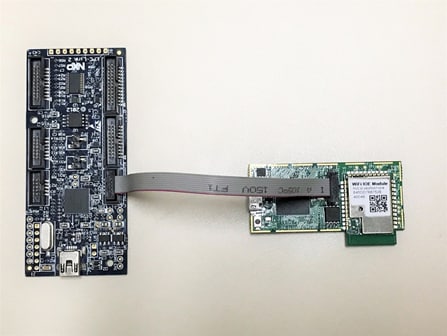
- Connect a LPC-Link2 debug probe to your LPC54018-IoT Module, make sure the cable connects as shown below
Connect a Debugger probe | JLink
- Download and install the latest J-Link Software from here
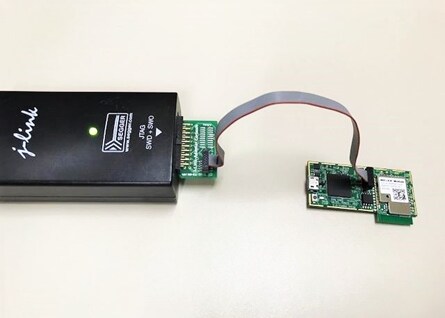
- Connect a J-Link debug probe to your LPC54018-IoT Module, make sure the cable connects as shown below
3.5 Download and Run your application
Download and run your AWS IoT Shadow application into the LPC54018 IoT Module.
Download and Run your Application | JLink
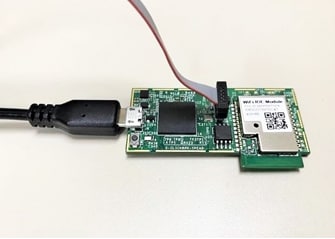
- Connect the LPC54018 IoT Module to your PC using a micro-USB cable
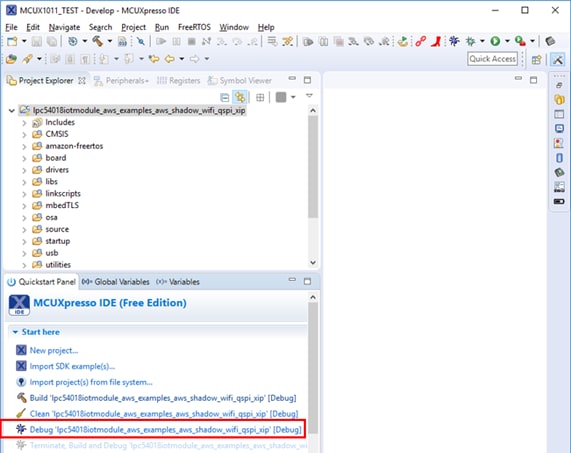
- Program your LPC54018 IoT Module by clicking on "Debug "lpc54018iotmodule_aws_examples_aws_shadow_wifi_qspi_xip" from the "Quickstart Panel"
- Select your debugger probe (LPC-Link2 or J-Link) and click "OK" to start programming your board
- Wait until the program is successfully downloaded
- Click "Run" to execute the application in debug mode
- Open the "Device Manager" on your Windows PC
- Open a Terminal emulator software (TeraTerm, PuTTY or similar) and connect to the COM port using any settings (it's an USB-Virtual COM port)
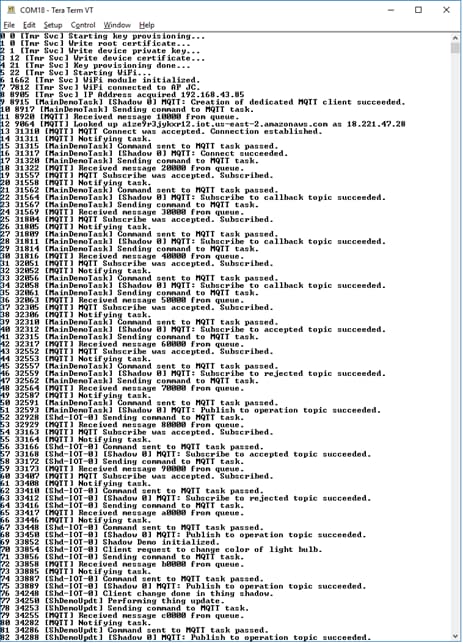
- Verify that the Shadow of your thing is being updated in AWS IoT


3.6 Success
You will see your Thing's shadow being updated. Confirm communication to AWS IoT using the Terminal.
4. Learn
4.1 More AWS examples projects
- Import the "aws_led_wifi" example project, then follow the readme instructions located at
{SDK_LOC}/board/lpc54018iotmodule/aws_examples/
Download Demo application integrating AWS and NXP components with Alexa from BlueWind Git .
Design Resources
Chip Documents
Board Information
Software
Additional Resources
Amazon Links of Interest
Support
Forums
Connect with other engineers and get expert advice on designing with Kinetis MCUs and MCUXpresso Software and Tools. Join the community discussion in one of our two dedicated communities:
On this page
- 1.1
Choose a Development Path
- 1.2
Jump Start Your Design with the MCUXpresso SDK
- 1.3
Install Your Toolchain
- 1.4
Update QCA firmware for latest SDK
- 2.1
Create an AWS account
- 2.2
IAM Policies
- 2.3
Create an IoT thing, private key, and certificate for your device