Getting Started with FRDM-MCXC242
Contents of this document
-
Plug it In
-
Get Software
-
Build, Run
-
Create
-
MCUXpresso Developer Experience
Sign in to save your progress. Don't have an account? Create one.
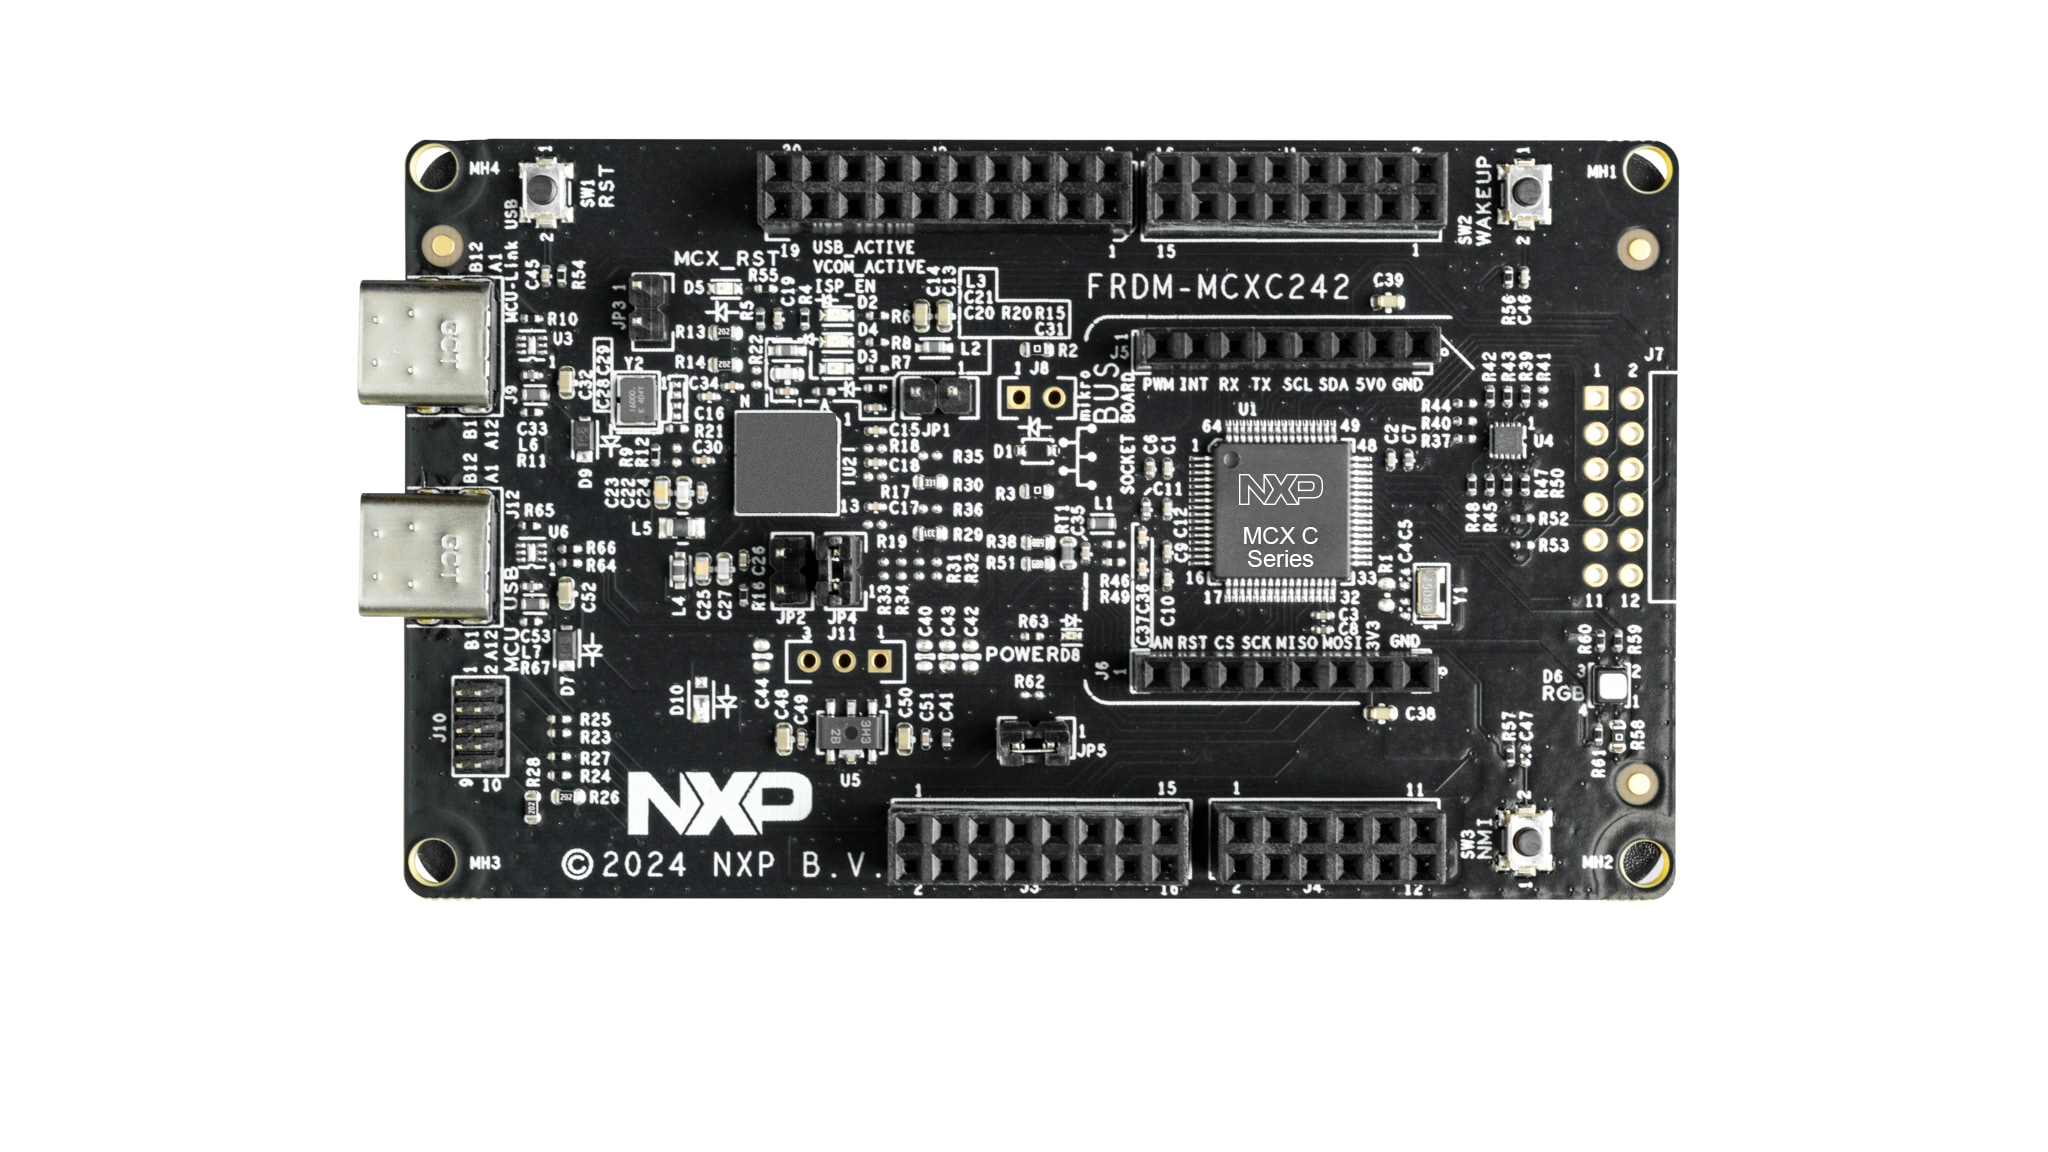
Purchase your FRDM-MCXC242 | MCUXpresso Developer Experience
1. Plug it In
Watch this video to get a quick overview of what to expect from the Getting Started guide.
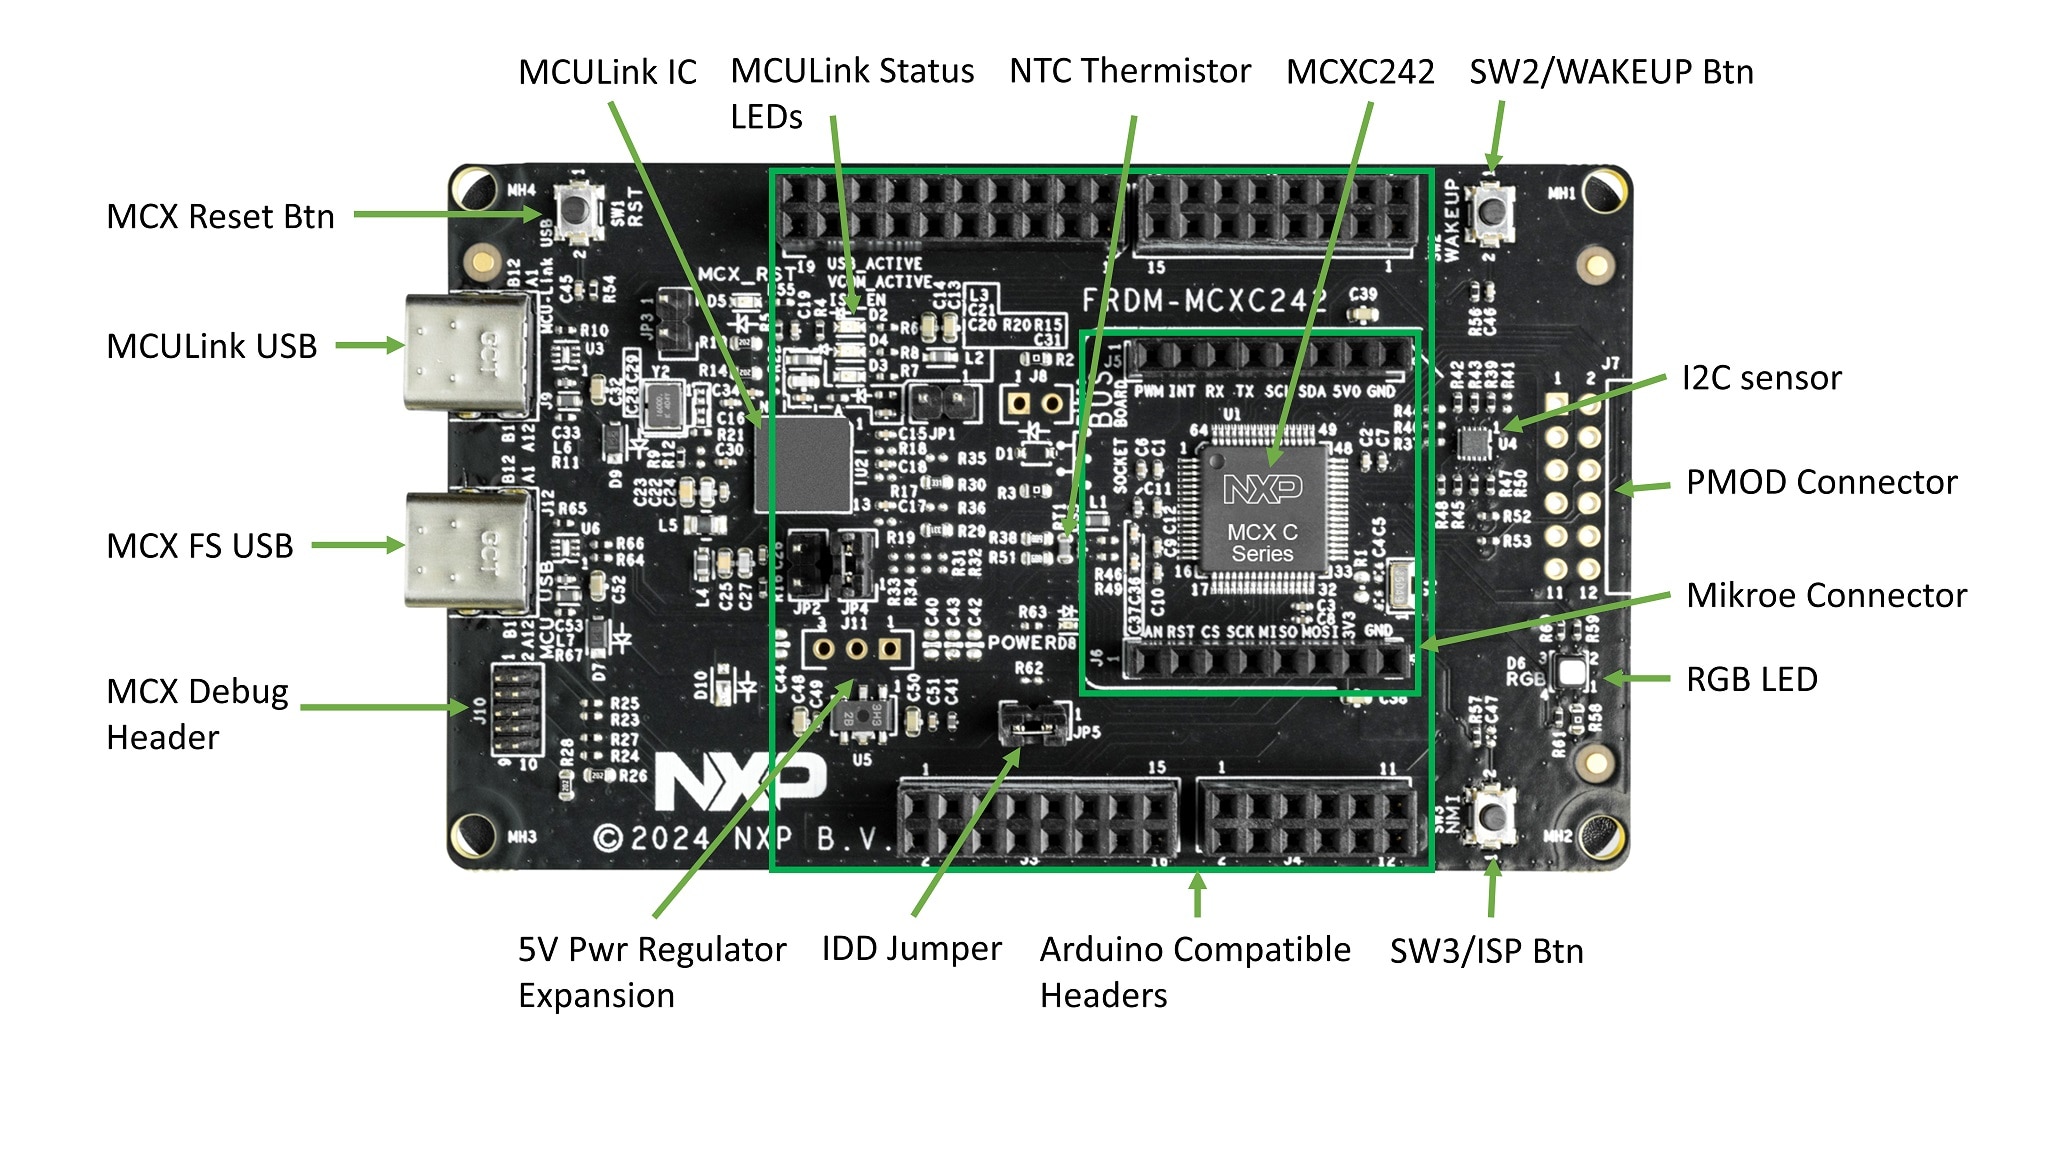
1.1 Get Familiar with the Board
The FRDM-MCXC242 board is pre-programmed with an LED blinky demo. This serves as a sanity check to verify that the device is working as expected out of the box.
1.2 Plug in the Board
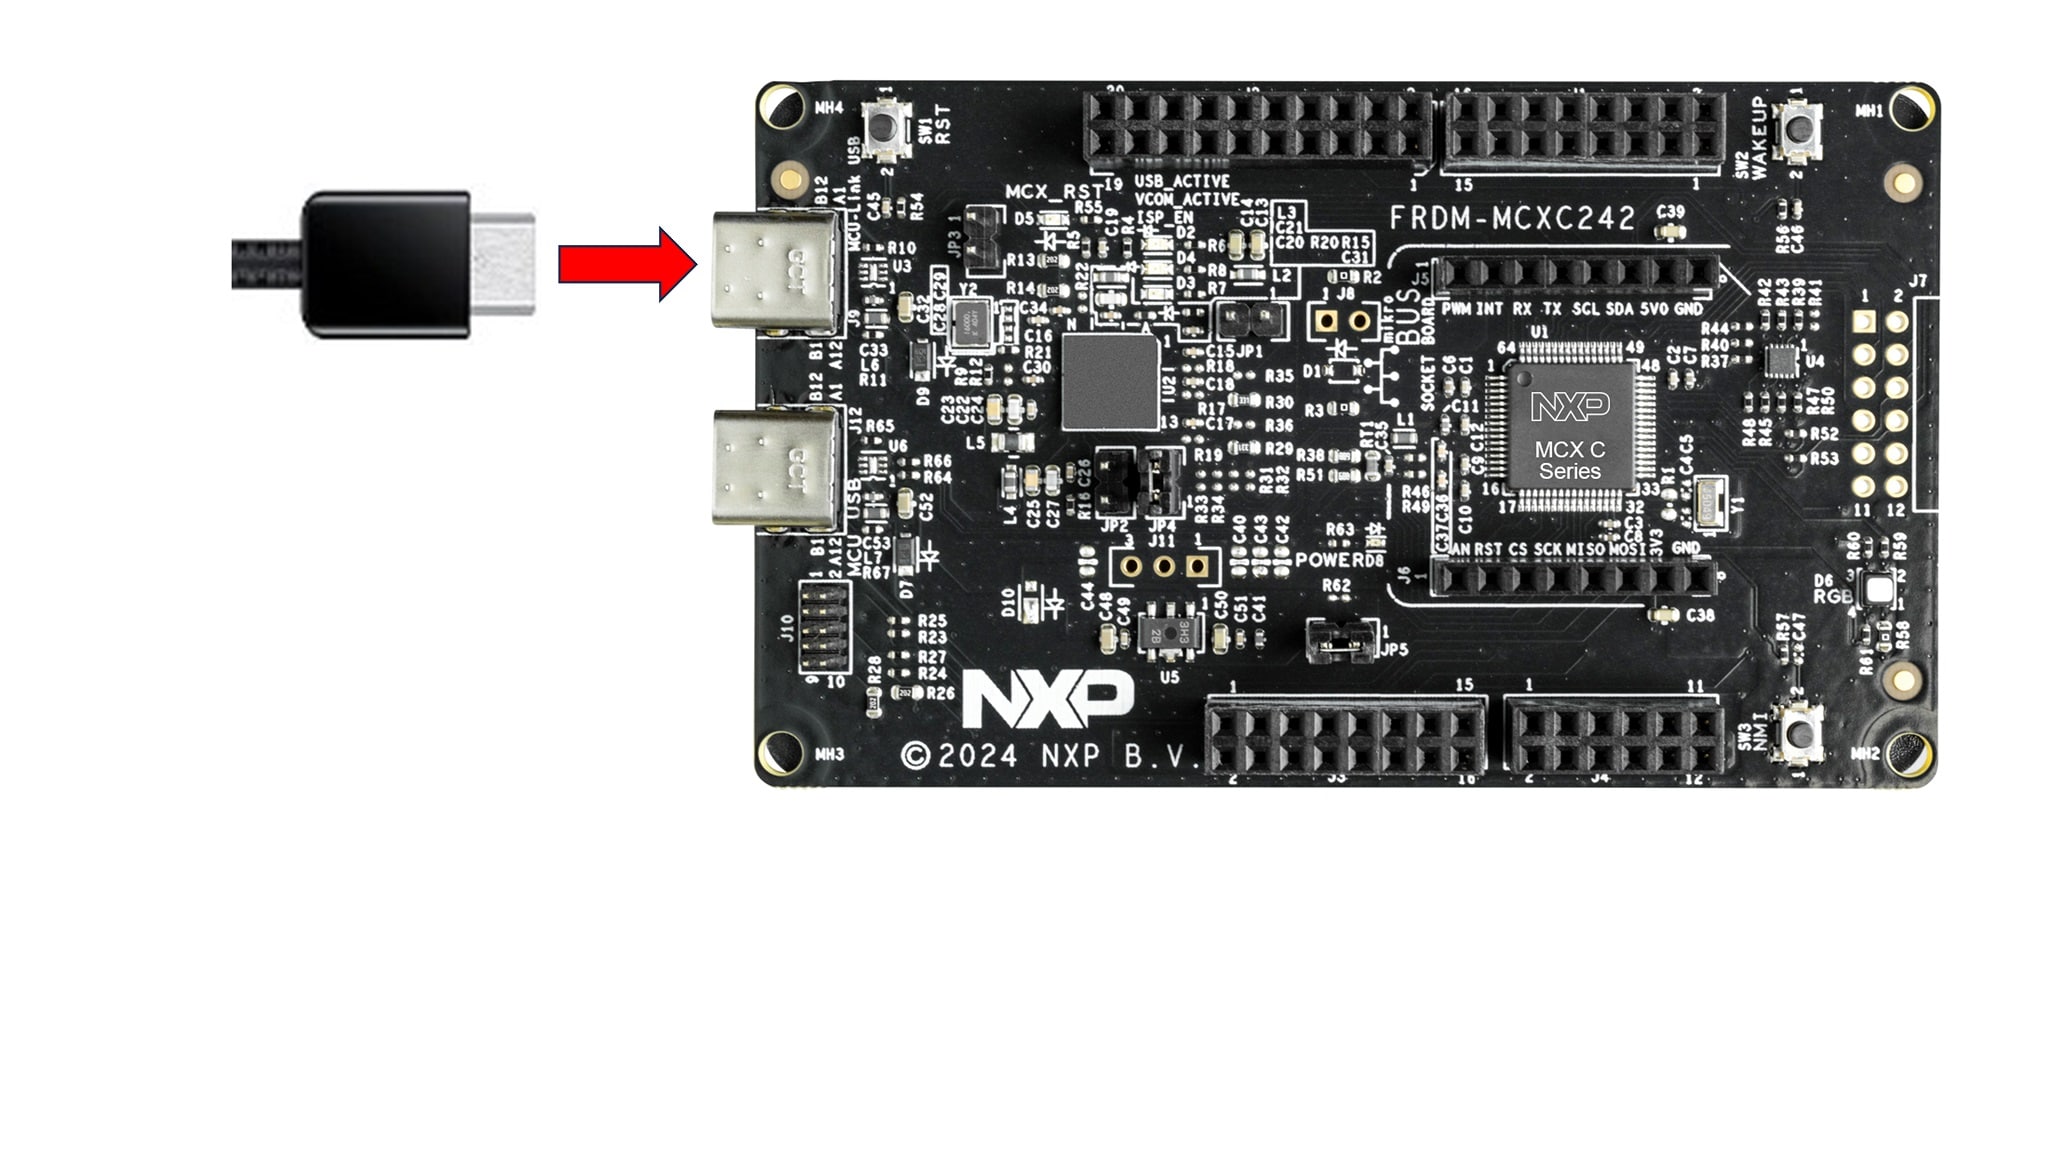
Connect a type-C USB cable from connector J9 to a host computer or power supply to power up the board and run the demo program. At this point, you should see the RGB LED blinking at a steady rhythm.
2. Get Software
2.1 MCUXpresso Installer (Recommended)
The MCUXpresso Installer is the recommended starting point for NXP microcontroller unit (MCU) development. It provides a single, streamlined installation process that brings together all the essential tools and components you need to get up and running quickly. Whether you are using Visual Studio (VS) Code, working from the command line with GNU compiler collection GCC or using partner integrated development environment (IDEs) from IAR or Arm (Keil), the installer helps you set up the needed components. Using this resource, you can also find other tools available for use with NXP products.
This installer is ideal for developers who want a ready-to-use environment without manually downloading and configuring multiple packages. We offer the installer for the following operating systems:
- Run the Installer Double-click the downloaded “MCUxpresso Installer” file to launch the installation wizard.
- Select “Components” In the component selection screen, choose the features you want to install or update. If you already have some components installed, the wizard will show which ones are up-to-date and which have an update available. The recommended minimum components for this guide are MCUxpresso SDK Developer, ARM GNU Toolchain, Link Server and MCUXpresso Config Tools.
- Press Install and Complete Setup Click “Install” to start the process. Once installation finishes, you can close the MCUXpresso Installer window to exit.
MCUXpresso Installer simplifies setting up an embedded development environment to save time on the installation process. Learn more about MCUxpresso Installer
2.2 MCUXpresso for VS Code
MCUXpresso for VS Code supports NXP MCUs based on Arm® Cortex®-M. It allows developers the flexibility to work on projects from Zephyr, Matter or the MCUXpresso software development kit (SDK.) The VS Code extension organizes relevant information including installed SDK repositories, available debug probes, user projects and links to help you get started:
- Open VS Code Launch VS Code on your system. VS Code is automatically installed using MCUxpresso Installer under MCUXpresso SDK Developer.
- Go to Extensions Marketplace Click on the Extensions icon in the left sidebar (or press Ctrl+Shift+X).
- Search for “MCUXpresso” Type “MCUXpresso,” in the search bar to locate the official extension from NXP.
- Install the Extension Click “Install.” Once installed, restart VS Code if prompted.
Explore a simpler way to work with MCUXpresso SDK, Zephyr and Matter projects. Learn more about our MCUXpresso Extension for VS Code
2.3 MCUXpresso SDK
The MCUXpresso SDK is inherently compatible with MCUXpresso for VS Code and also supports example projects for MCUXpresso IDE, IAR Embedded Workbench, Keil microcontroller development kit (MDK) and GCC with CMake + Kconfig. It includes production‑grade software with optional integrated real-time operating system (RTOS), enabling software technologies (stacks and middleware), reference software and more. Partner middleware and software can be integrated through custom west manifests.
The MCUXpresso SDK Developer component in the MCUXpresso Installer will download all required dependencies.
The NXP extension for VS Code allows you to add software repositories from four sources:
- Remote Git URL – Downloads the main repository, including all supported products
- Remote Archive Folder – Downloads an archive package for your chosen development board
- Local Git Repository – Uses an existing local Git repository previously downloaded to your PC
- Local Archive Folder – Uses an archive package previously downloaded from the SDK Builder
This section describes how to import the MCUXpresso SDK using the Remote Archive option:
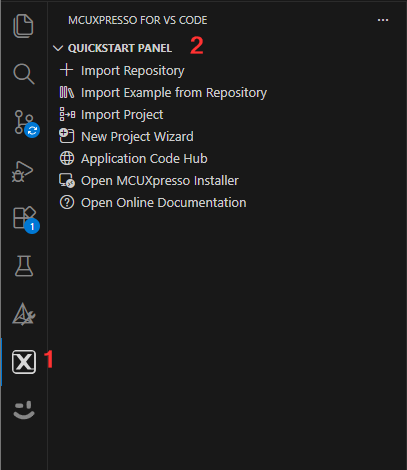
- Open the MCUXpresso Extension. Click the MCUXpresso icon in VS Code.
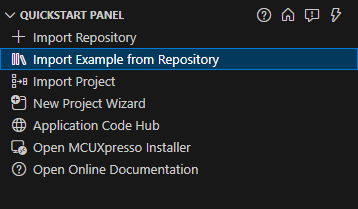
- Start Import. Go to the “QUICKSTART PANEL” tab and click “Import Repository.” A new import window will appear.
- Choose Remote Archive Source. Select “Remote Archive” as the source for SDK files.
- Select Package and Version. Choose the development board and SDK version you intend to use.
- Set Name and Destination Folder. Select a folder to store SDKs (e.g., “C:\SDK") and enter a name for the SDK (e.g., “mcuxsdk”).
- Import and Wait. Click “Import” and wait for the process to complete.
Discover how to work with MCUXpresso SDK, partner middleware and flexible repository options.
2.4 MCUXpresso Config Tool
The MCUXpresso Config Tool is an integrated suite that provides pin, clock, peripheral and trusted environment execution/configuration tools to generate initialization C code for custom board support. it is integrated as a part of MCUXpresso for VS Code and as a separate tool if using a different IDE such as IAR or Keil.
Install it using our MCUXpresso Installer described above:
- Open MCUXpresso Extension. In VS Code, click the MCUXpresso icon on the Activity Bar on the left side.
- Launch “Config Tools”. In the “Projects” tab, select and right-click your project, then click “Open Config Tools.”
See how to configure pins, clocks, peripherals and trusted execution environments with the MCUXpresso Config Tool. Learn more about our config tool
2.5 MCUXpresso Secure Provisioning Tools
NXP provides two complementary tools for secure programming and device provisioning on MCU devices. Both are fully supported for development and production workflows:
- Secure Provisioning SEC Graphical User Interface (GUI) Tool: A user-friendly graphical tool for secure programming and provisioning, ideal for both development and mass production. The GUI can be installed using the MCUXpresso Installer. Learn how to create a secure image in just 6 clicks
- Secure Provisioning Software Development Kit (SPSDK) Command-Line Interface (CLI): An open-source command-line toolkit for automation and integration, fully suitable for development and production workflows.
Discover how the SEC Tool and SPSDK integrate into development and production environments. Learn more about our MCUXpresso Secure Tools
2.6 Alternative Tools
MCUxpresso for VS Code is recommended for new designs.
Still want to use a different toolchain?
To help you choose the right one, explore the MCUXpresso Suite of Software and Tools.
The MCUXpresso SDK includes support for other tools such as MCUXpresso IDE,IAR ,KEIL and command-line GCC.
3. Build, Run
3.1 Build and Flash Application Using MCUXpresso for VS Code IDE
The following steps guide you through the hello_world demo application using MCUXpresso for VS Code IDE. But before you get started, you must download the Remote Archive SDK referenced in Section 2.3 of the Get Software step of this guide.
-
Open Quickstart Panel: Click the MCUXpresso icon in VS Code, then select the "Quickstart Panel" tab
-
Import Example: Click "Import example from Repository"
-
Select Archive Folder: From the “Repository” dropdown, choose your downloaded archive folder FRDM-MCXC242 SDK

-
Choose Board: From the Board dropdown, choose “FRDM-MCXC242”

-
Select Template: Select
“demo_apps/hello_world”from the Template dropdown
-
Select Freestanding Project and Location: Select the location which the project will be saved on your PC

-
Choose the Toolchain: Select the latest ARM GNU toolchain available

-
Import: Click “Import”

-
Build the Project: Expand Projects, right-click your project and select “Build Project” (or click the build icon)

-
Connect Board: Plug the board into your PC using the micro-USB cable on the MCU-LINK port
-
Debug the Project: Right-click the project and select “Debug” (or click the debug icon) to download the app to the board

-
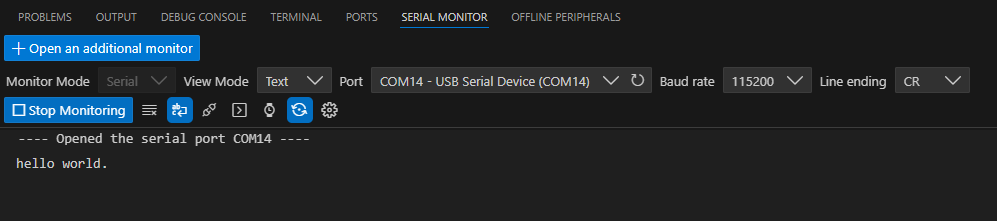
Open Serial Monitor: In VS Code, open “Serial Monitor,” select “COMx - MCU-Link VCom Port,” set baud rate to 115200, and click “Start Monitoring”

-
Run and View Output: Click “Continue” to run the app and view output in the Serial Monitor
3.2 Build and Flash Application with Alternative Toolchains
MCUXpresso IDE offers developers an easy-to-use, eclipse-based development environment for legacy NXP MCUs that are based on Arm® Cortex®-M cores. The preferred development environment is MCUxpresso for VSCode. However, MCUXpresso IDE remains fully supported for legacy products and SDKs that require MCUXpresso IDE. For those products that are not supported by MCUXpresso IDE, please refer to the SDK Documentation . Learn how to build and flash an application with MCUXpresso IDE .
Using a different toolchain?
This demo is also available for IAR and KEIL .4. Create
4.1 Modify an SDK Project Using the Config Tools on MCUXpresso for VS Code
The following steps will guide you through the manipulation of the general-purpose input/output (GPIO). The example sets up a TPM to generate a PWM signal and change a LED brightness.
-
Select Template: Follow the same steps as the previous section, but this
time select
“driver_examples/tpm_pwm_twochannel”from the Template dropdown - Import: Click “Import”
- Build the Project: Expand Projects, then right-click your project and select “Build Project” (or click the build icon)
- Connect Board: Plug the board into your PC using the micro-USB cable on the MCU-LINK port
- Debug the Project: Right-click the project and select “Debug” (or click the debug icon) to download the app onto the board
- Run and View Output: Click “Continue” to run the app and view the RGB LED blinking
- Stop Debug Session: Click on the stop debug session icon
- Open MCUXpresso Config Tool: Right-click on the project and select “Open” with MCUXpresso Config Tools
- Filter Pins: In the Pins view, uncheck “Show dedicated pins” and “Show no routed pins” to display only the routed pins (highlighted in green)
- In the current configuration, PTB18 and PTB19 are routed as the outputs of the TPM. Let’s add the pin configuration to enable the BLUE LED
- Select “Show no routed pins” to see the other options. To enable the BLUE LED, search for BLUE or PTA13 and select TPM1:CH,1 under the TPM column
- Now, it's time to implement these changes into the project by exporting the new updated pin_mux.c and pin_mux.h files that are generated by the Pins Tool. Click on "Update Project" in the menu bar. Then you can close the MCUXpresso Config Tools and click ok on the prompt in VS code to modify the source files
- Let’s add some additional code to the example. Open app.h file and add the following macros for BLUE LED TPM channel
- Add initialize structure for TPM1_CH1 in tpm_pwm_twochannel.c
- In the main function, add the TPM1_CH1 control function inside the while loop
- Build the Project: Expand Projects, then right-click your project and select “Build Project” (or click the build icon)
- Debug the Project: Right-click the project and select “Debug” (or click the debug icon) to download the app to the board
- Run the application. Choose a “Serial Terminal” and then set the UART settings to 115200 baud rate, 8 bit data size, no parity and 1 stop bit. Press OK. Enter any number between 0-9 to change LED brightness. You can see the RGB_LED is also changing the brightness. and the color should be white, which means that all 3 BLUE/GREEN/RED LED is on


4.2 Modify a Project Using Config Tools for Alternative Tools
MCUXpresso IDE offers developers an easy-to-use, eclipse-based development environment for legacy NXP MCUs based on Arm® Cortex®-M cores. The preferred development environment is MCUxpresso for VSCode. However, MCUXpresso IDE remains fully supported for legacy products and SDKs that require MCUXpresso IDE. For those products that are not supported by MCUXpresso IDE, please refer to the SDK Documentation . Learn how tomodify a project using the Config Tools in MCUXpresso IDE .
Using a different toolchain?
This demo is also available for IAR and KEIL .5. MCUXpresso Developer Experience
Check out each of the following sections to learn about the ecosystem provided to you for flexible protyping and development. In the video below, you will be introduced to the FRDM platform, the full-featured evaluation kit (EVK) and the compatible shields for extended capabilities. In addition, you will be guided through our Application Code Hub (ACH) portal where you will be provided numerous application examples through NXP's GitHub.
5.1 FRDM, EVK and Shields
For quick prototyping platforms, we offer both the low-cost FRDM platform and the full-featured EVK.
FRDM Development Boards come with standard form factor and headers, easy access to MCU I/Os, on-board MCU-Link debugger and a USB-C cable. Our full-featured EVKs include extended I/O and interface access, extendable with WiFi and additional MCU-Link features.
There are also many compatible Click Board and/or Arduino shields. For those that are supported with an Open Cortex®-microcontroller software interface standard (CMSIS) Pack, examples may be available in the ACH. However, this is not the case if not many of them are easy to use via serial interface such as inter-integrated circuit (I2C), serial peripheral interface (SPI) or universal asynchronous receiver/transmitter (UART), for which we provide drivers with examples in the MCUXpresso SDK.
5.2 Application Code Hub
The ACH further enhances our MCUXpresso Developer Experience by giving developers an interactive dashboard to quickly locate software. Explore the ACH today to discover additional details and the benefits of the new interactive Application Code Hub.
Software accessible from ACH is located in NXP’s GitHub repository where it can be easily accessed and cloned directly from that location.
5.3 Demo Walkthrough
The following demo walks you through importing a project from ACH using a system based on the FRDM platform with a motor-control shield and a low-cost LCD. Although your evaluation board may differ from this system, the following steps can be replicated and used accordingly for all supported platforms.
5.4 FreeMASTER Run-Time Debugging Tool
FreeMASTER is a user‑friendly, real‑time debug monitor and data visualization tool that enables runtime configuration and tuning of embedded software applications. It supports non‑intrusive monitoring of variables on a running system and can display multiple variables on oscilloscope‑like views, standard widgets (gauges, sliders and more) or in text form, offering simple‑to‑use data recorders.
MCUXpresso Installer provides the FreeMASTER component for easy download and update.
Optimize, tune and visualize your system in real time. Learn more about FreeMASTER.
5.5 GUI Guider
GUI Guider's drag-and-drop editor makes it easy to utilize the many features of the light and versatile graphics library (LVGL) such as widgets, animations and styles to create a GUI with minimal to no coding. It is a user-friendly GUI development tool from NXP that enables the rapid development of high-quality displays using the open-source LVGL.
MCUxpresso Installer offers the GUI Guider component that you can easily download and update.
Utilize LVGL widgets, animations and styles with zero coding needed. Learn more about GUI Guider
Design Resources
Support
Troubleshooting
On this page
- 2.1
MCUXpresso Installer (Recommended)
- 2.2
MCUXpresso for VS Code
- 2.3
MCUXpresso SDK
- 2.4
MCUXpresso Config Tool
- 2.5
MCUXpresso Secure Provisioning Tools
- 2.6
Alternative Tools
- 3.1
Build and Flash Application Using MCUXpresso for VS Code IDE
- 3.2
Build and Flash Application with Alternative Toolchains
- 4.1
Modify an SDK Project Using the Config Tools on MCUXpresso for VS Code
- 4.2
Modify a Project Using Config Tools for Alternative Tools