Getting Started With the MCU-Link
Contents of this document
-
Overview of MCU-Link Installation
-
Using MCU-Link with MCUXpresso IDE
-
Setting Up MCU-Link with 3rd Party IDEs
-
Using Other Serial Terminal Programs
Sign in to save your progress. Don't have an account? Create one.
Purchase your MCU-Link Debug Probe
1. Overview of MCU-Link Installation
Setting up your MCU-Link debug probe is very simple. MCU-Link debug probes are supported on host computers running a Windows 10/11, MacOS X, or Ubuntu Linux operating systems (OS). The debug probe works with standard OS drivers.
The LinkServer utility package provides all the required and for Windows platforms this also includes information files to provide user-friendly device names utilities. LinkServer itself provides a GDB server, flash programming and other features, along with MCU-Link firmware update capability. You will also see an MCU-Link firmware update utility for version 2.263, but only install this if you cannot use WinUSB drivers for MCU-Link or if you are using MCUXpresso 11.6.1 or an earlier version (see your board user guide for more information).
If the MCU-Link firmware version is 3.122 or later, an automatic firmware update can be done using LinkServer installer (version 1.4.85 or later), otherwise a manual update is necessary after placing the MCU-Link into In-System Programming (ISP) mode. The ISP jumper for MCU-Link is J3 and for MCU-Link Pro it is J4.
1.1 Installation Steps
Download and install the LinkServer utility package, change directory to the installation directory and follow the steps below:
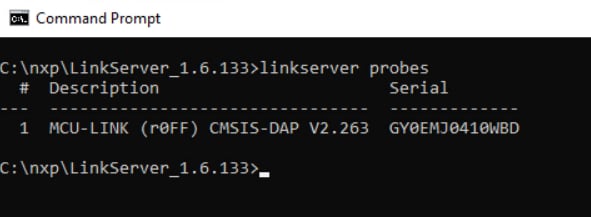
Plug in your MCU-Link / MCU-Link Pro and use the LinkServer application to ensure it is detected by using the linkserver probes command:
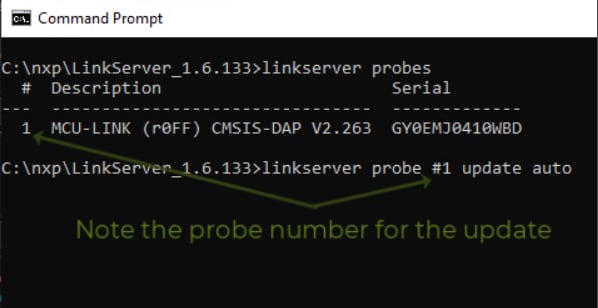
Now use the LinkServer auto update command to attempt to update the firmware, using the probe identifier number (#) from the last step:
If the update is successful the new version will be reported, and you are ready to use your MCU-Link.
If the update fails, unplug your MCU-Link, install the ISP jumper and reconnect. Then run the program_CMSIS.cmd script from the scripts directory:
1.2 Next Steps and Other Utilities
You MCU-Link should now work with any IDE that supports CMSIS-DAP probes, but is guaranteed to work with MCUXpresso IDE or MCUXpresso for Visual Studio Code with no further setup needed. As future releases of firmware become available these IDEs will inform you.
There are several useful commands and utilities included with LinkServer; refer to the readme markdown file in the installation for more details.
MCU-Link probes can also be used with the LIBUSBIO library to provide USB to serial bridges for test and development. MCU-Link is also fully supported by the FreeMASTER debug tool, which provides very powerful, customizable visualization and control of variables. Also note that MCU-Link probes are fully compatible with the MCUXpresso SEC secure programming / provisioning tool and the Secure Provisioning SDK which provides the source for the utilities that it uses.
2. Using MCU-Link with MCUXpresso IDE
2.1 MCU-Link with MCUXpresso IDE Tutorial
MCUXpresso IDE will automatically detect MCU-Link, just as it does with other supported probes (note version 11.1 or later are supported but 11.2.1 or later is recommended). The MCU-Link VCOM feature is independent of the IDE, but the built-in Serial terminal feature of MCUXpresso IDE can be used with it.
See this short tutorial video for an overview of using MCU-Link with MCUXpresso IDE:
3. Setting Up MCU-Link with 3rd Party IDEs
MCU-Link can be used with IDEs from our partners, such as Arm Keil uVISION and IAR Embedded Workbench. Setup is straightforward, as with any other CMSIS-DAP probe.
3.1 Setting Up IAR EWARM with MCU-Link
Install the latest version IAR available. The version must be at least, IAR Embedded Workbench IDE for Arm 8.40.2.
- With your project workspace open, right mouse click on the project:

- When the Options for workspace open, select the Debugger tab, then select CMSIS-DAP Debugger from the Setup selection:
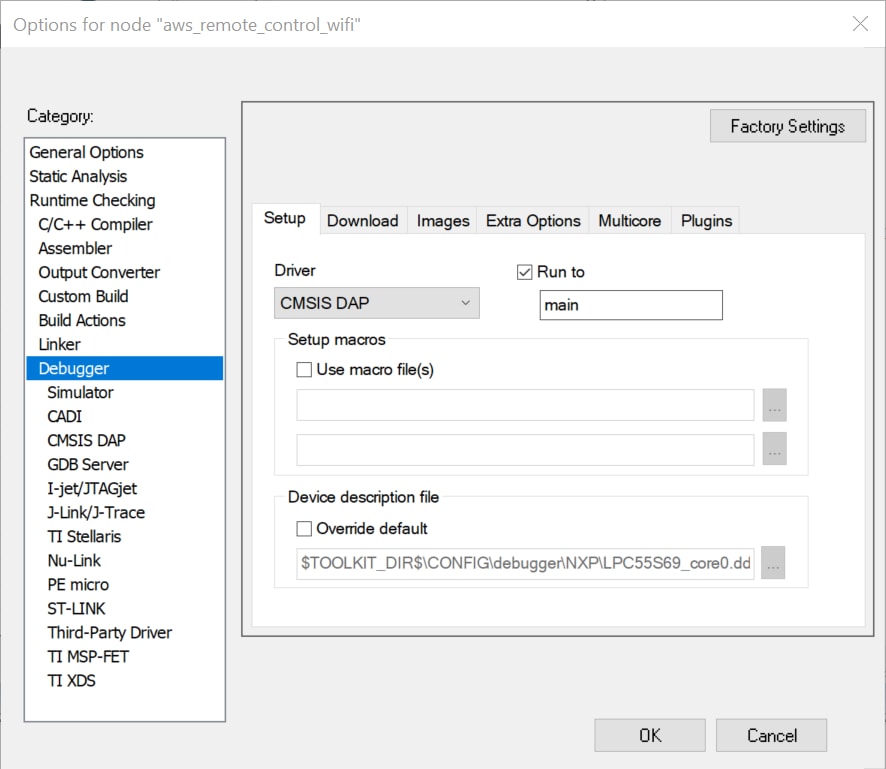
- Click OK to close the dialog boxes. You can now use your MCU-Link as you would any other CMSIS-DAP probe
3.2 Setting Up Keil uVision with MCU-Link
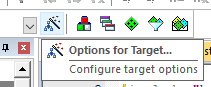
- With your project workspace open, click on the “Options for target” icon:
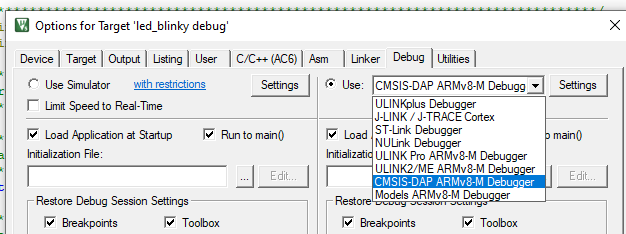
- When the Options for target dialog opens, select the Debug tab, then select CMSIS-DAP ARMv8-M Debugger from the Use selection:
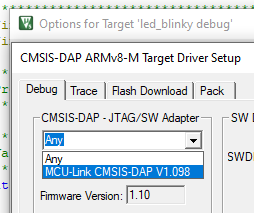
- After selecting this probe option, click on Settings to open the CMSIS-DAP ARMv8-M target Driver set up dialog. Select MCU-Link from the pulldown menu on the left:
- You should now see settings similar to this:
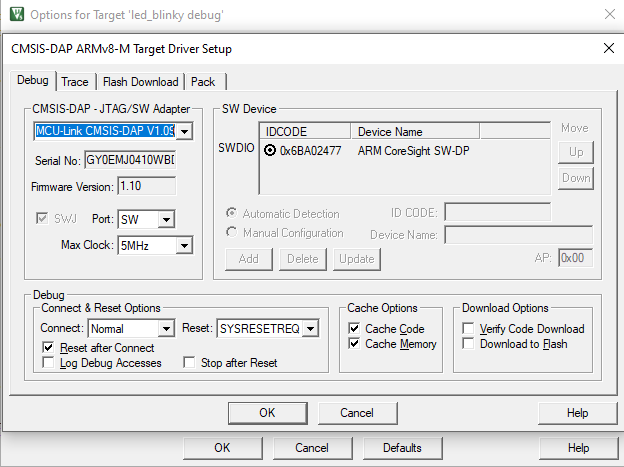
- Click OK to close the dialog boxes. You can now use your MCU-Link as you would any other CMSIS-DAP probe
4. Using Other Serial Terminal Programs
MCU-Link's VCOM feature can be used with serial terminal emulation programs such as PuTTY Tutorial and Tera Term Tutorial. Setup is as with similar VCOM devices. Most MCUXpresso SDK examples will use a configuration of 115200 baud rate, 8 data bits, no parity and 1 stop bit. To determine the port number of the MCU-Link virtual COM port, open the device manager and look under the "Ports" group (as shown earlier).
Tera Term Tutorial
Tera Term Tutorial
Tera Term is a very popular open source terminal emulation application. This program can be used to display information sent from your NXP development platform's virtual serial port.
- Download Tera Term from SourceForge. After the download, run the installer and then return to this webpage to continue
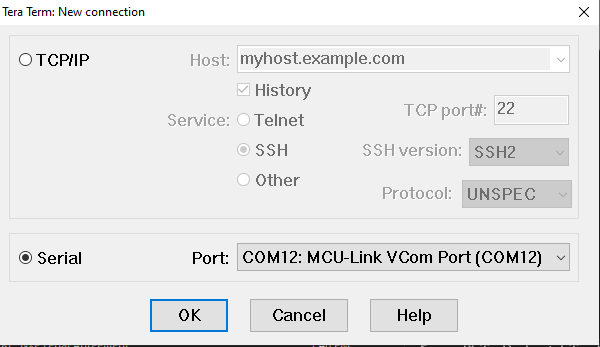
- Launch Tera Term. The first time it launches, it will show you the following dialog. Select the serial option. Assuming your board is plugged in, there should be a COM port automatically populated in the list with the MCU-Link name
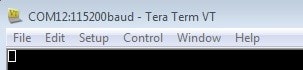
- Configure the serial port settings (using the COM port number identified earlier) to 115200 baud rate, 8 data bits, no parity and 1 stop bit. To do this, go to Setup → Serial Port and change the settings
- Verify that the connection is open. If connected, Tera Term will show something like below in its title bar
- You're ready to go
PuTTY Tutorial
PuTTY Tutorial
PuTTY is a popular terminal emulation application. This program can be used to display information sent from your NXP development platform's virtual serial port.
- Download PuTTY using the button below. After the download, run the installer and then return to this webpage to continue
- Launch PuTTY by either double-clicking on the
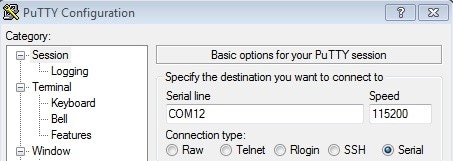
*.exefile you downloaded or from the Start menu, depending on the type of download you selected - Configure in the window that launches, select the Serial radio button and enter the COM port number that you determined from the Device manager. Also enter the baud rate, in this case 115200
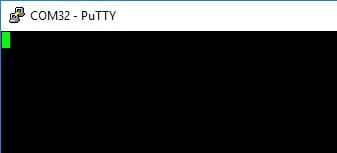
- Click Open to open the serial connection. Assuming the board is connected and you entered the correct COM port, the terminal window will open. If the configuration isn't correct, PuTTY will alert you
- You're ready to go
Design Resources
Board Documents
Chip Documents
Software
- MCU-LINK CMSIS - Linux Package
- MCU-LINK CMSIS - Mac Package
- MCU-LINK CMSIS - Windows Package
Support
Forums
Learn more about the MCU-Link with design tips, training documents, and the NXP Community. If you need additional help, contact NXP Support.
Connect with other engineers and get expert advice on designing with the MCU-Link on one of our community sites.