Getting Started with the FRDM-KEAZ128
Contents of this document
-
Get Started
-
Plug It In
-
Build, Run
Sign in to save your progress. Don't have an account? Create one.
Purchase your KEA General Purpose Evaluation Board
1. Get Started
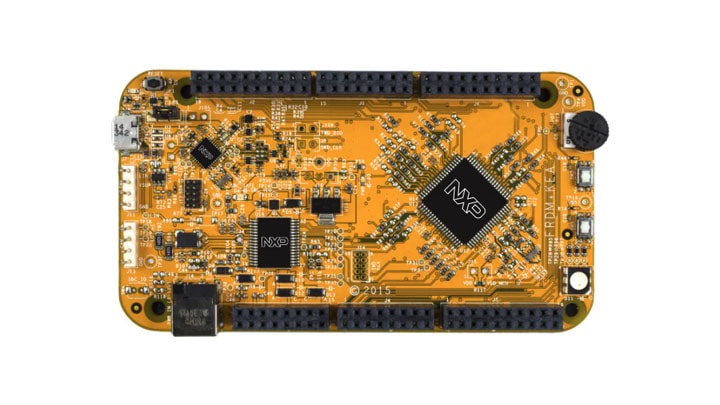
Let's take your FRDM-KEAZ128 KEA Freedom Evaluation Board for a test drive!
1.1 Getting Started with the FRDM-KEA Development Board
1.2 Get your Integrated Development Environment (IDE)
The FRDM-KEAZ128 board performs better when using S32 Design Studio for Arm® IDE.
FRDM-KEAZ128 board is also supported by the Kinetis® Design Studio IDE.
Download S32 Design Studio for Arm
1.3 Download the FRDM-KEAZ128 QSP
Get the FRDM-KEAZ128 Quick Start Package and check both FRDM-KEAZ128 Quick Start Guide and FRDM-KEAZ128 Software Integration Guide.
1.4 Download the FRDM-KEAZ128 Sample Code
Get the FRDM-KEAZ128 Sample Code.
Download FRDM-KEAZ128 sample code
1.6 Get the Virtual COM Port Driver
Make sure that the driver for the boards virtual COM port is installed as many of the example applications output data over the MCU's UART.
Download virtual COM port driver
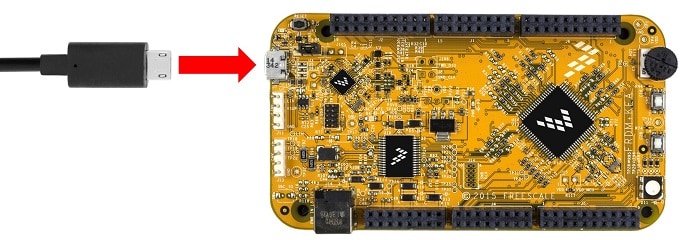
2. Plug It In
2.2 Run the Out-of-Box Demo
Your FRDM-KEAZ128 KEA Freedom Evaluation Board comes preloaded with two demos:
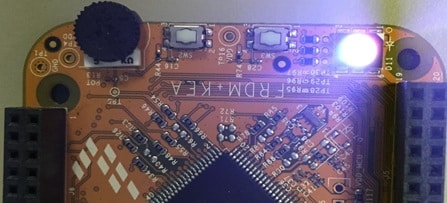
Demo 1. LED blinking with interactivity using the onboard potentiometer
The LED will blink faster and then switch colors when the potentiometer is turned.
Demo 2. LED brightness and dim
Press the user button, which uses the ADC and potentiometer.
2.3 Use a Terminal Application
Run your favorite terminal application to view the serial output from the MCU's UART (the recommended settings are: 115,200 baud rate, 8 data bits, no parity, 1 stop bit)
Open the device manager and look under the "Ports" group to define the port number of the FRDM-KEA's virtual COM port.
Follow these tutorials if you are unsure on how to use the terminal application to display information sent from your NXP development platform's virtual serial port: Tera Term Tutorial, PuTTY Tutorial.
3. Build, Run
Learn how to create a new project in S32 Design Studio for Arm® and the basics to load your own code by running an easy example code.
3.1 Create an Application for the FRDM-KEA
3.2 Create a New S32DS Project
Create a new project in your workspace and load the configuration for your FRDM-KEAZ128 KEA Freedom Evaluation Board.
3.3 Create, Build and Run your Application
Create a "hello world" code within minutes and watch it working in your FRDM-KEAZ128.
Tera Term Tutorial
Tera Term Tutorial
- Download Tera Term from SourceForge and run the installer
-
Select the Serial option once you launch Tera Term. A COM port will be automatically populated in the list if the FRDM-KEAZ128 board is plugged

- Configure the serial port settings (using the COM port number identified earlier) by going to Setup → Serial Port and change the settings to 115,200 baud rate, 8 data bits, no parity and 1 stop bit
-
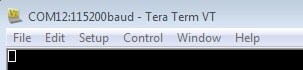
Verify the open connection by checking the title bar in the Tera Term application:
PuTTY Tutorial
PuTTY Tutorial
- Download PuTTY and run the installer
- Launch PuTTY by either double-clicking on the *.exe file you downloaded or from the Start menu, depending on the type of download you selected
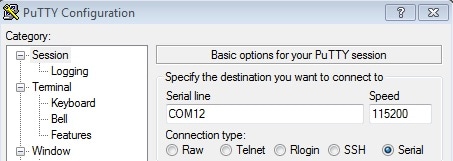
- Configure the serial port settings by selecting the Serial radio button and enter the selected COM port number and change the settings to 115,200 baud rate
- Click Open to open the serial connection
- Verify the open terminal window once entered the correct COM port and plug the FRDM-KEAZ128 board
Design Resources
Board Information
Support
Forums
Connect with other engineers and get expert advice on designing with the FRDM-KEAZ128 on one of our community sites.
On this page
- 1.1
Getting Started with the FRDM-KEA Development Board
- 1.2
Get your Integrated Development Environment (IDE)
- 1.3
Download the FRDM-KEAZ128 QSP
- 1.4
Download the FRDM-KEAZ128 Sample Code
- 1.5
Download the MSCAN Driver
- 1.6
Get the Virtual COM Port Driver