Getting Started with the LPCXpresso54628 Development Board
Contents of this document
-
Plug It In
-
Get Software
-
Build, Run
Sign in to save your progress. Don't have an account? Create one.
Purchase your OM13098
1. Plug It In
Let's take your LPCXpresso54628 board for a test drive
1.2 Run the Out-of-Box Demo
Your LPCXpresso54628 board comes preloaded with a graphical HMI demo that leverages the included touchscreen. The demo demonstrates various simple GUIs, graphs and text rendering.
2. Get Software
2.3 Getting Started with the MCUXpresso SDK
The MCUXpresso Software Development Kit (SDK) is complimentary and includes full source code under a permissive open-source license for all hardware abstraction and peripheral driver software.
Click below to download a pre-configured SDK release for the LPCXpresso54608, which includes versions for MCUXpresso IDE, Keil MDK and IAR EWARM. Use LPCXpresso54608 as the target board; LPCXpresso54628 will have a specific SDK package from November 2017, but is binary compatible with LPCXpresso54608.

You can also use the online MCUXpresso web tool to create a custom SDK package for the LPCXpresso54628 using the SDK builder.
2.4 Install your toolchain
NXP offers a free, GNU/Eclipse based toolchain called MCUXpresso IDE.
Want to use a different toolchain?
No problem, The MCUXpresso SDK includes support for other tools such as IAR and Keil.

To set up your LPCXpresso54628 for use with 3rd party tools, first install LPCScrypt in order to install the board’s device drivers. The video below shows how to use LPCScrypt to program your board’s debug probe using this utility.
The video on this Getting Started section are for LPCXpresso54608, but the steps are the same for LPCXpresso54628.
2.5 MCUXpresso Config Tools
The MCUXpresso Config Tool is an integrated suite of configuration tools that guides users in creating new MCUXpresso SDK projects, and provides pin and clock tools to generate initialization C code for custom board support.
To learn more about the basic interactions between the tools while working with either an imported MCUXpresso SDK example project or creating a new project within the IDE, watch this three-part video series Basic Application Development Using MCUXpresso IDE and MCUXpresso Config Tools.
2.6 Serial terminal
Most of the MCUXpresso SDK examples set up for IAR and Keil tools use the MCU UART for printf output, and this is also an option for the MCUXpresso IDE. If you are not sure how to use a terminal application try one of these tutorials:
Not sure how to use a terminal application? Try one of these tutorials:
Tera Term Tutorial
Tera Term is a very popular open source terminal emulation application. This program can be used to display information sent from your NXP development platform's virtual serial port.
- Download: Tera Term from SourceForge. After the download, run the installer and then return to this webpage to continue.
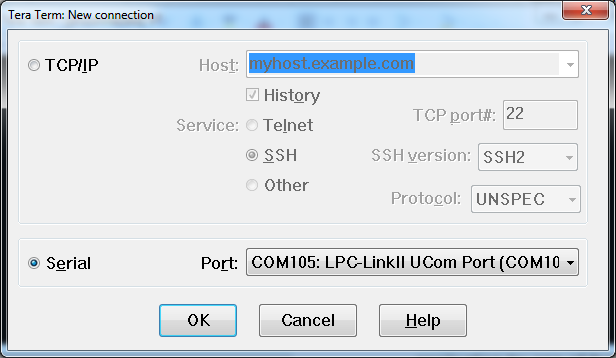
- Launch: Tera Term. The first time it launches, it will show you the following dialog. Select the serial option. Assuming your board is plugged in, there should be a COM port automatically populated in the list.
- Configure: the serial port settings (using the COM port number identified earlier) to 115200 baud rate, 8 data bits, no parity and 1 stop bit. To do this, go to Setup -> Serial Port and change the settings.
- Verify: that the connection is open. If connected, Tera Term will show something like below in it's title bar.
- You're ready to go

PuTTY Tutorial
PuTTY is a popular terminal emulation application. This program can be used to display information sent from your NXP development platform's virtual serial port.
- Download: PuTTY using the button below. After the download, run the installer and then return to this webpage to continue.
-
Launch: PuTTY by either double clicking on the
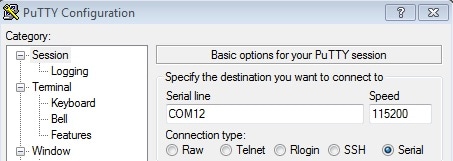
*.exefile you downloaded or from the Start menu, depending on the type of download you selected. - Configure: In the window that launches, select the Serial radio button and enter the COM port number that you determined earlier. Also enter the baud rate, in this case 115200.
- Click Open: to open the serial connection. Assuming the board is connected and you entered the correct COM port, the terminal window will open. If the configuration is not correct, PuTTY will alert you.
- You're ready to go
3. Build, Run
3.1 Explore the MCUXpresso SDK Example Code
The MCUXpresso SDK comes with a long list of example applications code. To see what's available, browse to the SDK boards folder of your SDK installation and select LPCXpresso54608 (
To learn more about specific example code, open the readme.txt file in an example's directory.
3.2 Build, Run and Debug MCUXpresso SDK Examples
If one or more of the demo applications or driver examples sounds interesting, you're probably wanting to know how you can build and debug yourself. The Getting Started with SDK v.2.0 for LPC546xx guide provides easy, step-by-step instructions on how to configure, build, and debug demos for all toolchains supported by the SDK.
Use the guide below to learn how to open, build and debug an example application using the MCUXpresso IDE.
3.3 To run the LPCXpresso54628 board at over 180MHz
To run the LPCXpresso54628 board at over 180MHz, a modified version of the device power library found in the MCUXpresso SDK (for LPCXpresso54608) and appropriate clock configurations need to be used. A package, including a Technical Note, power library and example code to show how to do this is provided under the Software and Tools tab for this board.
Building and debugging with MCUXpresso IDE
The video on this Getting Started section are for LPCXpresso54608, but the steps are the same for LPCXpresso54628.
Using a different toolchain?
Running a demo using IAR
Build an Example Application
The following steps will guide you through opening the led_output application. These steps may change slightly for other example applications as some of these applications may have additional layers of folders in their path.
-
If not already done, open the desired example application workspace. Most example application workspace files can be located using the following path:
boards/sdk_board_name/example_type/application_name/iarUsing the hello_world demo as an example, the path is:
/boards/LPCXpresso54628/driver_examples/gpio/led_output/iar -
Select the desired build target from the drop-down. For this example, select the "hello_world – Debug" target.
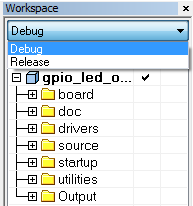
-
To build the application, click the “Make” button, highlighted in red below.

-
The build will complete without errors.:
Run an Example Application
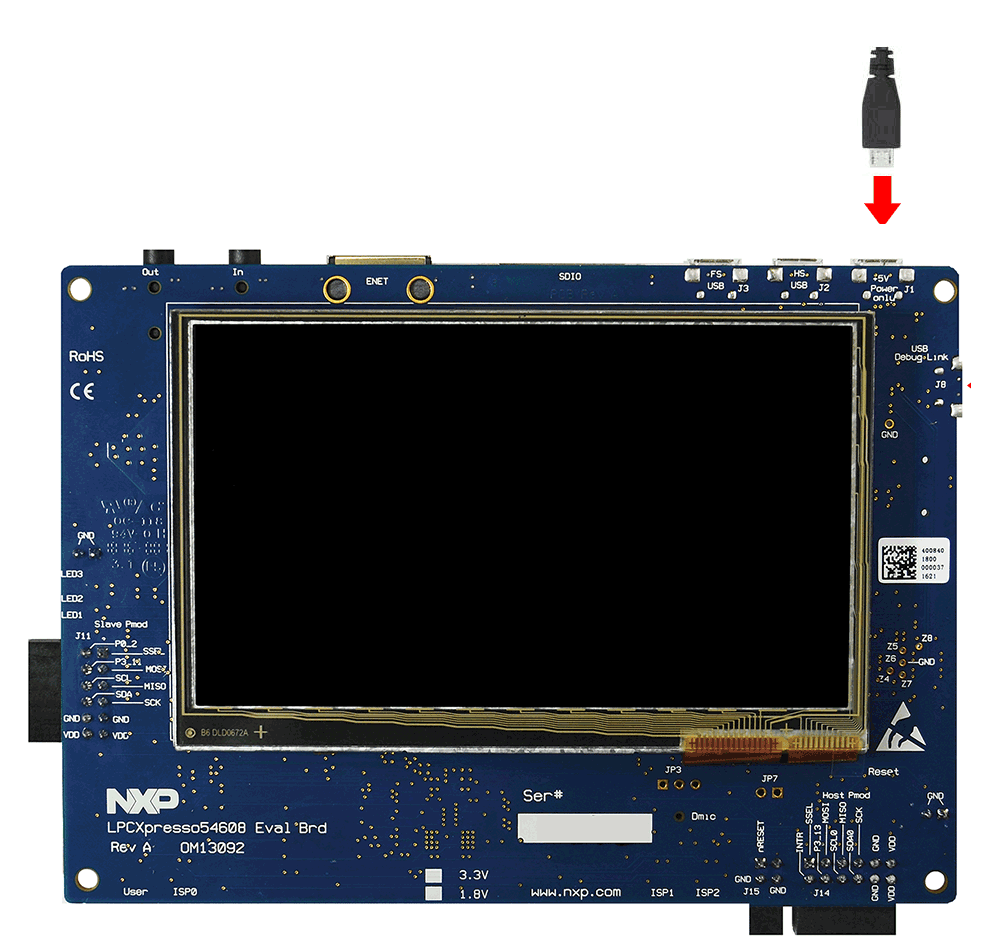
The LPCXpresso54628 board comes loaded with the CMSIS-DAP debug interface from the factory. Connect the development platform to your PC via USB cable to J8 “Debug Link”.
-
Click the "Download and Debug" button to download the application to the target.

-
The application is then downloaded to the target and automatically runs to the main() function.
-
Run the code by clicking the "Go" button to start the application.

Running a demo using Keil® MDK/µVision®
Install CMSIS device pack
After the MDK tools are installed, Cortex® Microcontroller Software Interface Standard (CMSIS) device packs must be installed to fully support the device from a debug perspective. These packs include things such as memory map information, register definitions and flash programming algorithms. Follow these steps to install the appropriate CMSIS pack.
-
Open the MDK IDE, which is called µVision. In the IDE, select the "Pack Installer" icon.

-
In the Pack Installer window, navigate to the section with the LPC packs (they are in alphabetical order). The Kinetis packs start with "Keil::LPC" and are followed by the MCU family name, for example "Keil::LPC54000". Because this example uses the LPCXpresso54628 platform, the LPC54000 family pack is selected. Click on the "Install" button next to the pack. This process requires an internet connection to successfully complete.

-
After the installation finishes, close the Pack Installer window and return to the µVision IDE.
Build the Example Application
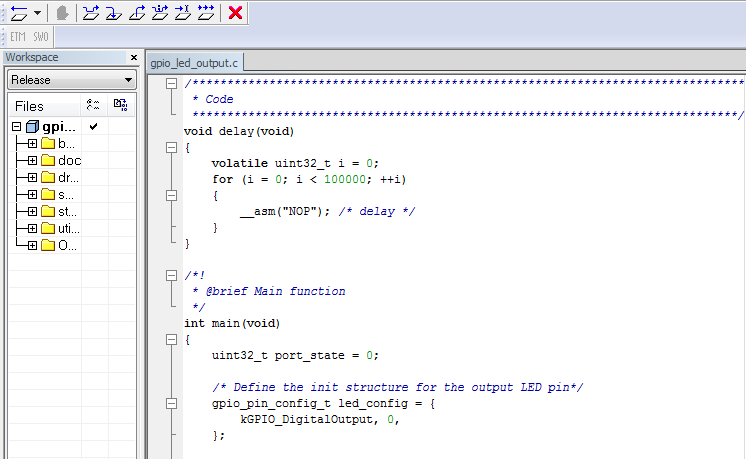
The following steps will guide you through opening the gpio_led_output application. These steps may change slightly for other example applications as some of these applications may have additional layers of folders in their path.
-
If not already done, open the desired demo application workspace in:
boards/sdk_board_name/example_type/application_name/mdkThe workspace file is named
.uvmpw, so for this specific example, the actual path is:boards/LPCXpresso54628/driver_examples/gpio/led_output/mdk/gpio_led_output.uvmpw -
To build the demo project, select the "Rebuild" button, highlighted in red.

-
The build will complete without errors.
Run an Example Application
The LPCXpresso54628 board comes loaded with CMSIS-DAP debug interface from the factory.
-
After the application is properly built, click the "Download" button to download the application to the target.

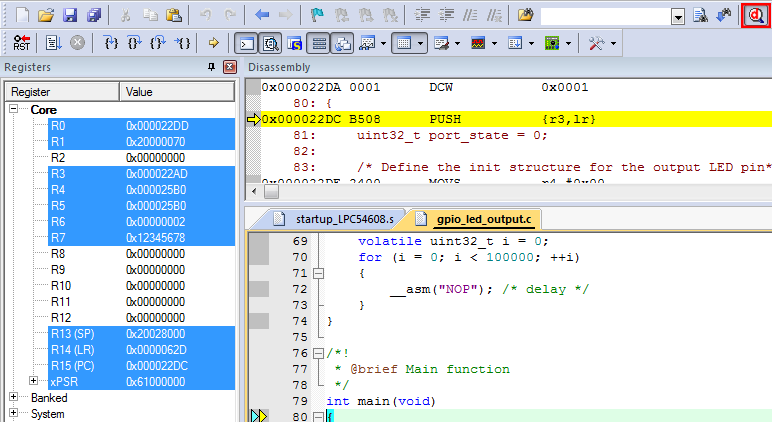
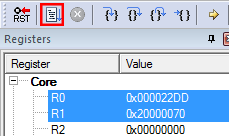
- After clicking the "Download" button, the application downloads to the target and should be running. To debug the application, click the "Start/Stop Debug Session" button, highlighted in red.
-
Run the code by clicking the "Run" button to start the application.
External Memory
External Memory
| Documents and Videos | Description | Application Note Software |
|---|---|---|
| AN13165 LPC546xx SPIFI Usage and Performance | How to implement Execute In Place (XIP) feature with SPIFI, data access and performance benchmark with KEIL. |
Download |
| AN13113 A Kind of SD card-based Second Bootloader on LPC54600 MCU | How to design a 2nd bootloader using SD card as the external memory media to keep the firmware image files to be executed. |
Download |
| AN12563 SPI Flash Programming Algorithms for LPC546xx | Provides step-by-step guide on how to create a flash programming file for MDK, and provide a pre-compiled flash programming algorithm which can be used directly. |
Download |
| AN12423 SDRAM Code Execution in LPC5460x | This article explains the means for code execution in synchronous dynamic random-access memory(SDRAM), and the performance benchmark on LPC5460x. |
|
| AN12026 SDRAM interface to LPC546xx External Memory Controller | How to interface SDRAM memory to the LPC546xx External Memory Controller. |
MCUXpresso SDK Examples
Several examples, demos and drivers are available within the SDK to help you get started. Some common examples related to external memory are listed below.
EEPROM
A demonstration program that uses the KSDK software to program EEPROM memory and verify the program.
Path: <SDK_PATH>/boards/lpcxpresso54628/driver_examples/eeprom
EMC
How to access the SDRAM.
Path: <SDK_PATH>/boards/lpcxpresso54628/driver_examples/emc
Flashiap
Demonstrates the SDK FLASIAP driver by erasing and programming a portion of on-chip flash memory
Path: <SDK_PATH>/boards/lpcxpresso54628/driver_examples/flashiap
IAP Examples
Various demonstrations of basic, EEPROM read/write and flash operations
Path: <SDK_PATH>/boards/lpcxpresso54628/driver_examples/iap
SPIFI Examples
Demonstrates using the KSDK software to program external serial flash using DMA or polling and read through AHB bus
Path: <SDK_PATH>/boards/lpcxpresso54628/driver_examples/spifi
Wired Communications
Wired Communications
| Documents and Videos | Description | Application Note Software |
|---|---|---|
| Using ConfigTool to Create USB Project From Start |
Creating a USB project with MCUXpresso Config Tool and the LPCXpresso55S69-EVK. Note: Even though this document references the LPCXpresso55S69-EVK it can be used as a reference for the LPC54628-EVK. |
|
| AN12646 USB CAN Bridge for LPC546xx | How to build an example to implement a communication bridge between USB bus and CAN-bus. |
|
| TN00032 LPC546xx Crystal-less USB Solution | This technical note explains the steps required to modify the software to integrate a crystal-less USB device operation in full-speed mode in the LPC556xx application. |
|
| AN11985 LPC546xx SD Card with FATFS | Introduces the SD/MMC card interface on LPC546xx devices and how to access the SD card with the SD/MMC interface based on SDK FATFS. |
|
| LPC54608 LIN Master Basic Usage Sharing | A simple LIN master example using the LPCXpresso 54608 board. |
|
| AN12384 LPC5460x UART Secondary Bootloader using YModem | In this application note, a simple SBL software is designed to optionally load the new image file from user UART terminal and keep it in the on-chip flash memory for next run. |
Download |
MCUXpresso SDK Examples
Several examples, demos and drivers are available within the SDK to help you get started. Some common examples related to wired communications are listed below.
Shell demo (UART example)
Demonstrates how to implement a command line shell application.
Path: <SDK_PATH>/boards/lpcxpresso54628/demo_apps/shell
CMSIS Driver Examples
How to use I²C, SPI and USART drivers to do board to board transfer with DMA.
Path: <SDK_PATH>/boards/lpcxpresso54628/cmsis_driver_examples
Driver Examples
A number of driver examples exist within the SDK including GPIO, I²C, I2S, SPI and USART.
Path: <SDK_PATH>/boards/lpcxpresso54628/driver_examples
CANopen Examples
Implement a minimal CANopen Manager which produces a cyclic heartbeat message and waits for CANopen Slave devices to reply.
Path: <SDK_PATH>/boards/lpcxpresso54628/canopen_examples
LwIP Example
Multiple lwIP TCP/IP examples for bare metal or FreeRTOS.
Path: <SDK_PATH>/boards/lpcxpresso54628/lwip_examples
SDMMC Examples
Multiple examples that show how to use interrupt or polling-based transfer API in SDHC driver to access the SD card and using the SDCARD driver based FATFS disk in SDK software.
Path: <SDK_PATH>/boards/lpcxpresso54628/sdmmc_examples
USB Examples
A number of USB examples for host and device operation exist within the SDK.
Path: <SDK_PATH>/boards/lpcxpresso54628/usb_examples
Tools and References
LPC54628 Secure CANFD Bootloader V100 - Secure CANcrypt Bootloader for LPC5461x/LPC54628 devices from Embedded Systems Academy.
Micro CANopen Plus Source Code - Compliant and mature CANopen and CANopen FD follower and manager stack with a range of module add-ons. Designed to run in any environment: bare-metal, RTOS or consumer OS.
Wireless Connectivity
| Documents and Videos | Description |
|---|---|
| Connecting the LPC55S69 to Amazon Web Services |
Demo focused on the WIFI enablement and cloud connectivity through AWS using MCUXpresso and an Amazon Alexa. NOTE: While this document references the LPC55S69 it can be used as a reference with the shadow serial example for the LPC54628 as well. |
| How to Add Peripherals to AWS IOT and Alexa Skills | Step-by-step approach to adding peripherals to your AWS IOT and Alexa Skills project. |
| Amazon FreeRTOS Documentation | FreeRTOS is a market-leading real-time operating system (RTOS) for microcontrollers and small microprocessors. Find resources here included users guide, API reference, porting guide and qualification guide. |
| AWS IoT developer guide | AWS IoT provides device software that can help you integrate your IoT devices into AWS IoT-based solutions. |
MCUXpresso SDK Examples
Several examples, demos and drivers are available within the SDK to help you get started. Some common examples related to wireless connectivity are listed below.
Wi-Fi Serial Demo and Wi-Fi Serial iPerf Example
The serial demo shows usage of SerialMWM Wi-Fi module connected over UART interface. The iperf example provides basic commands to measure performance of network stack.
Path: <SDK_PATH>/boards/lpcxpresso54628/wifi_examples
Shadow Wi-Fi Example
The simple lightbulb example illustrates how client application and things communicate with the Shadow service.
Path: <SDK_PATH>/boards/lpcxpresso54628/aws_examples/shadow_wifi_serial
Power Management
Power Management
| Documents and Videos | Description |
|---|---|
| TN00038 LPC546xx Power Library Source Code |
This technical note provides the source code of the power library used with the SDK software platform |
MCUXpresso SDK Examples
Several examples, demos and drivers are available within the SDK to help you get started. Some common examples related to power management are listed below.
Power Manager Demo
Shows the usage of normal power mode control APIs for entering the three kinds of low power mode: Sleep mode, Deep Sleep mode and Sleep Power Down mode.
Path: <SDK_PATH>/boards/lpcxpresso54628/demo_apps/utick_wakeup
MicroTick Timer Demo
Shows wakeup from deep sleep mode using MicroTick timer.
Path: <SDK_PATH>/boards/lpcxpresso54628/demo_apps/power_manager_lpc
Audio
MCUXpresso SDK Examples
Several examples, demos and drivers are available within the SDK to help you get started. Some common examples related to audio are listed below.
Audio Demos
Bare metal and FreeRTOS examples that enumerate a recording or playback device
USB Device: Audio generator, audio speaker, composite hid audio
USB Host: Audio speaker
Path: <SDK_PATH>/boards/lpcxpresso54628/usb_examples
DMIC Example
How to use DMA to transfer data from DMIC to memory
Path: <SDK_PATH>/boards/lpcxpresso54628/driver_examples/dmic
I2S Examples
DMA and Interrupt transfer examples show how to use one I2S interface to continuously playback the sine wave to output
Path: <SDK_PATH>/boards/lpcxpresso54628/driver_examples/i2s
Touch and Sensing
MCUXpresso SDK Examples
Several examples, demos and drivers are available within the SDK to help you get started. Some common examples related to touch and sensing are listed below.
Touch Cursor Demo
Shows how to change a cursor’s position in reaction to detected touch.
Path: <SDK_PATH>/boards/lpcxpresso54628/demo_apps/touch_cursor
emWin Examples
Serial terminal, slide show and termperature control examples demonstrate how to use the emWin library to render text and graphical widgets of the emWin library.
Path: <SDK_PATH>/boards/lpcxpresso54628/emwin_examples
emWin GUI Examples
Demonstrates the graphical widgets of the emWin library.
Path: <SDK_PATH>/boards/lpcxpresso54628/emwin_gui_demo
Display and Graphics
The Rocktech LCD module is used on the LPCXpresso54628 Development Board.
| Documents and Videos | Description |
|---|---|
| Graphical User Interfaces for NXP Microcontrollers | Learn more about your GUI options for NXP Microcontrollers. |
| AN13113 A Kind of SD card-based Second Bootloader on LPC54600 MCU | How to implement a typical LVGL GUI application using GUI Guider on the LPC54608. |
| LVGL Open-Source Graphics Library | LVGL is a free and open-source embedded graphic library with features that enable you to create embedded GUIs with intuitive graphical elements, beautiful visual effects and a low memory footprint. |
| GUI Guider | A user-friendly graphical user interface development tool from NXP that enables the rapid development of high-quality displays with the open-source LVGL graphics library. |
| AN13110 LPC54608 Crank Storyboard Engine Integration with IAR | How to integrate Storyboard engine to LPC54608 base on freeRTOS. |
| GUI Development With emWin and AppWizard | How to use the different features in AppWizard to create complete, ready-to-run projects based on emWin. |
| TN00028 LPC54608 emWin Touch and Draw example with FreeRTOS | This technical note describes an example on LPC54608 XPCXpresso board using emWin graphics library and FreeRTOS. |
| TN00025 LPC54608 LCD Dual Frame Butter with eXecute-in-Place (XIP) from Quad SPI flash | This technical note gives an overview of examples that use LCD with code executing from Quad SPI flash. |
| TN00024 LPC54608 TCP Socket example with emWin and FreeRTOS | This technical note gives an overview of an example that shows TCP server and clients connecting on a custom port and exchanging ADC data and LED controls over the Ethernet network and displaying the information on the LCD display using emWin graphics and FreeRTOS. |
| TN00022 LPC54608 Temperature logging on LCD using emWin’s graphics library | This technical note describes the example that logs temperature on LPC54608 LPCXpresso board LCD using the graphics library features of emWin. |
| TN00021 LPC54608 LCD Dual Frame Buffer with Images loaded from Quad SPI flash | This technical note gives an overview of examples that uses LCD with images loaded from Quad SPI flash. |
| AN12732 HDMI-CEC Implementation on LPC5500 Series |
How to implement High-Definition Multimedia Interface (HDMI)-Consumer Electronics Control (CEC) functions as a TV set or a projector that support the HDMI-CEC protocol based on LPC5500 series with GPIO and SCT used. NOTE: While this indicates the LPC5500 it can be used as a reference for the LPC54628, although some changes are required. |
MCUXpresso SDK Examples
Several examples, demos and drivers are available within the SDK to help you get started. Some common examples related to display and graphics are listed below.
LCDC Examples
Two examples show how to use the LCD hardware cursor and how to use the LCD driver to drive a TFT panel.
Path: <SDK_PATH>/boards/lpcxpresso54628/driver_examples/lcdc
LVGL Examples
A demo application to show littlevgl widgets.
Path: <SDK_PATH>/boards/lpcxpresso54628/littlevgl_examples
emWin Examples
Serial terminal, slide show and termperature control examples demonstrate how to use the emWin library to render text and graphical widgets of the emWin library.
Path: <SDK_PATH>/boards/lpcxpresso54628/emwin_examples
emWin GUI Examples
Demonstrates the graphical widgets of the emWin library.
Path: <SDK_PATH>/boards/lpcxpresso54628/emwin_gui_demo
Tools and References
NXP emWin Libraries - NXP has partnered with SEGGER Microcontroller to offer the high performance emWin embedded graphics libraries in binary form for free commercial use with any Arm Cortex-M microcontrollers from NXP.
emWin (GUI / Graphics Package) - emWin is one of the most efficient and comprehensive GUIs available. It is written in ANSI C and supports any display controller, display and CPU. emWin includes the AppWizard GUI design tool and a Simulation Environment to help speed your development.
Embedded Wizard - Enables the creation of sophisticated GUIs for MCUs and MPUs. The GUI development is speeded-up with the use of the built-in WYSIWYG editing facility, instant prototyping, simulating and debugging on PC.
Camera Interfaces
| Documents and Videos | Description | Application Note Software |
|---|---|---|
| AN12583 Enabling Camera on LPC5460x with State Configurable Timer State Machine | How to design a software camera interface solution with SCT and DMA on LPC5460x. |
Download |
MCUXpresso SDK Examples
Several examples, demos and drivers are available within the SDK to help you get started. A common example related to camera interfaces is listed below.
USB Video Virtual Camera
A simple demonstration program based on the MCUXpresso SDK. It is enumerated as a camera and users can see the video of the device by using a PC test tool.
Path: <SDK_PATH>/boards/lpcxpresso54628/usb_examples/usb_device_video_virtual_camera
Motor Control
Motor Control
Motor control is a complicated and advanced topic, with a wide range of intricacies and pitfalls that depend on motor type, number of motors, and sensored or sensorless motor drivers.
NXP has a number of ready-to-use motor control algorithms [NOTE: middleware], and the best way to get started is with the FreeMaster examples included in the SDK. These examples utilize the Time Debugging Tool – user-friendly real-time debug monitor and data visualization tool that enables runtime configuration and tuning of embedded software applications.
FreeMASTER supports non-intrusive monitoring of variables on a running system and can display multiple variables on oscilloscope-like displays as standard widgets (gauges, sliders and more) or as data in text form, offering simple-to-use data recorders. It can link with HTML, MATLAB®, Excel to other scriptable frameworks or even popular visual programming tools like Node-RED .”
| Documents and Videos | Description |
|---|---|
| FreeMASTER How To | A starting guide for engineers using FreeMASTER tool. |
| FreeMASTER 3.0 Installation Guide | This article will walk you through the installation process of FreeMASTER 3.0. |
MCUXpresso SDK Examples
Several examples, demos and drivers are available within the SDK to help you get started. A common example related to Motor Control is listed below.
FreeMASTER Examples
Watch variables and graphs over various interface options.
Path: <SDK_PATH>/boards/lpcxpresso54628/freemaster_examples
Tools and References
FreeMASTER Communication Driver User’s Guide - Describes the embedded-side software driver which implements a serial interface between the application and the host PC and covers the native Serial UART communication and CAN communication for the applicable devices.
Path: <SDK_PATH>/middleware/freemaster/doc/user_guide
Device Management and Secure OTA
Device Management and Secure OTA
| Documents and Videos | Description |
|---|---|
| AN13073 OTA update via TFTP on LPC5460x | Introduces a simple OTA update solution with a TFTP (Trivial File Transfer Protocol) through a WiFi module. |
Design Resources
Board Documents
Chip Documents
Support
Training
| Training | Description |
|---|---|
| Basic Application Development Using MCUXpresso IDE and MCUXpresso Config Tools | This three-part video series covers the basic interactions between the MCUXpresso IDE and Config Tools when working with either an imported SDK example project or creating a new one.. |
| Hands-On Workshop: LPC546xx MCUs: A 180 MHz ARM Cortex-M4-based MCU for Your Cost-effective HMI Applications | Gain the knowledge and skills to get up and running with the LPC546xx MCU family, includes our comprehensive ecosystem of software and tools that support it. |
| AWS Training | Training programs and offerings from the experts at AWS |
| LPC546x Training | Full list of on-demand training, how-to videos and webinars from NXP about this product |
Forums
Connect with other engineers and get expert advice on designing with the LPC54628 on one of our community sites.
On this page
- 2.1
Arm mbed Online Development Site
- 2.2
MCUXpresso SDK
- 2.3
Getting Started with the MCUXpresso SDK
- 2.4
Install your toolchain
- 2.5
MCUXpresso Config Tools
- 2.6
Serial terminal
